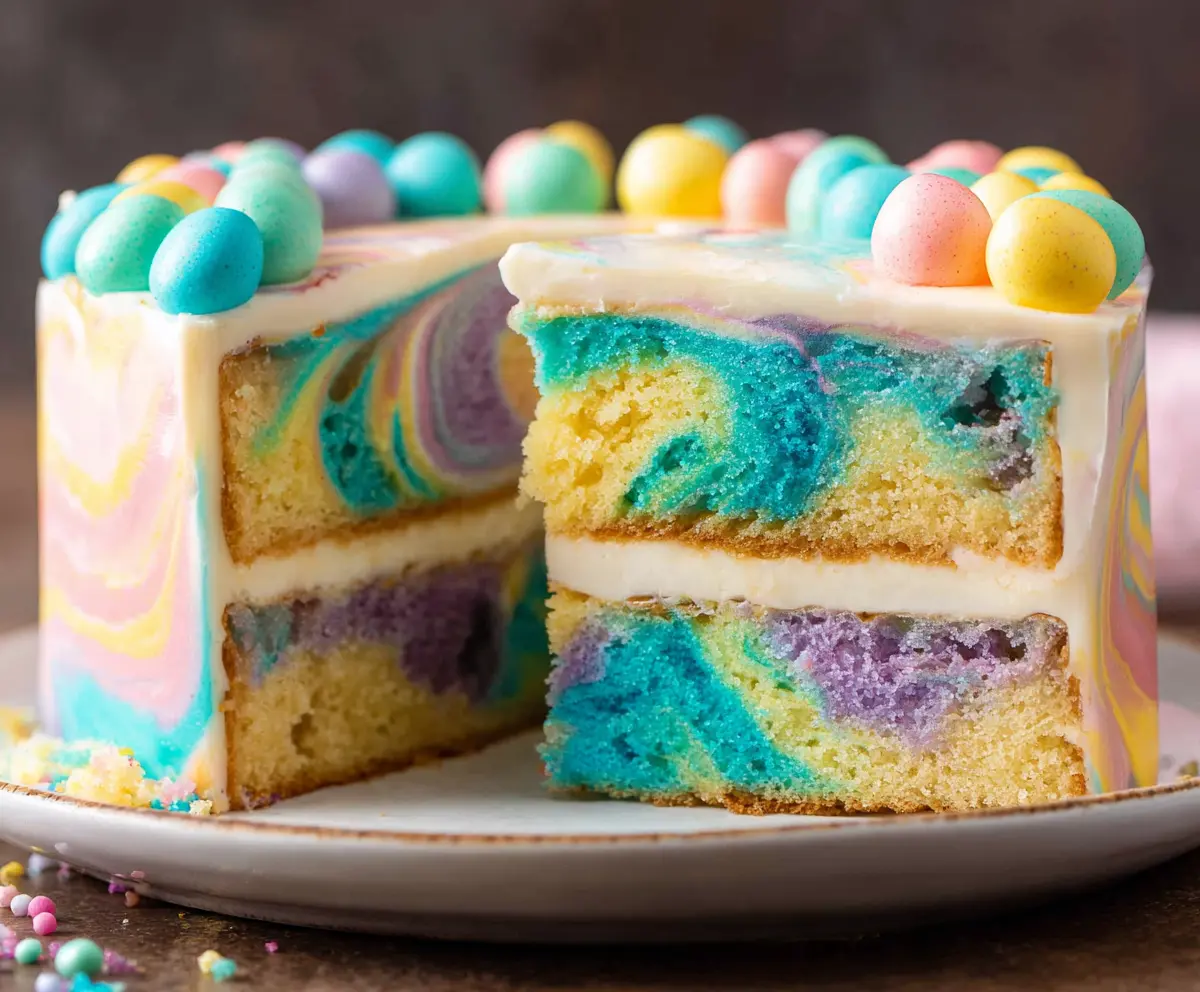
This colorful Swirled Easter Cake is a fun treat for the holiday! It features bright layers of cake twisted together, looking like a cheerful rainbow.
I love baking this cake because it always brings smiles to faces. Plus, it’s super easy to slice into those pretty swirls. Grab some friends and enjoy a slice together! 🐣🍰
Key Ingredients & Substitutions
All-Purpose Flour: This flour is perfect for cake texture. If you need a gluten-free option, almond flour or a gluten-free all-purpose blend can work well, but adjust the liquid slightly as they may absorb more moisture.
Unsalted Butter: I prefer unsalted butter for better control of salt levels in the cake and frosting. If you’re looking for a dairy-free option, try using coconut oil or a vegan butter substitute.
Sugar: Granulated sugar keeps the cake sweet. You can substitute half with brown sugar for a deeper flavor or use coconut sugar for a lower glycemic index option.
Food Coloring: While I love the classic pastels, you can use natural food colorings made from beet juice, turmeric, or spinach if you want to go organic. The colors will be softer but can still produce lovely results.
How Do I Create a Swirl Effect Without Overmixing?
Swirling the colors is where your cake gets its charm! Here’s how to do it properly without messing up the colors:
- After dividing the batter into bowls, use a spoon to scoop dollops of each color into the pan randomly.
- Use a skewer or a butter knife and gently run it through the colors. Make sure not to mix too much—just a few swirls will keep the colors beautiful.
- Less is more here! The goal is to create a marbled look, so just a couple of gentle swirls will do.
Practice makes perfect, so don’t worry if you don’t get it right the first time. Enjoy the process!

How to Make a Swirled Easter Cake
Ingredients You’ll Need:
For The Cake:
- 3 cups all-purpose flour
- 1 tbsp baking powder
- 1/2 tsp salt
- 1 cup unsalted butter, softened
- 2 cups granulated sugar
- 4 large eggs
- 1 tbsp vanilla extract
- 1 cup whole milk
- Food coloring (blue, purple, yellow, and other pastel colors as desired)
For The Buttercream Frosting:
- 1 cup unsalted butter, softened
- 4 cups powdered sugar
- 2-3 tbsp heavy cream or milk
- 1 tsp vanilla extract
- Pinch of salt
For Decoration:
- Mini pastel candy eggs or chocolate eggs
How Much Time Will You Need?
This delightful Swirled Easter Cake takes about 25 minutes to prepare, plus 30-35 minutes for baking, and 30 minutes to chill afterwards. In total, you should plan for around 1.5 to 2 hours, plus any additional cooling time needed before serving!
Step-by-Step Instructions:
1. Preheat and Prepare:
Start by preheating your oven to 350°F (175°C). Next, grease and flour two 8-inch round cake pans, so the cake won’t stick when baked. This is a super important step!
2. Mix Dry Ingredients:
In a medium bowl, whisk together the flour, baking powder, and salt. This mixture is the base of your cake and helps it rise beautifully!
3. Cream Butter and Sugar:
In a large mixing bowl, cream the softened butter and granulated sugar together until the mixture is light and fluffy, which should take about 3-5 minutes. This helps to incorporate air into the mix for a nice texture.
4. Add Eggs and Vanilla:
Add the eggs one at a time, beating well after each addition. This ensures everything mixes evenly. Then, stir in the vanilla extract for a lovely flavor.
5. Combine Wet and Dry Ingredients:
Now, it’s time to combine the dry ingredients and the milk! Alternately add the dry mix and the milk to the butter mixture, starting and finishing with the dry ingredients. Mix until everything is just combined—don’t overdo it!
6. Prepare the Colored Batters:
Divide the cake batter evenly into separate bowls depending on how many colors you want to use. Add a different food coloring to each bowl and stir gently until the colors are even.
7. Create the Swirl Effect:
To make your cake beautiful, drop spoonfuls of the different colored batters randomly into your prepared pans. Then, using a skewer or a knife, gently swirl the colors together to create a marbled pattern. Remember to keep it light—too much mixing will make the colors blend!
8. Bake the Cakes:
Pop the pans in the oven and bake for 30-35 minutes, or until a toothpick inserted into the center comes out clean. When they’re done, let the cakes cool in the pans for about 10 minutes, then transfer them to wire racks to cool completely.
9. Make the Buttercream Frosting:
While the cakes cool, prepare your frosting. Beat the softened butter until creamy, then gradually mix in the powdered sugar. Add the vanilla extract, salt, and heavy cream a little at a time until your frosting is nice and spreadable.
10. Assemble the Cake:
If needed, level the cakes with a knife so they stack evenly. Place one cake layer on your serving plate and spread a layer of buttercream on top, then set the second layer on top.
11. Frost the Cake:
Frost the outside of your cake with the remaining buttercream. For a fun pastel swirl effect on the exterior, you can mix a few pastel colors of frosting lightly and apply a thin coat to the sides. Blend gently with an offset spatula for a marbled look!
12. Decorate:
Top it off by decorating the edge of the cake with pastel mini candy eggs around the perimeter. This adds a festive touch!
13. Chill and Serve:
Finally, chill the cake in the fridge for about 30 minutes to set everything before serving. Enjoy your festive and colorful Swirled Easter Cake!
Can I Use Different Types of Flour?
Yes! While all-purpose flour is recommended for this recipe, you can use gluten-free flour blends or almond flour. Just keep in mind that different flours may require adjustments in liquid to achieve the right batter consistency.
How Do I Store Leftover Cake?
Store any leftover cake in an airtight container at room temperature for up to 3 days, or in the fridge if you prefer. To keep it moist, you can wrap it in plastic wrap before placing it in the container. If you need to store it longer, consider freezing individual slices!
Can I Make This Cake In Advance?
Absolutely! You can bake the cake layers a day ahead. Once cooled, wrap them tightly in plastic wrap and store in the fridge. Frost them just before serving for the best texture.
What Can I Use Instead of Food Coloring?
If you prefer natural options, you can use pureed fruits or vegetable juices, like beet puree for pink, spinach for green, or turmeric for yellow. The colors will be softer, but it’s a fun alternative!