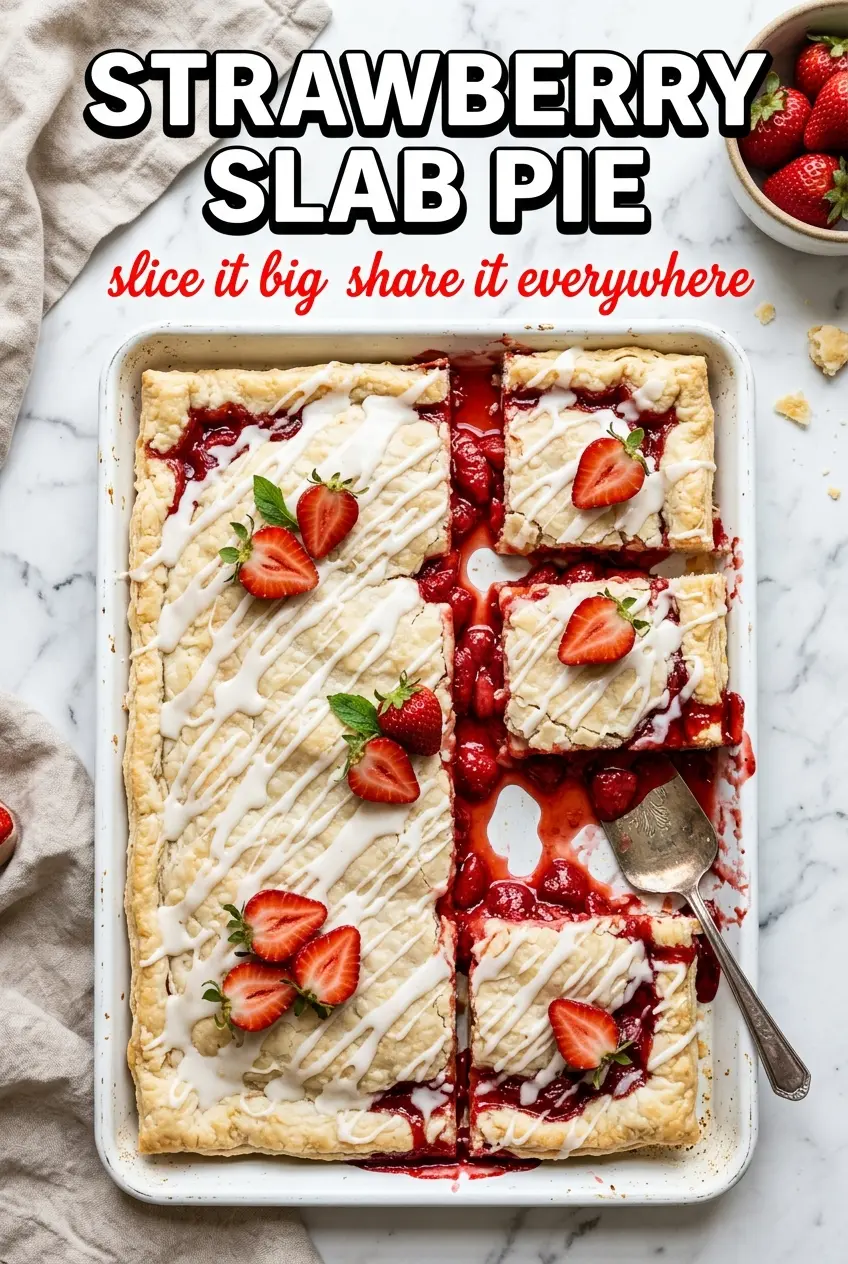
Strawberry slab pie gives you all the things people love about pie, but on a scale that actually works for a crowd. The crust bakes up crisp and bronzed, the filling turns glossy and jammy, and every square cuts cleanly enough to serve at a picnic, potluck, or family dessert table without the usual pie-slice drama.
The trick is keeping the strawberries thickened enough to hold their shape without turning gluey. Cornstarch handles the setting, lemon juice keeps the filling bright, and a little vanilla plus cinnamon makes the berries taste fuller instead of just sweeter. The sheet-pan shape helps the filling spread into a thinner layer, which means you get more of that cooked-strawberry flavor in every bite.
Below, you’ll find the one detail that keeps the bottom crust from going soggy, plus the best way to cut and weave the lattice so it still looks neat after baking. If you’ve ever wanted a pie that feeds a crowd without sacrificing a flaky crust, this is the one to make.
The filling set up perfectly and didn’t run all over the pan when I sliced it. The crust stayed crisp on the bottom, and the lattice looked bakery-fancy even though it was easy to put together.
Golden strawberry slab pie is the kind of dessert that disappears fast at a crowd table, so save this lattice-topped version for your next gathering.
The Crust Stops Being Soggy When You Treat the Filling Like It Has a Deadline
The biggest mistake with a slab pie is letting juicy fruit sit around after it’s mixed. Strawberries start leaking almost immediately once the sugar hits them, and if that liquid pools before the pie goes into the oven, the bottom crust softens before it ever has a chance to bake. Mix the filling, spread it into the crust, and get it into the oven without lingering.
The other thing that matters here is thickness. A slab pie works because the filling layer is shallow enough to cook quickly, so the berries break down just enough to become saucy while the cornstarch sets the juices. If the filling looks loose when you cut it, the pie needed a little more bake time or a little more cooling before slicing.
What Each Ingredient Is Actually Doing in This Pie
- Fresh strawberries — Use ripe berries with good flavor, but don’t chase the softest ones on the tray. They should slice cleanly and hold their shape in the oven; mushy berries collapse too fast and muddy the filling.
- Cornstarch — This is what keeps the filling from running across the pan. It thickens the berry juices as they bubble, and there isn’t a substitute that behaves quite the same way in this kind of fruit pie.
- Lemon juice — A little acid keeps the strawberries tasting bright instead of flat. It also helps the filling read as fruit-forward instead of just sweet.
- Pie crust — Refrigerated crust is fine here because the filling is the main event and you need enough structure to handle a sheet-pan pie. Homemade crust works too, especially if you want a little more flavor and flakiness.
- Coarse sugar — This gives the top crust a little sparkle and crunch. Regular sugar won’t give the same finish.
Building the Filling and Lattice So the Pie Bakes Evenly
Setting Up the Bottom Crust
Fit the pie crusts into the half-sheet pan and press the seams together where they overlap so the base acts like one sheet. Any gap there turns into a leak path once the filling starts bubbling. Let the crust come slightly up the sides of the pan so the juices stay contained and the edge has something to cling to.
Mixing the Berries at the Last Minute
Stir the strawberries with the sugar, cornstarch, lemon juice, vanilla, and cinnamon until every slice looks lightly coated. You want the mixture evenly glossy, not wet and soupy in the bowl. If you let it sit long enough to collect a puddle, spoon the berries into the crust and leave the extra liquid behind.
Weaving the Top Before It Starts to Warm
Cut the second crust into strips and lay them across the filling in a lattice. The strips don’t need to be perfect, but they do need enough spacing for steam to escape. If the top is packed too tightly, the center takes longer to bake and the crust can end up pale instead of crisp.
Watching for the Bubble at the Edges
Brush the top with egg wash and sprinkle on the coarse sugar, then bake until the crust is deeply golden and the filling is actively bubbling at the edges. That bubbling matters more than the clock because it tells you the cornstarch has activated. Pull it too early and the juices stay loose after cooling.
Make It With Mixed Berries
Swap up to half the strawberries for raspberries or blueberries if you want a deeper berry flavor. Raspberries break down faster and make the filling softer, while blueberries hold their shape a little longer, so the texture shifts depending on the mix.
Gluten-Free Version
Use a gluten-free pie crust that’s meant for rolling or sheet-pan baking, not a crumb crust. The filling is already gluten-free, so the only real challenge is getting a crust that browns and holds together without cracking when you move it.
Less-Sweet Filling
Cut the sugar back to 3/4 cup if your strawberries are very ripe and sweet. The pie will taste brighter and a little more fruit-forward, but don’t reduce it too far or the filling can turn sharp instead of balanced.
Storage and Reheating
- Refrigerator: Keep covered for up to 4 days. The crust softens a little as it sits, but the filling stays set.
- Freezer: Freeze baked pie in slices or as a whole slab, wrapped tightly, for up to 2 months. Thaw in the fridge so the filling doesn’t turn watery.
- Reheating: Warm slices in a 300°F oven for about 10 minutes. The oven brings the crust back to life; the microwave makes the pastry limp and the filling overly loose.
Questions I Get Asked About This Recipe
Strawberry Slab Pie
Ingredients
Equipment
Method
- Preheat the oven to 375°F. Unroll the pie crusts and fit them into a half-sheet pan (13x18 inches), overlapping as needed and pressing to seal (visual cue: no gaps where filling could escape).
- Mix the strawberries, sugar, cornstarch, lemon juice, vanilla, and cinnamon together. Spread the filling evenly over the crust (visual cue: an even red layer).
- Unroll the second batch of pie crusts and cut into strips. Arrange the strips in a lattice pattern over the filling (visual cue: open lattice with strawberry filling visible between strips).
- Whisk together the egg and water, then brush over the pastry. Sprinkle with coarse sugar (visual cue: pale golden sheen and sparkly sugar on top).
- Bake at 375°F for 30-35 minutes until the crust is golden and the filling is bubbly at the edges (visual cue: thick bubbles around the perimeter).
- Cool on a wire rack for 30 minutes before cutting (visual cue: set filling with less bubbling at the surface).