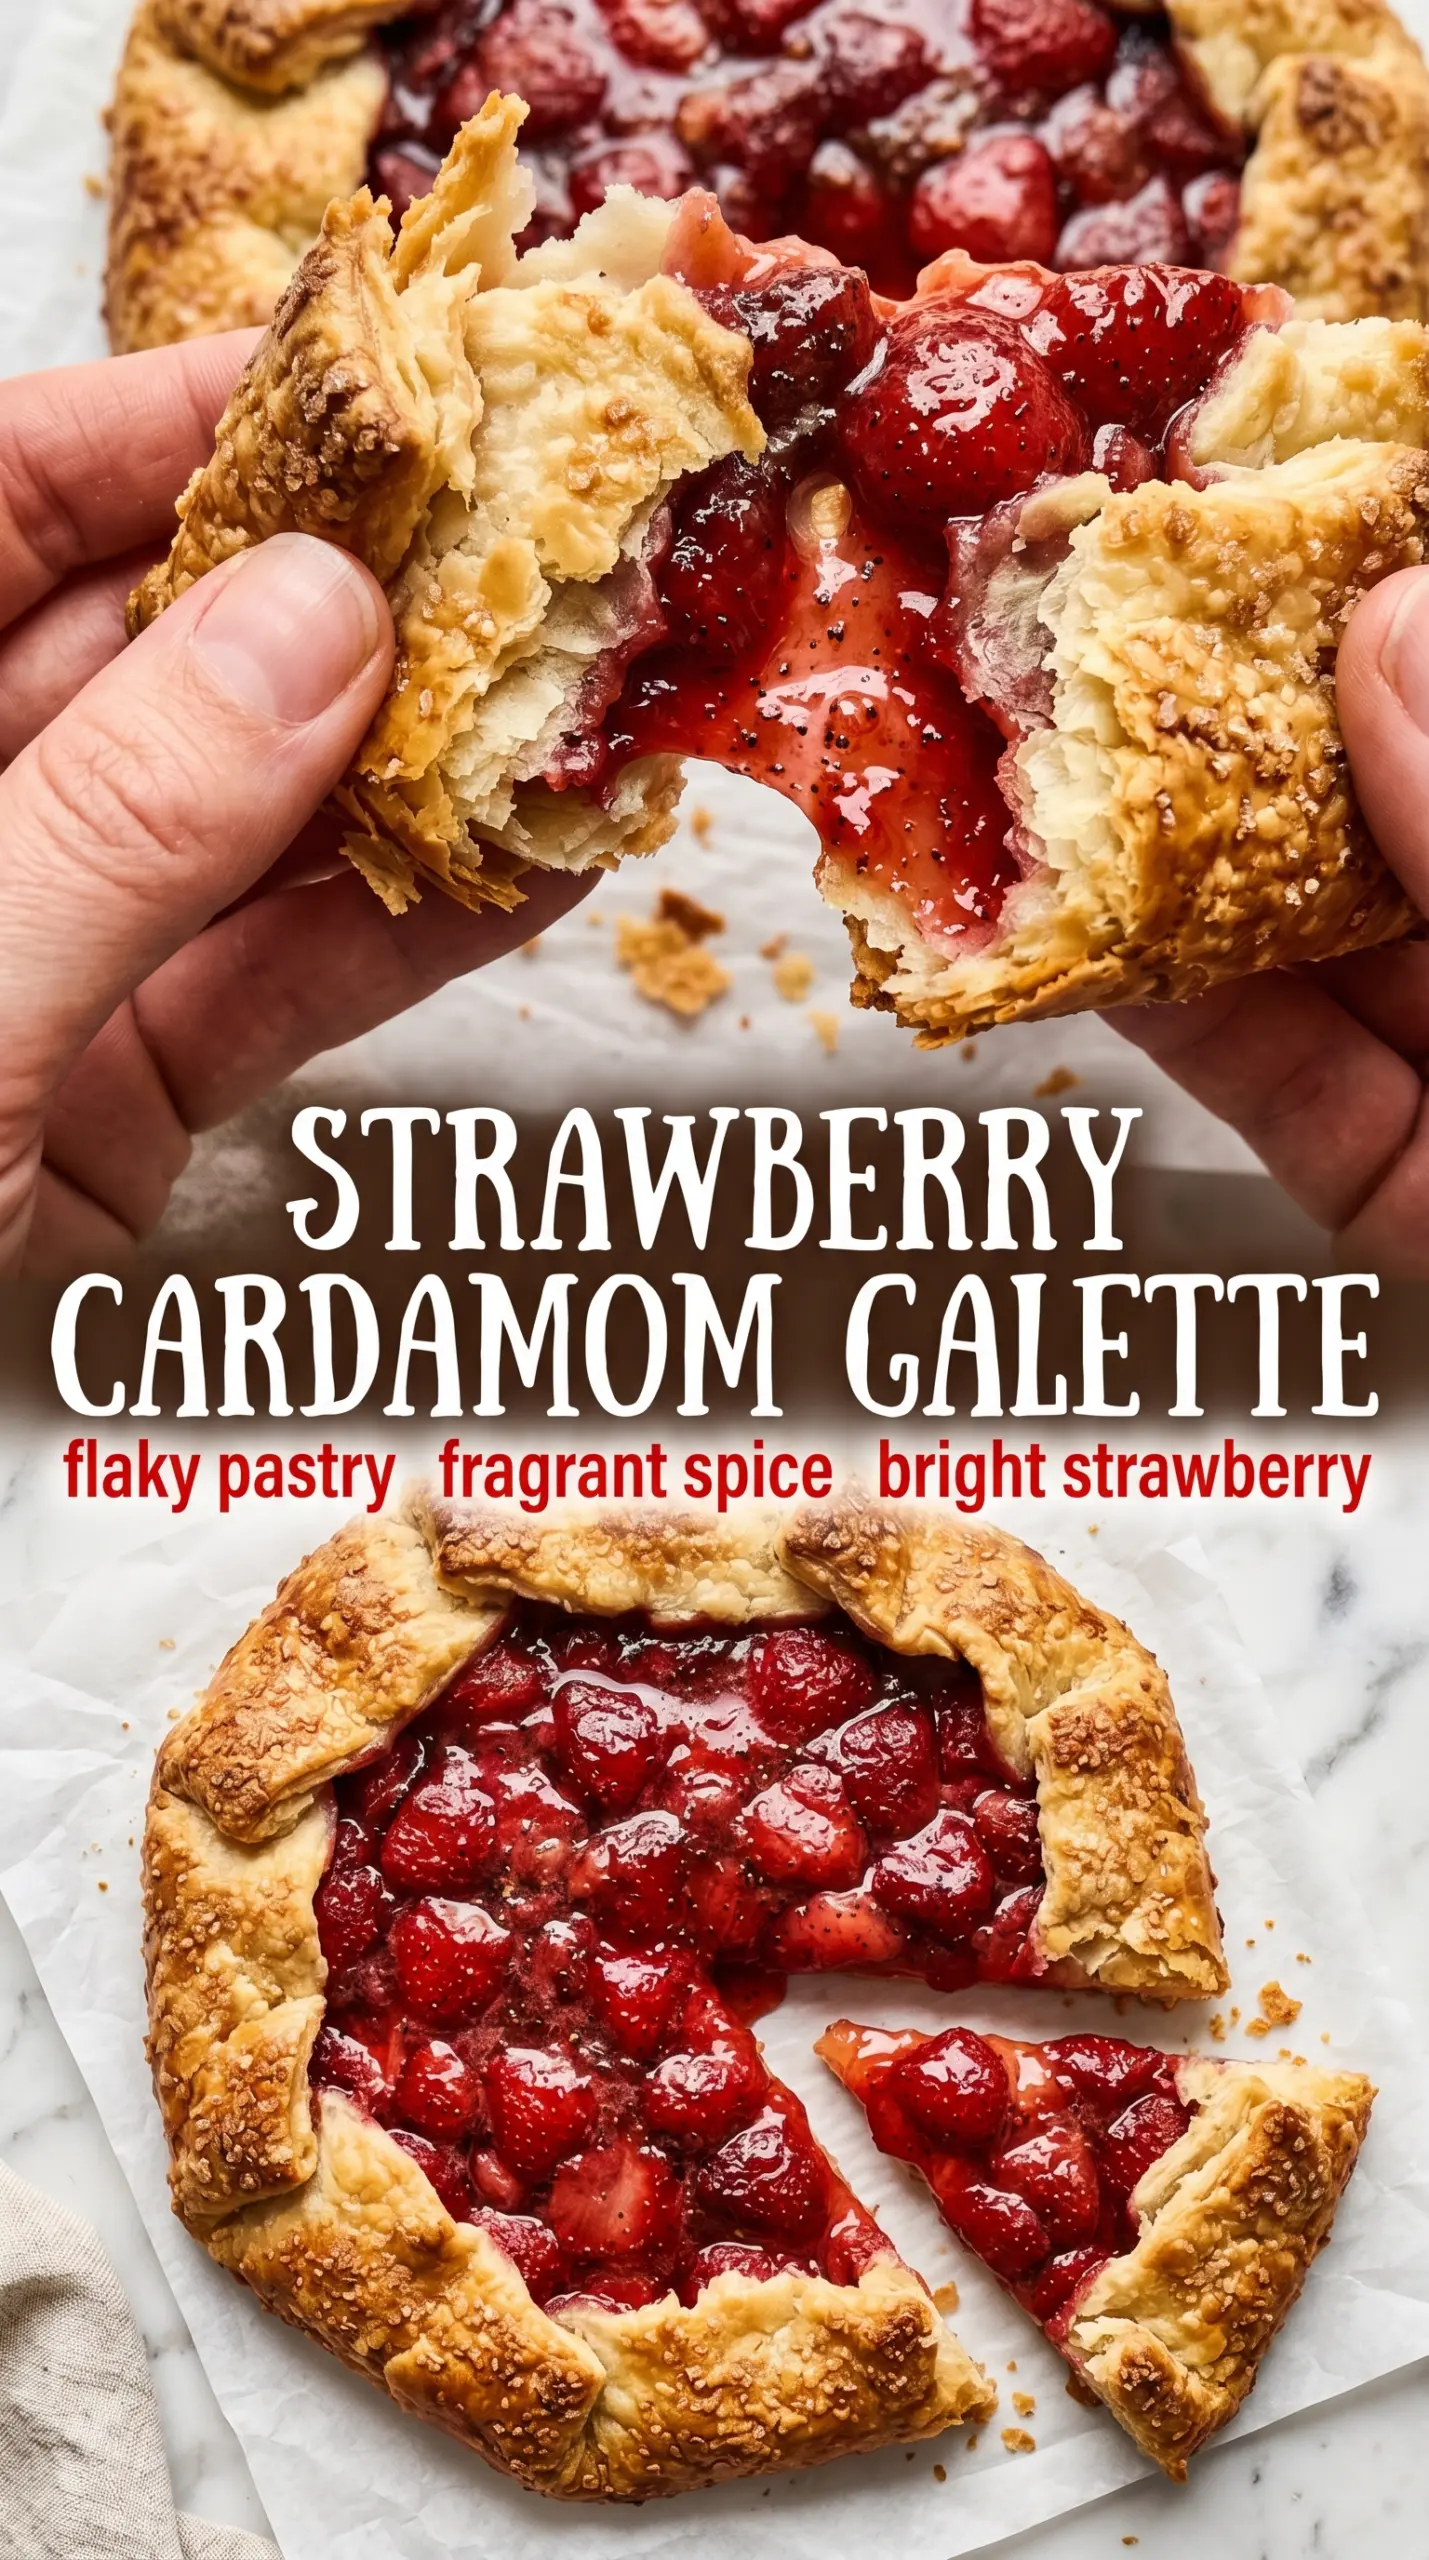
Ruby strawberries tucked into a buttery crust and lifted with cardamom make this galette taste polished without losing that hand-formed, rustic look. The edges bake up deeply golden and crisp while the center turns jammy and spoonable, which is exactly the contrast you want in a fruit galette.
The dough stays tender because the butter goes in cold and the water is added just until the flour hydrates. That keeps the crust flaky instead of dense. Cardamom is the quiet trick here: it doesn’t shout over the berries, but it gives the filling a warm, floral edge that makes the whole dessert feel more composed than a plain strawberry tart.
Below, I’ve included the small details that matter most, including how to keep the bottom from going soggy and how to fold the dough so it holds its shape without looking fussy.
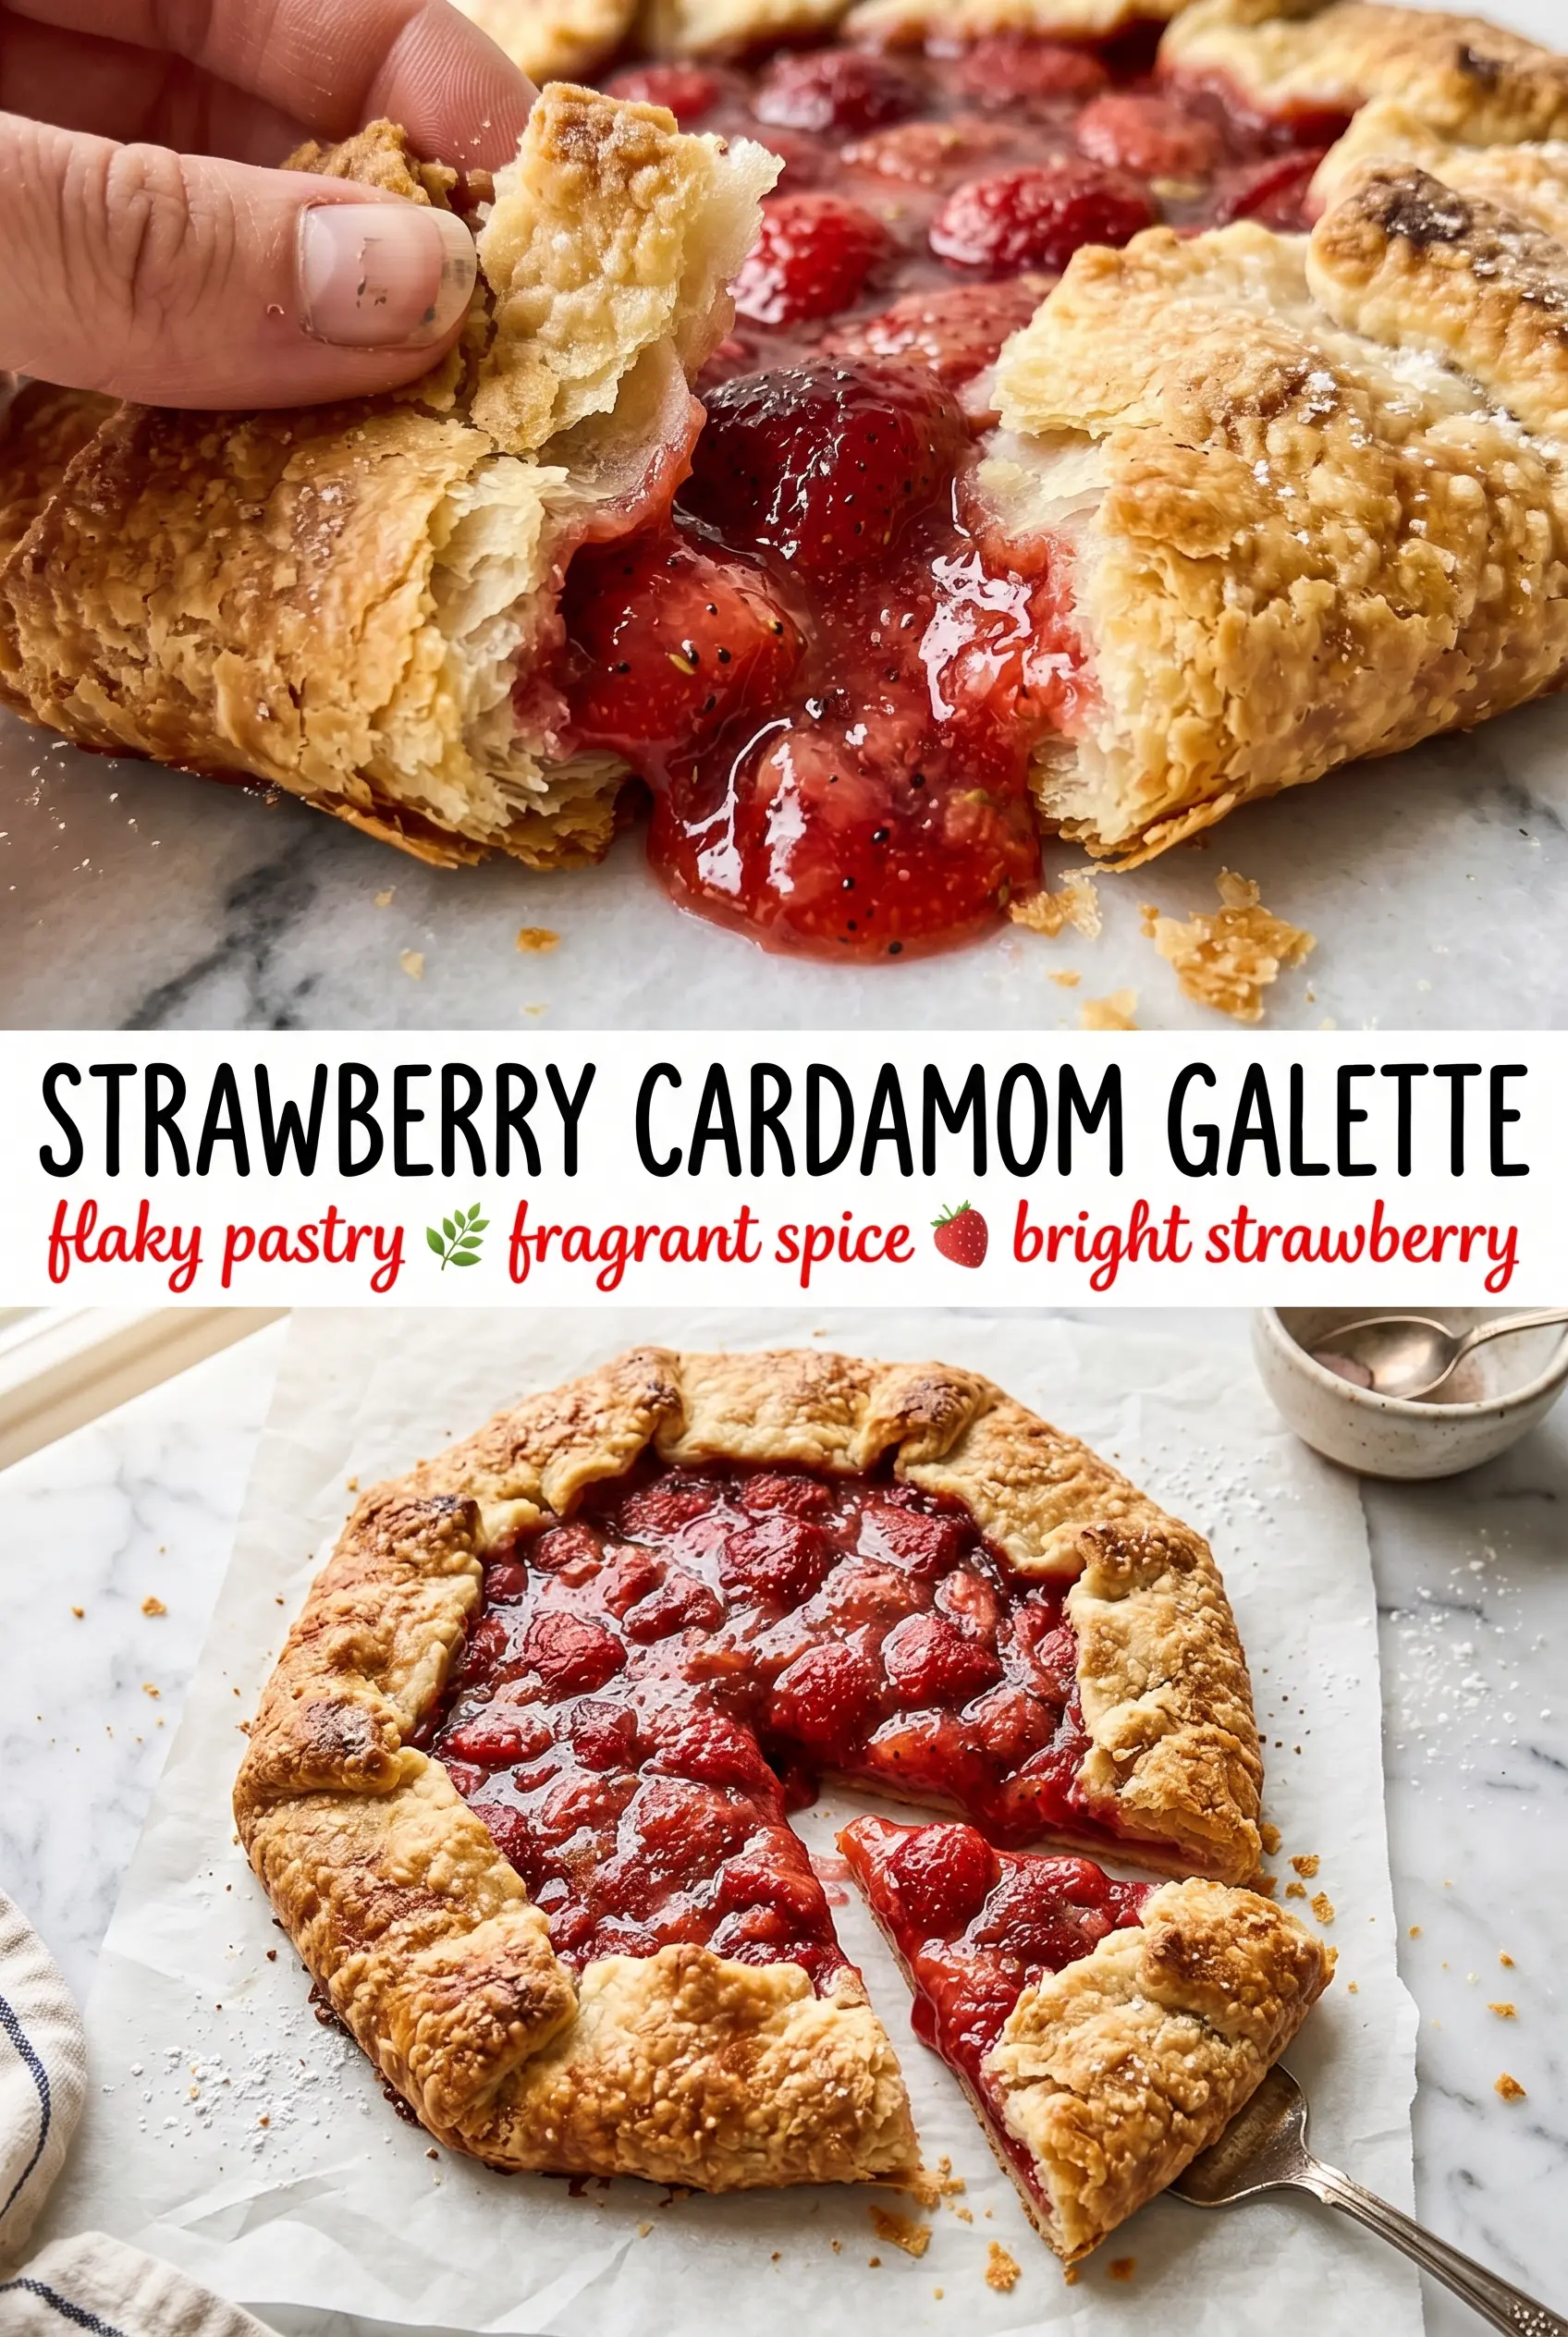
The crust stayed crisp under the strawberries, and the cardamom made it taste a lot fancier than the effort it took. I also loved that the juices stayed put instead of running all over the pan.
Save this strawberry cardamom galette for the kind of dessert that looks elegant without needing a pie dish.
The Mistake That Makes Fruit Galettes Leak Into the Pan
The biggest failure point in a fruit galette is too much juice. Strawberries release a lot of liquid as they bake, and if the filling isn’t thickened before it goes into the oven, that juice runs straight across the parchment and softens the crust before it has time to set. Cornstarch handles that problem here, but only if the berries are tossed evenly and the filling goes into the oven right away.
The other thing that matters is how the dough is handled. Warm dough spreads, shrinking the border and leaving you with a flatter, less defined galette. Chill the dough long enough to firm the butter back up, and work quickly when you roll and fold it. You want visible layers of butter in the crust, not a smooth, overworked disk.
What the Strawberries, Cardamom, and Cornstarch Each Do Here
- Strawberries — Fresh berries are the whole point here. Use ripe ones with good aroma, but don’t use berries that are already soft and leaking in the carton; those break down too fast in the oven. If your strawberries are large, halve or quarter them so they bake at the same rate.
- Cardamom — Ground cardamom gives this galette its quiet, floral warmth. Freshly ground will taste brighter, but a good store-bought spice works fine here because it’s mixed into the fruit rather than used on its own. If you want a softer flavor, cut it back slightly; if you want more perfume, don’t go past a full teaspoon or it will take over the strawberries.
- Cornstarch — This is what keeps the filling from flooding the crust. It thickens the berry juices as they bake and gives you spoonable fruit instead of a watery puddle. Arrowroot can work in the same amount, but the filling may look a little looser when it cools.
- Butter — Cold butter is nonnegotiable if you want a flaky crust. The little butter pieces melt in the oven and leave those delicate pockets that make the pastry crisp and layered. If the butter softens while you’re mixing, stop and chill the bowl before going further.
Rolling, Folding, and Baking the Galette So It Holds Together
Making the dough
Mix the flour and salt, then cut in the cold butter until the mixture looks like coarse crumbs with a few pea-size pieces still visible. Those larger bits are what give the finished crust flake. Add the ice water a little at a time and stop as soon as the dough clumps when pressed; if it feels sticky, it’s already too wet and will bake up tough instead of tender.
Building the berry center
Toss the strawberries with sugar, cardamom, and cornstarch until every piece looks lightly coated. You’re looking for a glossy, sandy coating, not a wet bowl of fruit. Roll the dough into a 12-inch circle on parchment so you can move the galette without tearing it, then mound the berries in the center and keep that 2-inch border clear so the folds can seal properly.
Folding and finishing
Lift the edges up and over the strawberries in loose pleats. The dough should overlap naturally; don’t stretch it or it will shrink back in the oven. Brush the crust with beaten egg for color, then bake until the pastry is deep golden and the filling is bubbling through the center. If the crust is browning too fast before the fruit bubbles, lower the rack one level and keep baking until the juices look thick, not cloudy.
Three Ways to Make This Strawberry Galette Work for Your Kitchen
Dairy-Free Crust
Swap the butter for a solid plant-based baking stick that stays firm when cold. The crust will still be flaky, though the flavor will be a little less rich and a touch more neutral. Keep everything cold and handle the dough gently, because dairy-free fats often soften faster once they start warming up.
Gluten-Free Version
Use a 1:1 gluten-free flour blend that already includes xanthan gum. The dough may be a little more fragile, so roll it between parchment sheets instead of relying on extra flour, which can dry it out. The texture won’t be quite as crisp at the edges, but it still bakes into a sturdy, rustic galette.
Mixing in Another Berry
Replace up to half the strawberries with raspberries or blueberries for a sharper, juicier filling. Raspberries soften fast, so keep the cornstarch in place; blueberries hold their shape a little better and give the galette a darker, jammy center. The flavor gets a little deeper and less purely strawberry, which works nicely with the cardamom.
Storage and Reheating
- Refrigerator: Store leftovers covered for up to 3 days. The crust softens a bit as it sits, but the flavor stays good.
- Freezer: Baked galette freezes best in slices wrapped tightly and stored in an airtight container for up to 2 months. The fruit will be softer after thawing, but it still works well.
- Reheating: Warm slices in a 325°F oven until the crust crisps back up, about 10 to 12 minutes. The microwave makes the pastry limp, which is the one mistake that will undo all the work you put into the crust.
Questions I Get Asked About This Recipe
Strawberry Cardamom Galette
Ingredients
Equipment
Method
- Mix all-purpose flour and salt in a bowl until evenly combined. Add cold butter cubes and cut in until the mixture resembles coarse breadcrumbs, with visible butter pieces throughout.
- Add ice water a little at a time and mix just until the dough comes together. It should look slightly shaggy but hold when pressed.
- Shape the dough into a disk, wrap in plastic, and refrigerate for at least 30 minutes. Chill until firm enough to roll without sticking.
- Toss the halved strawberries with granulated sugar, ground cardamom, and cornstarch until evenly coated. Let sit briefly so the cornstarch starts to moisten the fruit.
- Roll the chilled dough into a 12-inch circle on parchment paper. Keep the border area even so it folds cleanly over the fruit.
- Arrange the strawberries in the center, leaving a 2-inch border around the edges. Spread them in a single layer for more even bubbling.
- Fold the edges of dough up and over the strawberries to form a rustic shape. Press lightly so the folds stay in place while baking.
- Brush the folded crust with the beaten egg for an egg-washed finish. Make sure the pastry border is well coated for golden color.
- Bake at 400°F for 35 minutes until the crust is golden and the filling is bubbly. Watch for caramelized edges where butter meets sugar and a glossy fruit center.
- Cool the galette for 15 minutes, then dust with powdered sugar and serve. Letting it rest helps the filling set slightly so it slices cleanly.