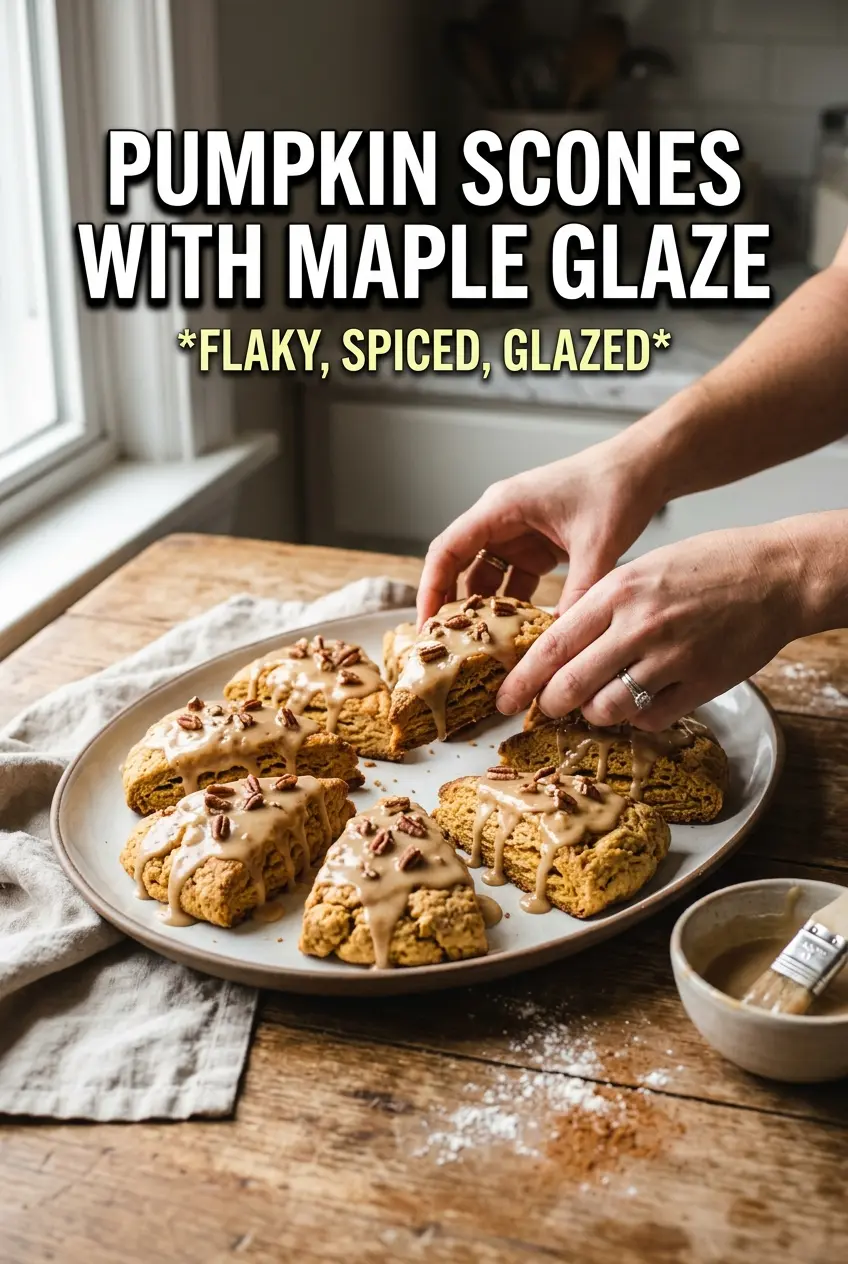
These pumpkin scones bake up with crisp, lightly sugared edges and a tender middle that pulls apart in flaky layers when you break one open. The maple glaze sets into a thin, sweet finish that drips over the sides just enough to hit every bite, and the pumpkin pie spice gives the whole batch that bakery-style warmth without burying the pumpkin.
What makes these work is the balance between moisture and structure. Pumpkin puree adds flavor and softness, but it also brings a lot of water, so the cold butter and the short mix time matter more than people expect. If you overwork the dough, the scones bake up tough instead of crumbly and tender. Keeping the butter cold gives you those little steam pockets that turn into flaky layers in the oven.
Below, I’ve included the one step that keeps the dough from getting sticky, plus the best way to glaze these so the maple flavor stays front and center instead of getting lost in sugar.
The scones baked up tall and tender instead of dry, and the maple glaze set just enough that it didn’t slide right off. My kitchen smelled like a coffee shop.
Save these pumpkin scones with maple glaze for a bakery-style breakfast that comes together fast and bakes up with flaky, tender layers.
The Trick to Flaky Scones That Don’t Turn Dense
The biggest mistake with pumpkin scones is treating the dough like cookie dough and mixing until it looks perfectly smooth. It never needs to get there. As soon as the flour disappears and the dough starts to hold together, stop. A shaggy, slightly sticky dough is exactly what you want because it bakes into a tender crumb instead of a heavy one.
Cold butter is doing a lot of the work here. Those little chunks melt in the oven and leave air pockets behind, which is what gives you a scone that breaks cleanly instead of baking up cakey. If the dough starts warming up while you work with it, pop it in the fridge for 10 minutes before shaping. That short rest keeps the butter firm and makes the wedges hold their shape better in the oven.
What the Pumpkin, Butter, and Maple Each Bring to the Pan

- Pumpkin puree — Use plain pumpkin puree, not pumpkin pie filling. The puree gives the scones their color, moisture, and earthy pumpkin flavor without extra sugar or spices throwing off the dough. If your puree looks watery, blot it lightly with a paper towel before mixing so the dough doesn’t spread.
- Cold unsalted butter — This is the ingredient that creates flaky layers. Unsalted butter gives you control over the seasoning, and cold cubes are non-negotiable because room-temperature butter blends in too quickly and makes the scones more like quick bread. If you only have salted butter, use it and reduce the added salt slightly.
- Heavy cream — Cream adds richness and helps the dough come together without making it gummy. Whole milk can work in a pinch, but the scones will be a little less tender and the flavor won’t be as lush. Save a little extra cream for brushing the tops so they brown with a soft, glossy finish.
- Pure maple syrup — Use the real stuff in the glaze. Pancake syrup tastes flat here and thins the glaze without bringing the same depth. Maple syrup gives the topping its warm finish and keeps the sweetness in step with the pumpkin instead of fighting it.
Building the Dough and Glazing at the Right Moment
Mix the Dry Ingredients First
Whisk the flour, sugar, baking powder, pumpkin pie spice, cinnamon, and salt until the spices are evenly distributed. That keeps you from getting pockets of cinnamon in one bite and plain flour in the next. When you cut in the butter, stop while you still have visible pea-sized pieces; if the mixture turns sandy, the scones lose flakiness.
Bring the Dough Together Without Overworking It
Whisk the pumpkin, cream, egg, and vanilla in a separate bowl, then add them to the flour mixture and stir just until the dry bits disappear. The dough will look rough and a little sticky, and that’s the right texture. If you keep stirring until it looks polished, the gluten tightens and the scones bake up chewy instead of tender.
Shape, Cut, and Chill Fast
Pat the dough into an 8-inch circle on a lightly floured surface, then cut it into 8 wedges with a sharp knife or bench scraper. Pressing instead of rolling keeps the layers from getting compressed. If the dough feels too soft to cut cleanly, slide the whole round onto a plate and chill it for 10 minutes before baking.
Bake Until the Edges Set and the Tops Turn Golden
Brush the tops with cream before they go into the oven. That gives the scones color and helps the crust set. Bake until the edges are golden and the tops look dry with just a little lift around the seams. Pull them before they get dark, because overbaked scones dry out fast.
Drizzle the Glaze After a Short Cool
Let the scones cool for about 10 minutes before glazing. If they’re too hot, the glaze melts off and disappears into the tops. If they cool completely, the glaze sits more sharply on top, which is fine, but you’ll lose that soft drizzle effect that makes them look bakery-made.
How to Adapt These Scones Without Losing the Texture
Dairy-Free with Coconut Cream
Use a thick dairy-free butter and full-fat coconut cream instead of the cream. The scones will still be tender, but the flavor shifts slightly toward coconut and the glaze won’t taste quite as classic. Keep the coconut cream cold so the dough behaves like the original version.
Gluten-Free with a 1:1 Baking Blend
A good gluten-free flour blend can work here, especially one that already includes xanthan gum. The scones will be a little more delicate and may need an extra minute or two in the oven, but the flavor stays close if you don’t overmix the dough. Shape them gently because gluten-free dough tears more easily.
Maple-Free Glaze Swap
If you’re out of maple syrup, use honey, but expect a different finish. Honey makes the glaze sweeter and a little brighter, while maple brings the deeper, autumn spice note. Thin it with a touch more milk if it thickens too fast.
Make Them More Dessert-Like
Add 1/2 cup chopped pecans or white chocolate chips to the dough for a richer, sweeter scone. Pecans add crunch and a toasted note that plays well with the spice, while white chocolate pushes the recipe toward dessert territory. Keep the mix-ins modest or they’ll weigh the wedges down.
Storage and Reheating
- Refrigerator: Store glazed or unglazed scones in an airtight container for up to 3 days. The texture softens a little by day two, but they still hold up well.
- Freezer: Freeze unglazed scones for up to 2 months. Wrap them individually, then thaw at room temperature before warming and glazing.
- Reheating: Warm in a 300F oven for 8 to 10 minutes. The biggest mistake is microwaving them too long, which turns the crumb rubbery and melts the glaze into a sticky mess.
Questions I Get Asked About This Recipe
Pumpkin Scones With Maple Glaze
Ingredients
Equipment
Method
- Preheat the oven to 400°F and line a baking sheet.
- Whisk all-purpose flour, granulated sugar, baking powder, pumpkin pie spice, cinnamon, and salt, then cut in the cold butter until the mixture looks like coarse crumbs.
- Whisk pumpkin puree, heavy cream, egg, and vanilla, then add to the flour mixture and stir until just combined.
- Pat the dough into an 8-inch circle, then cut into 8 wedges.
- Brush the tops with cream, then bake 18-20 minutes at 400°F until golden.
- Cool the scones for 10 minutes.
- Whisk powdered sugar, pure maple syrup, milk, cinnamon, and pumpkin pie spice until smooth, then drizzle over the warm scones.