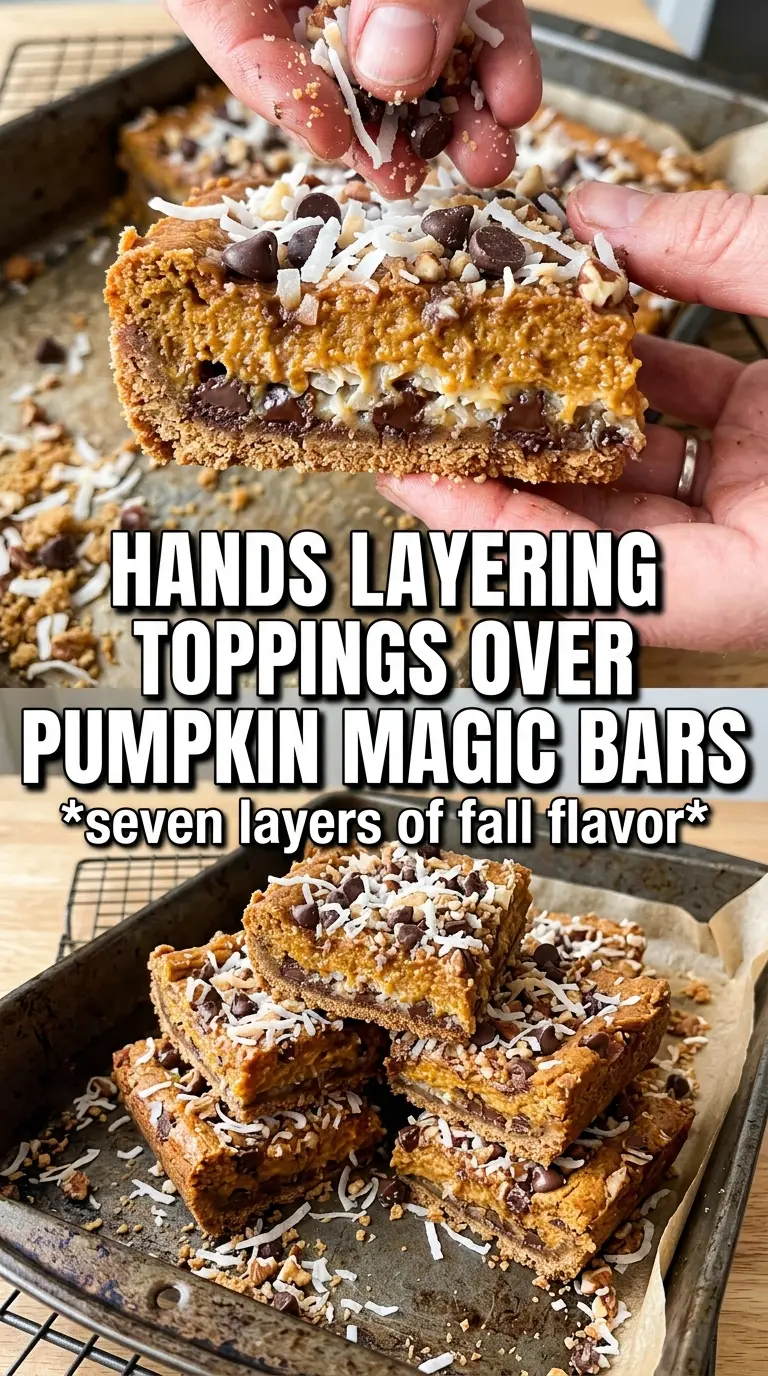
Pumpkin magic bars bake into thick, chewy layers with a buttery gingersnap crust, a spiced pumpkin filling, and a top that turns golden around the edges while the coconut and chips stay just a little soft. They slice cleanly once cooled, but the texture still has that candy-bar richness that makes people reach for a second piece before the pan is half gone.
What makes this version work is the balance between the pumpkin layer and the sweetened condensed milk. Pumpkin puree adds flavor and body, but it needs the condensed milk to set into something sliceable instead of loose. The gingersnap crumbs matter too; they bring enough spice and structure to stand up to all that sweetness, which keeps the bars from tasting flat.
Below you’ll find the exact layering order that helps these bars hold together, plus a few smart swaps if you want to change the nuts or chips without messing up the final texture.
The pumpkin layer set up beautifully and the gingersnap crust stayed crisp underneath. I cut them after a full cool and they came out in neat squares instead of a gooey mess.
Save these Pumpkin Magic Bars for the dessert table when you want a chewy gingersnap crust, a spiced pumpkin layer, and those melty white chocolate and toffee bits in every bite.
The Part That Keeps Pumpkin Magic Bars From Going Soft
The biggest mistake with magic bars is rushing the layering or underbaking the center. Pumpkin adds moisture, and when it sits on top of a crust that hasn’t been pressed evenly into the butter, the bottom turns crumbly instead of dense and sliceable. The goal is a base that looks a little saturated at first, then bakes into a firm, cookie-like layer that can hold the filling.
These bars also need a full cool before you cut them. That’s not optional here. The filling keeps setting as it sits, and if you cut too early, the layers slide apart and the topping scatters instead of staying stacked.
- Gingersnap crumbs — These do more than make the crust seasonal. They bring spice and a tighter crumb than graham crackers, which helps the bottom layer hold up under the pumpkin filling. A food processor gives the finest crumbs, but a sturdy zip-top bag and rolling pin work too.
- Sweetened condensed milk — This is the binder and the sweetness all in one. There isn’t a substitute that behaves the same way in these bars. Evaporated milk won’t set the filling the same way, and regular milk is too thin.
- Pumpkin puree — Use plain pumpkin puree, not pumpkin pie filling. Pie filling already contains sugar and spices, which throws off the balance and makes the bars overly sweet and a little muddy in flavor.
- White chocolate chips, butterscotch chips, pecans, and toffee bits — These are the texture layer. They melt, toast, and crunch in different ways, which is what makes each bite interesting. If you swap the pecans, keep another crunchy element in the mix so the bars don’t become one-note.
What Each Ingredient Is Actually Doing in This Recipe
- Primary ingredient (the star) — Quality matters most. Choose the best you can find.
- Cooking medium (oil, butter, or broth) — This carries flavors and prevents dryness.
- Seasonings (salt, pepper, spices, herbs) — Layer flavors so nothing overpowers. Build depth gradually.
- Aromatics (garlic, onion, herbs) — Cook with fat to bloom flavors. Become the foundation.
- Supporting ingredients — Complement the main ingredient without overpowering it.
- Sauce or liquid (if applicable) — Brings flavors together. Balance richness with acid.
- Acid (lemon, vinegar, wine, or other) — Brightens and prevents flat-tasting results.
- Final finish (garnish, glaze, or sauce) — Prevents one-dimensional taste and adds visual appeal.
Building the Layers So the Bars Slice Cleanly
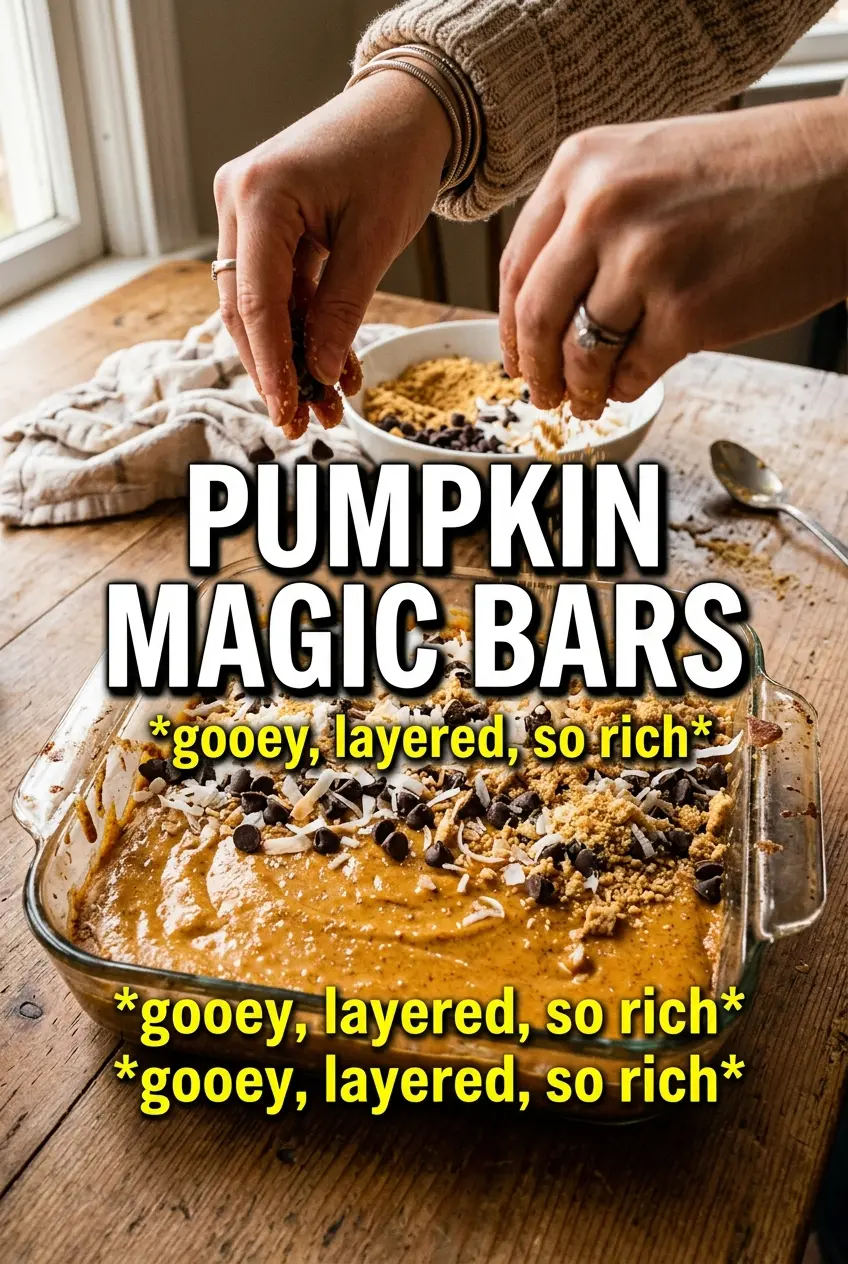
Start by pouring the melted butter straight into the pan, then scatter the gingersnap crumbs over it. That order helps the butter soak into the crust instead of pooling on top, which gives you a tighter bottom layer. Press the crumbs lightly if they look dry in spots, but don’t compact them into a brick.
Whisk the pumpkin, condensed milk, pumpkin pie spice, and cinnamon until smooth, then pour that mixture evenly over the crust. The top layer should cover the crumbs edge to edge before you add the chips, coconut, nuts, and toffee. A gentle press with your hands helps everything adhere to the filling so the toppings don’t burn off or fall away after baking.
Making the Gingersnap Base
The crust should look evenly moistened, with no dry pockets of crumb showing through. If your crumbs are too coarse, the base will fall apart when you cut the bars. The melted butter needs to touch almost every bit of cookie dust, so spread it first, then add the crumbs and give the pan a little shake to settle them.
Mixing the Pumpkin Layer
Whisk the filling until the pumpkin is fully blended into the condensed milk and the spices are evenly distributed. You’re looking for a smooth, thick pour, not a loose batter. If you see streaks of pumpkin puree, keep whisking; those streaks can bake into soft pockets that make the center uneven.
Baking Until the Center Sets
Bake until the edges are golden and the center no longer looks wet or sloshy when you nudge the pan. The middle can still have a slight jiggle when it comes out, but it shouldn’t ripple like liquid. If the top is browning fast before the center sets, tent it loosely with foil and keep going until the filling looks settled.
Cooling Before the First Cut
Let the bars cool completely in the pan. Warm bars will smear, and the topping will drag through the filling instead of staying in clean layers. For the neatest squares, wait until they’re fully cool, then lift them out and cut with a sharp knife wiped clean between slices.
How to Change the Toppings Without Losing the Texture
Gluten-Free Crust Swap
Use certified gluten-free gingersnap cookies for the crust and keep the rest of the recipe the same. You’ll get the same spicy base and chewy texture without changing the structure of the bars. The only thing to watch is crumb size; gluten-free cookies can be a little more delicate, so press them gently into the butter instead of grinding them into powder.
Dairy-Free Version
This one is harder to make fully dairy-free because sweetened condensed milk is doing the heavy lifting. If you need to go that direction, use a dairy-free sweetened condensed milk alternative and dairy-free chips, then expect a slightly softer set. The bars will still taste rich, but they may need a longer chill before cutting.
Nut-Free Topping
Leave out the pecans and replace them with extra coconut, more toffee bits, or even crushed pretzels if you want a little salt in the mix. The bars will still hold together, but the texture will be softer without the nut crunch. If you skip the nuts, keep the topping layer generous so the surface still has some bite.
Make Them Less Sweet
Swap the butterscotch chips for semisweet chocolate chips if you want a deeper, less candy-like finish. That change pulls the bars a little more toward brownie territory and cuts some of the sweetness from the condensed milk and toffee. You’ll lose a bit of caramel note, but the bars taste more balanced.
Storage and Reheating
- Refrigerator: Store in an airtight container for up to 5 days. The bars firm up a little more in the fridge, which actually makes them easier to cut cleanly.
- Freezer: These freeze well. Wrap individual bars tightly and freeze for up to 2 months, then thaw in the refrigerator so the topping doesn’t get sticky.
- Reheating: These are best served at room temperature or slightly chilled, not hot. If you warm them, do it briefly just until the top softens a little; too much heat will make the filling greasy and loosen the layers.
Questions I Get Asked About This Recipe
Pumpkin Magic Bars
Ingredients
Equipment
Method
- Preheat oven to 350F, then pour melted butter into a 9x13 baking pan so the bottom is coated.
- Sprinkle gingersnap crumbs evenly over the butter in an even layer.
- Whisk sweetened condensed milk, pumpkin puree, pumpkin pie spice, and cinnamon, then pour evenly over the crumbs to form the pumpkin layer.
- Layer sweetened shredded coconut, white chocolate chips, butterscotch chips, pecans, and toffee bits evenly over the top.
- Press down gently with your hands so the toppings adhere to the pumpkin layer.
- Bake for 30-35 minutes, until the edges are golden and the center is set (no longer wet-looking).
- Cool completely before cutting into bars so the layers slice cleanly.