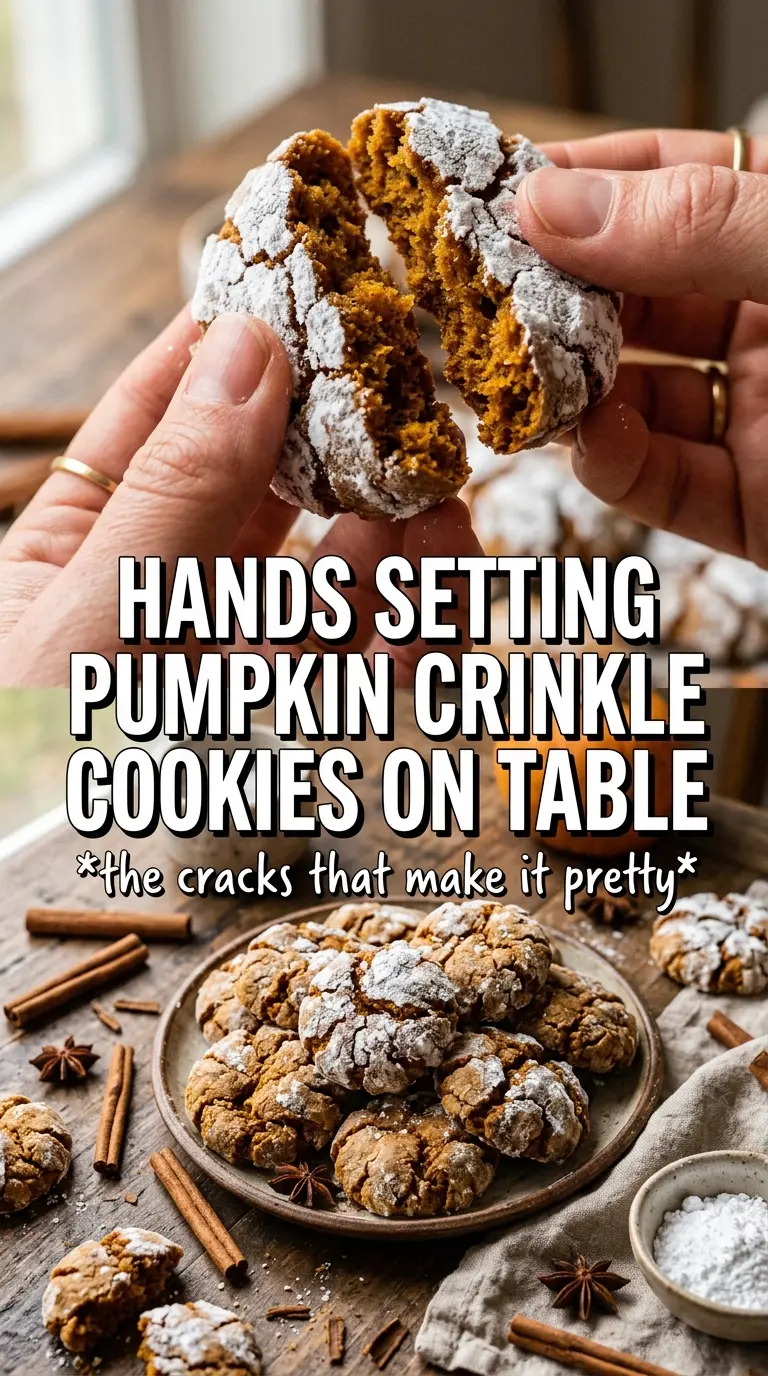
Pumpkin crinkle cookies bake up soft in the middle with a crackly sugar shell that splits open just enough to show the deep orange dough underneath. They look dramatic on the tray, but the real payoff is the texture: tender, pumpkin-spiced centers wrapped in a sweet, powdered finish that stays crisp at the edges after cooling.
What makes this version work is restraint. The pumpkin puree gets blotted dry so the dough doesn’t turn cakey, and the melted butter keeps the cookies chewy instead of fluffy. Rolling the dough first in granulated sugar, then in a heavy layer of powdered sugar gives you that bold crinkle effect in the oven instead of a dusty coating that disappears as soon as the cookies spread.
Below, I’ll show you how to keep the dough from spreading too much, why the chill time matters, and the small coating trick that gives these cookies their best bakery-style finish.
The cookies came out soft and chewy with those perfect cracks on top, and the double sugar coating kept the powdered sugar from melting right off.
Love the crinkly tops and soft pumpkin centers? Save these Pumpkin Crinkle Cookies for your next baking day.
The Dough Has to Be Cold Enough to Crinkle, Not Spread
These cookies depend on a chilled dough ball that goes into the oven firm and stays tall long enough for the outside to split. If the dough is too warm, the cookies melt outward before the surface sets, and you lose that dramatic crackled top. The two-hour chill is doing real work here, not just passing time.
The other thing that matters is moisture. Pumpkin puree varies a lot, and wet puree makes a loose dough that bakes up puffy and soft instead of defined. Blotting the pumpkin on paper towels or a clean kitchen towel pulls out just enough liquid to keep the texture chewy and the crinkles sharp.
- Chilling the dough — This is what helps the cookies hold their rounded shape long enough to crack. If your kitchen runs warm, chill the scooped dough again for 15 to 20 minutes before baking.
- Dry pumpkin puree — A drier puree gives you a better cookie structure and a deeper pumpkin flavor. If the puree still looks wet after blotting, keep going until it looks thick and pasty.
- Double sugar coating — Granulated sugar gives the powdered sugar something to grip, so the white layer stays visible after baking. Skipping the first sugar roll usually leads to a patchy coating.
What Each Ingredient Is Actually Doing in These Cookies
- Pumpkin puree — This brings the flavor and color, but it also adds moisture that can work against the crinkle effect. Blotting it dry is the difference between a chewy cookie and one that bakes up cakey.
- Melted butter — Melted butter helps the dough come together quickly and keeps the cookies dense enough to crack on top. Softened butter would whip in more air and push the texture in a cakier direction.
- Brown sugar and granulated sugar — The brown sugar adds depth and a little chew, while the white sugar helps the edges set and supports the crackly top. You need both for the right balance.
- Pumpkin pie spice and cinnamon — These give the cookies their warm bakery-style aroma. If you only have pumpkin pie spice, you can use that alone and skip the extra cinnamon, but the flavor will be a touch less layered.
- Powdered sugar coating — This is what gives the cookies their snowy finish after baking. Use plenty; a thin dusting tends to disappear into the cracks.
From Sticky Dough to Sharp Crinkles
Mix the wet ingredients first
Whisk the melted butter with both sugars until the mixture looks glossy and thick, then add the blotted pumpkin, eggs, and vanilla. It won’t be perfectly smooth, and that’s fine. The pumpkin can look a little grainy at this stage; what matters is that everything is evenly combined before the flour goes in. If the butter is still hot, let it cool first or you’ll start cooking the eggs and the dough will turn greasy.
Bring the dough together gently
Stir the dry ingredients into the wet just until no flour streaks remain. Overmixing builds too much structure and makes the cookies tough instead of tender. The dough will be soft and a little sticky, which is exactly what you want before chilling. Cover it well and refrigerate for the full two hours so it firms up enough to scoop cleanly.
Roll for a strong sugar shell
Scoop the chilled dough into 1 1/2 tablespoon balls, then roll each one first in granulated sugar and then in a heavy coat of powdered sugar. The first layer acts like glue, and the second layer creates the bold white cracks you want after baking. If the dough starts sticking to your hands, dust your palms with a little granulated sugar instead of adding more flour, which would dry out the cookies.
Bake just until the tops split
Bake at 350°F for 11 to 13 minutes until the cookies are puffed, cracked, and set around the edges but still soft in the center. Pull them before the tops look fully dry; they finish setting as they cool on the pan. If you wait until they seem completely done in the oven, they’ll go from soft to dry fast. Let them rest on the baking sheet for a few minutes before moving them so the crinkles stay intact.
How to Adapt These Pumpkin Crinkle Cookies Without Losing the Crinkle
Gluten-Free Version
Use a cup-for-cup gluten-free flour blend with xanthan gum already included. The cookies may spread a little less, so flattening is not needed, but keep the chill time and sugar coating exactly the same or you’ll lose the crackled finish.
Dairy-Free Swap
Replace the butter with melted dairy-free baking sticks, not a tub-style spread. You want a fat that behaves like butter in the oven, or the cookies can spread too thin and the crinkles won’t stand out.
Extra-Strong Pumpkin Spice Flavor
Add another 1/2 teaspoon of pumpkin pie spice and a pinch of nutmeg. Don’t push the spice too far beyond that, or it starts to taste dusty instead of warm and balanced.
Storage and Reheating
- Refrigerator: Store baked cookies in an airtight container for up to 5 days. The powdered sugar softens a little by day two, but the cookies stay tender.
- Freezer: Freeze the unbaked dough balls after the first sugar coating, then roll in powdered sugar right before baking. Baked cookies can also be frozen, but the coating won’t stay as bright.
- Reheating: Warm baked cookies for 5 to 8 seconds in the microwave if you want them softer. Don’t overheat them or the sugar coating will melt and the centers can dry out.
Answers to the Questions Worth Asking

Pumpkin Crinkle Cookies
Ingredients
Equipment
Method
- Whisk all-purpose flour, baking powder, pumpkin pie spice, cinnamon, and salt until evenly combined, with no visible spice streaks.
- Whisk melted unsalted butter, granulated sugar, brown sugar, blotted pumpkin puree, eggs, and vanilla until smooth and thick, with the batter looking cohesive.
- Fold the dry ingredients into the wet ingredients just until no dry pockets remain, then refrigerate for 2 hours so the dough firms up.
- Preheat the oven to 350°F and line baking sheets, so the pans are ready when the dough is scooped.
- Scoop dough into 1-1/2 tablespoon balls, rolling each ball first in granulated sugar so it’s evenly dusted.
- Roll each ball very generously in powdered sugar until well coated, covering the dough completely for a crinkle finish.
- Bake for 11-13 minutes at 350°F until the cookies are crinkled and the centers look just set; do not overbake.