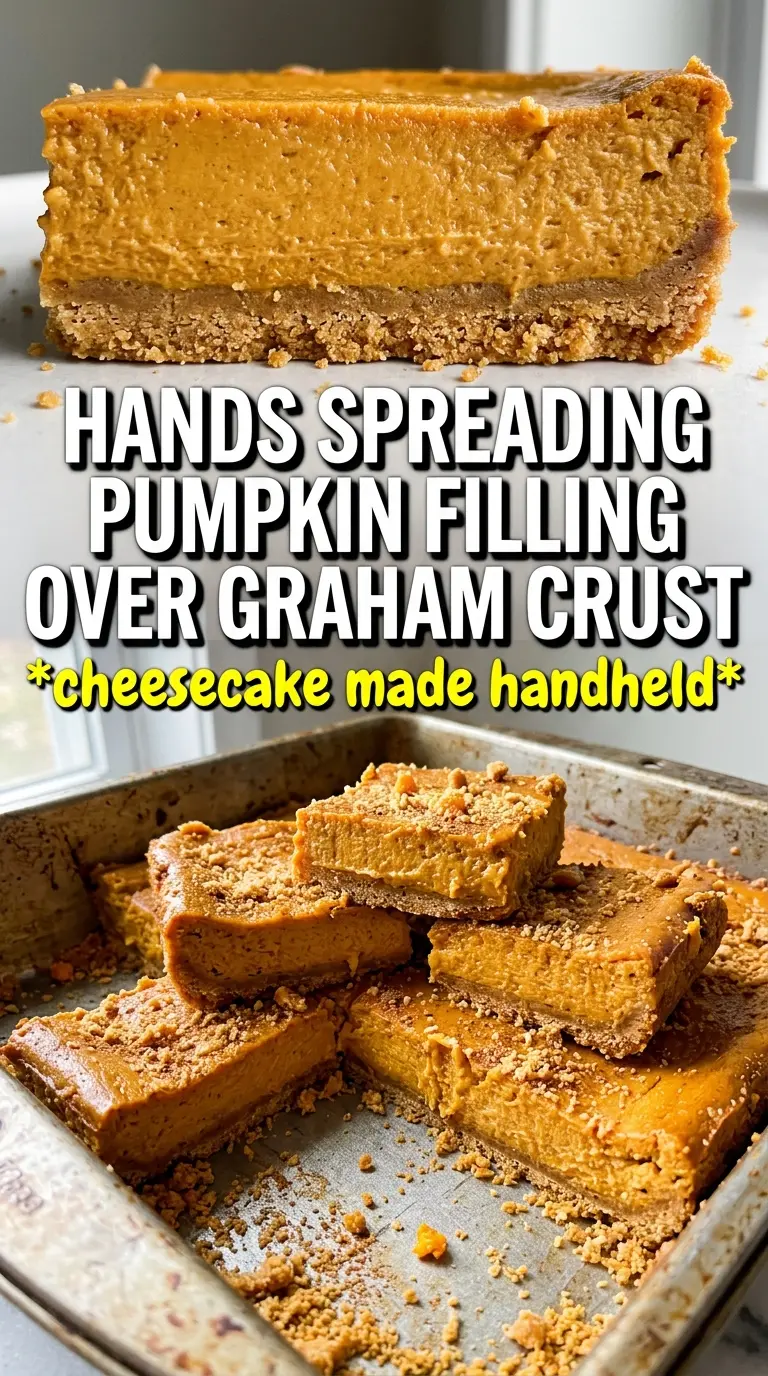
These pumpkin cheesecake bars slice cleanly into rich, creamy squares with a buttery gingersnap crust underneath and a marbled pumpkin layer on top. The texture is the part that keeps people coming back: firm enough to hold its shape, soft enough to melt on the tongue, and spiced just enough to taste like autumn without turning muddy or heavy.
The crust matters here more than it might in a standard cheesecake. Gingersnap crumbs bring warmth and a little bite, and the short bake before the filling goes in keeps the base from tasting raw or soggy. The cheesecake layer stays smooth because the cream cheese is beaten until it’s fully lump-free before the eggs go in, and the pumpkin mixture gets pulled off from that same base so the bars bake up with two distinct flavors instead of one blended mass.
Below, I’ll walk through the step that keeps the swirl looking clean, the ingredient choices that actually affect texture, and the one chilling step you don’t want to rush if you want neat bars instead of soft squares.
The gingersnap crust stayed crisp under the cheesecake, and the bars chilled into perfect squares with that swirled pumpkin layer right on top. I’d make these again just for how clean they cut.
Save these pumpkin cheesecake bars for when you want a crisp gingersnap crust, creamy swirls, and neat slices that chill up beautifully.
The Swirl Looks Better When the Filling Stays Separate
Most cheesecake bars go wrong when the pumpkin gets mixed straight into the full batter. That turns the filling into one uniform orange layer and often loosens the texture too much. Here, the plain cheesecake base stays rich and stable, then part of it gets turned into the pumpkin layer only after the cream cheese mixture is smooth and fully combined.
The other thing that matters is baking only until the center is just set. If the bars bake until they look firm all the way across, they’ll finish dry and dense after chilling. You want a slight wobble in the middle when the pan comes out of the oven. That carryover heat is what gives you a creamy slice instead of a chalky one.
- Gingersnap crumbs — These bring spice and a sturdier, more flavorful base than plain graham crumbs. If you swap them, the bars will still work, but you’ll lose that warm molasses edge that makes the pumpkin filling pop.
- Cream cheese — Use full-fat block cream cheese, softened all the way to room temperature. Cold cream cheese leaves tiny lumps in the batter, and those never fully disappear once the eggs are in.
- Sour cream — This loosens the filling just enough and adds a slight tang that keeps the bars from tasting flat. Plain Greek yogurt works in a pinch, but the texture is a little less silky.
- Pumpkin puree — Use pure pumpkin, not pumpkin pie filling. The pie filling already contains sugar and spices, which throws off both the flavor balance and the texture of the pumpkin layer.
What Each Ingredient Is Actually Doing in This Recipe
- Primary ingredient (the star) — Quality matters most. Choose the best you can find.
- Cooking medium (oil, butter, or broth) — This carries flavors and prevents dryness.
- Seasonings (salt, pepper, spices, herbs) — Layer flavors so nothing overpowers. Build depth gradually.
- Aromatics (garlic, onion, herbs) — Cook with fat to bloom flavors. Become the foundation.
- Supporting ingredients — Complement the main ingredient without overpowering it.
- Sauce or liquid (if applicable) — Brings flavors together. Balance richness with acid.
- Acid (lemon, vinegar, wine, or other) — Brightens and prevents flat-tasting results.
- Final finish (garnish, glaze, or sauce) — Prevents one-dimensional taste and adds visual appeal.
The 20 Minutes That Matter Before the Oven Does
Build the crust first
Mix the gingersnap crumbs, sugar, and melted butter until every crumb looks evenly moistened, then press the mixture firmly into the parchment-lined pan. You want a tight layer here, not a loose sprinkle, or the crust will crumble when you cut the bars. Bake it for 8 minutes so it sets before the filling goes on.
Whip the cheesecake base until it goes silky
Beat the cream cheese and sugar until the mixture looks smooth and glossy, with no visible lumps along the bowl. Add the eggs one at a time, then the sour cream and vanilla, and stop mixing as soon as it turns uniform. If you overbeat after the eggs go in, you’ll trap too much air and the bars can puff, crack, or sink as they cool.
Split the batter and swirl with restraint
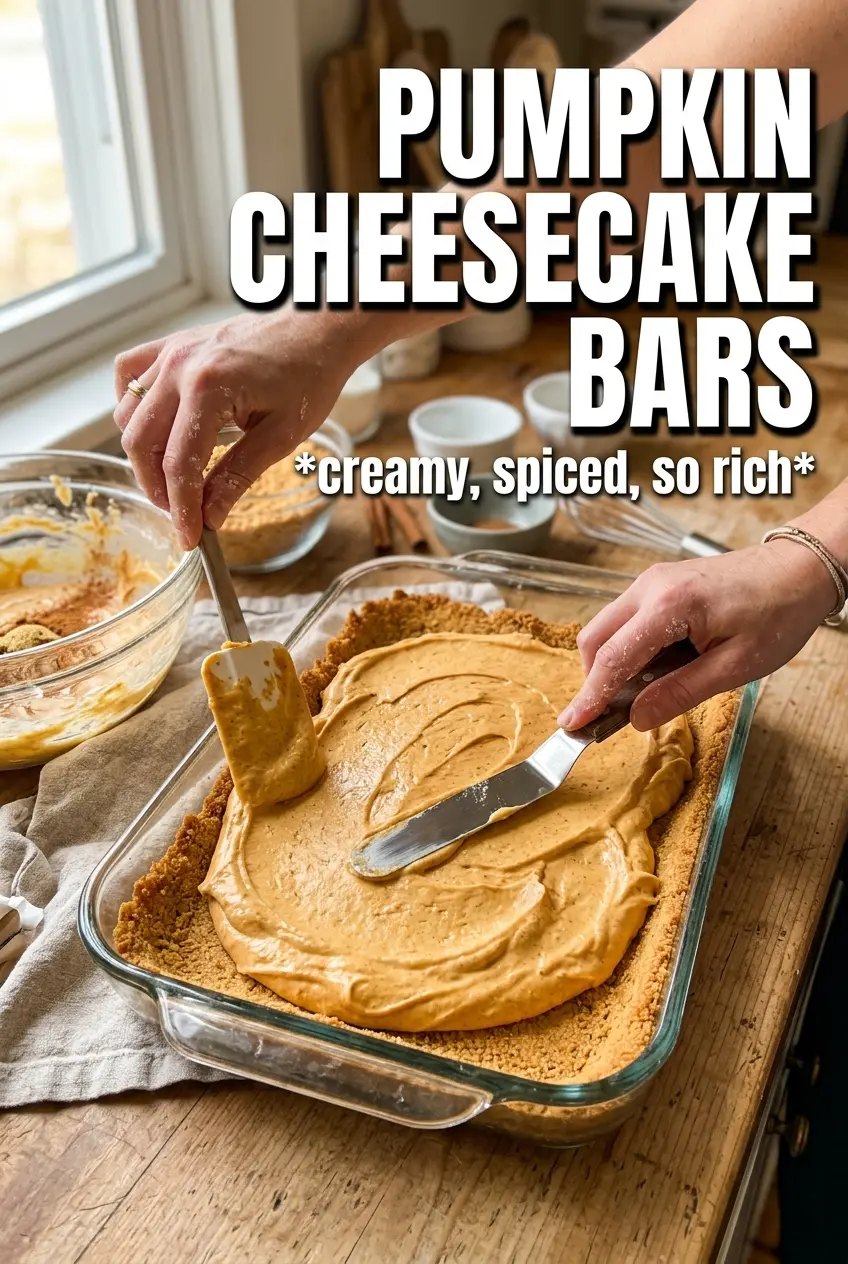
Scoop out 1 1/2 cups of the cheesecake batter and whisk it with the pumpkin puree, brown sugar, pumpkin pie spice, and cinnamon. Pour the plain batter over the crust first, then spoon the pumpkin mixture on top in dollops. Run a knife through it just a few times to create visible swirls; if you keep dragging the knife, the layers blend together and you lose that marbled look.
Cool completely before cutting
Bake until the edges are set and the center still has a slight jiggle, then let the bars cool at room temperature before chilling them for at least 3 hours. The fridge is what gives you clean slices, not the oven. If you cut them too soon, the filling will smear and the crust can lift right out of the pan.
How to Make These Bars Fit Your Kitchen and Your Schedule
Gluten-Free Crust Swap
Use gluten-free gingersnap crumbs or a gluten-free spice cookie crumb in the same amount. The filling stays exactly the same, but the crust may be a touch more delicate, so press it firmly into the pan and chill the baked bars well before cutting.
Less Sweet, More Cheesecake
Reduce the sugar in the cheesecake layer by 2 tablespoons if you like a sharper cream cheese flavor. The bars will still set the same way, but the pumpkin swirl will taste a little more grounded and less dessert-counter sweet.
Make-Ahead for a Party Tray
Bake the bars a day ahead and chill them overnight before slicing. The flavor settles, the swirl sets more cleanly, and the bars cut into neat squares instead of soft rectangles that need trimming.
Dairy-Free Version
Use a high-quality dairy-free cream cheese and plant-based butter. The texture will be a little softer and less dense than the original, but the pumpkin spice flavor still comes through clearly if you chill the bars fully before serving.
Storage and Reheating
- Refrigerator: Store in an airtight container for up to 5 days. The crust stays best in the first 2 to 3 days, but the bars remain sliceable after that.
- Freezer: These freeze well. Wrap individual bars tightly and freeze for up to 2 months, then thaw in the refrigerator overnight.
- Reheating: These are meant to be served chilled or cool. Don’t microwave them; heat softens the cheesecake layer and ruins the clean slice.
Answers to the Questions Worth Asking
Pumpkin Cheesecake Bars
Ingredients
Equipment
Method
- Preheat the oven to 325F and line a 9x13 pan with parchment.
- Press the gingersnap crumbs, sugar, and melted butter firmly into the pan.
- Bake the crust for 8 minutes, then remove to cool slightly.
- Beat the cream cheese and granulated sugar until smooth.
- Add the eggs, sour cream, and vanilla, then beat until well combined.
- Remove 1-1/2 cups of the cream cheese mixture and whisk in pumpkin puree, brown sugar, pumpkin pie spice, and cinnamon.
- Pour the plain cheesecake mixture over the crust, then dollop the pumpkin mixture on top.
- Swirl the layers with a knife, creating a marbled surface.
- Bake at 325F for 35 to 38 minutes, until the center is just set.
- Cool completely, then refrigerate for 3 hours.
- Cut into bars and serve chilled.