Golden chicken thighs with a sticky balsamic glaze and burst tomatoes are the kind of skillet dinner that disappears fast because the pan does half the work and the sauce tastes like it took far longer than 25 minutes. The skin stays crisp, the sauce turns glossy and tangy-sweet, and the tomatoes soften just enough to fall apart into the pan juices without turning to mush.
The trick here is starting with bone-in, skin-on thighs and giving them enough time in the skillet to render and brown properly before anything goes into the sauce. That first sear builds the deep savory base the balsamic needs, and the garlic goes in whole so it turns sweet and mellow instead of bitter. Honey rounds out the vinegar, while the broth keeps the glaze from tightening too fast.
Below, I’m walking through the part that matters most: how to keep the chicken skin crisp while the sauce reduces around it, plus the small adjustments that make this work if you want to swap ingredients or cook ahead.
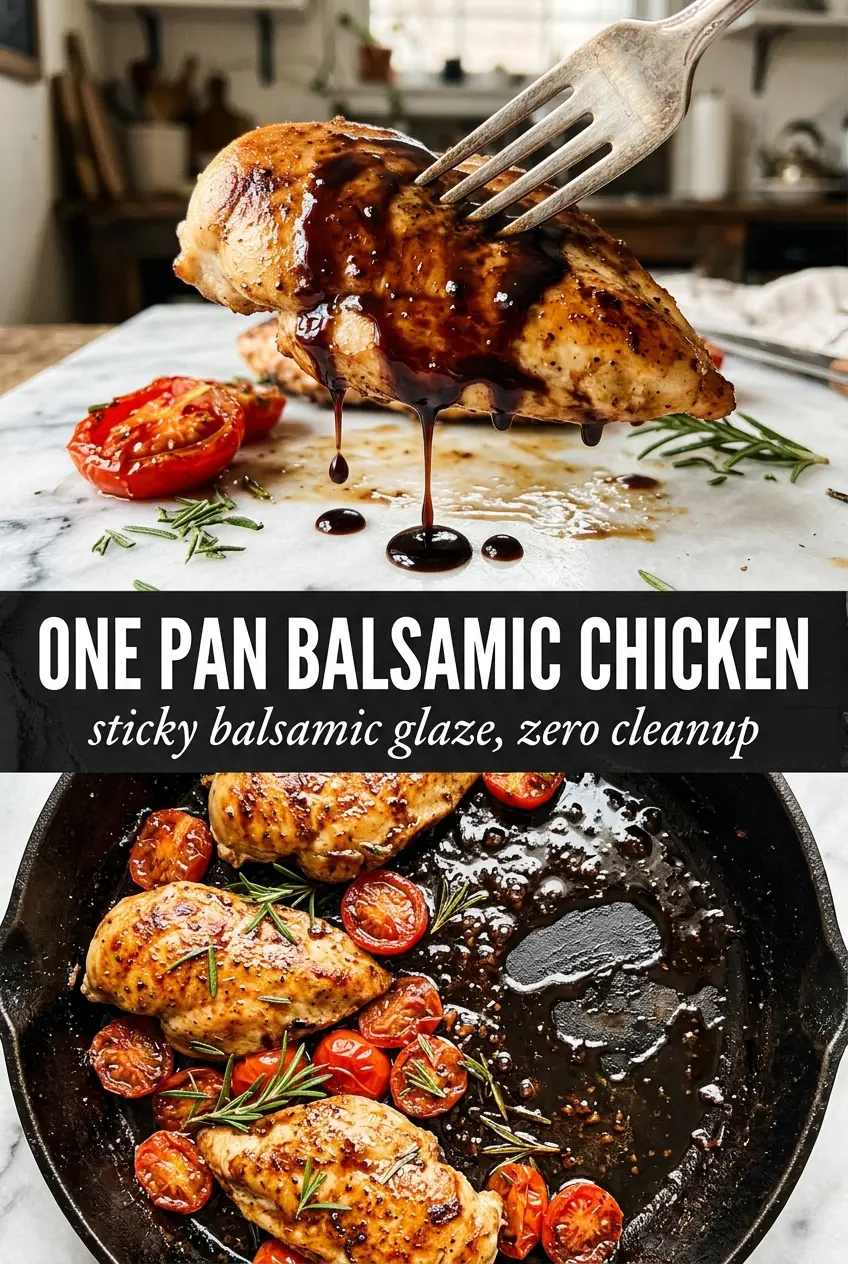
The sauce reduced into a thick glaze and the chicken skin stayed crispy even after it went back into the pan. I served it with rice and the tomatoes basically melted into the sauce.
Save this one pan balsamic chicken for the nights when you want crispy chicken thighs and a glossy balsamic glaze in the same skillet.
The Crisp Skin Has to Happen Before the Glaze Goes In
With skillet chicken, the biggest mistake is rushing the first sear. If the thighs go into the sauce before the skin has fully browned, the skin softens and never really comes back. That’s why the chicken gets seared skin-side down first and left alone until it releases cleanly from the pan and turns deeply golden.
The other thing that matters is heat control once the balsamic mixture goes in. Balsamic vinegar, honey, and broth need a boil at first so they start reducing, but once the chicken returns to the pan, the heat should settle to medium so the sauce thickens without burning the honey or turning bitter. The goal is a glossy glaze that clings, not a sticky syrup that starts catching on the bottom.
What the Garlic, Broth, and Honey Are Doing in This Pan

- Bone-in, skin-on chicken thighs — These stay juicy while the skin renders into something crisp and substantial. Boneless thighs will work in a pinch, but they cook faster and you lose that rich, crackly top that makes this dish feel finished.
- Balsamic vinegar — This is the backbone of the sauce, so use a balsamic you actually like the taste of. A cheaper bottle is fine here because it’s being cooked down with honey and broth, but avoid anything harsh and thin tasting.
- Honey — It smooths out the sharp edges of the vinegar and helps the sauce glaze instead of just tasting acidic. Maple syrup can stand in, but it brings a different sweetness and a slightly woodsy finish.
- Chicken broth — This keeps the pan sauce from reducing too fast and adds savory depth. Water technically loosens the sauce, but it won’t give you the same roundness or help the glaze taste complete.
- Whole garlic cloves — Leaving them whole keeps them soft and sweet instead of scorching in the hot pan. If you mince them, they’ll brown too quickly and can turn bitter before the tomatoes are done.
- Butter — Stirred in at the end, it gives the glaze shine and a little body. Don’t add it early; butter in a hard boil can separate, and you want that final silky finish right before serving.
- Cherry tomatoes — They break down just enough to add brightness and juiciness around the chicken. Grape tomatoes work too, but choose ones that are small and ripe so they blister instead of staying hard.
Building the Glaze Without Burning the Bottom of the Skillet
Seasoning the Chicken Properly
Season both sides of the thighs generously with salt, pepper, garlic powder, and Italian seasoning before they ever hit the pan. Chicken thighs can handle more seasoning than people think, and the surface salt helps the skin brown instead of steaming. If the chicken seems wet, pat it dry first; moisture is the enemy of a crisp sear.
Rendering the Skin
Heat the olive oil in a large cast iron skillet over medium-high heat, then place the thighs skin-side down and don’t move them. You want 7 to 8 minutes of quiet contact so the fat can render and the skin can deepen to a dark golden color. If the skin sticks at first, leave it alone a little longer; it usually releases once it has browned enough.
Blistering the Tomatoes and Softening the Garlic
After the chicken comes out, add the whole garlic cloves and cherry tomatoes to the hot skillet. Two minutes is enough to wake up the garlic and blister the tomato skins without collapsing them completely. If the garlic starts taking on too much color, the pan is too hot; pull it off the heat for a moment before adding the liquid.
Reducing the Sauce
Pour in the balsamic vinegar, honey, and chicken broth, then stir and scrape the browned bits from the bottom. Those bits are the backbone of the sauce, so don’t leave them behind. Bring it to a boil first so it starts reducing, then return the chicken skin-side up and cook until the sauce thickens enough to coat a spoon and the chicken reaches 165°F.
Finishing for Shine
Take the pan off the heat and stir in the butter until melted, then scatter fresh basil over the top. Butter at the end smooths out the glaze and gives it that restaurant-style finish without making it greasy. If you add the basil too early, it loses its bright color and fresh scent, so save it for the last minute.
How to Adapt This Skillet Chicken for What You Have
Gluten-Free Without Any Extra Work
This recipe is naturally gluten-free as written, which is one of the reasons it’s such a dependable weeknight dinner. Just check your chicken broth and seasoning blends to be sure they don’t include hidden wheat-based additives.
Using Boneless Chicken Thighs
Boneless thighs will cook faster, usually in about half the time once they’re back in the sauce. They’ll still be juicy, but you’ll lose the extra richness that comes from bone-in meat and the skin won’t crisp the same way, so this version is best if speed matters more than texture.
Swapping the Sweetener
Maple syrup can replace the honey in equal measure if that’s what you have on hand. The sauce will taste a little deeper and less cleanly sweet, which works nicely if you like a darker glaze, but keep the heat moderate so the sugars don’t scorch.
Storing the Leftovers
- Refrigerator: Store in an airtight container for up to 4 days. The skin softens as it sits, but the sauce stays flavorful.
- Freezer: This freezes well without the basil. Freeze the chicken and sauce together for up to 2 months, then thaw overnight in the refrigerator.
- Reheating: Warm gently in a covered skillet over low heat with a splash of broth. High heat will dry out the chicken and can cause the balsamic glaze to turn sticky and bitter.
Questions I Get Asked About This Recipe
One Pan Balsamic Chicken
Ingredients
Equipment
Method
- Season bone-in skin-on chicken thighs generously on both sides with salt, pepper, garlic powder, and Italian seasoning to ensure the flavor penetrates as it sears.
- Heat olive oil in a large cast iron skillet over medium-high heat, then sear the chicken skin-side down for 7-8 minutes until the skin is deeply golden and crispy; keep it steady without moving the thighs.
- Flip the chicken and sear for 3 more minutes, using the sizzling surface to develop more color before removing the thighs to a plate.
- Add whole garlic cloves and cherry tomatoes to the hot skillet and cook for 2 minutes until the tomatoes begin to blister.
- Pour in balsamic vinegar, honey, and chicken broth, stir, and bring to a boil while scraping up browned bits from the bottom for maximum flavor.
- Return the chicken skin-side up to the skillet and cook over medium heat for 12-15 minutes until the chicken reaches 165°F and the balsamic sauce reduces to a thick glaze.
- Stir in butter until melted, then scatter fresh basil over the top for a fresh finish and serve straight from the skillet while the glaze looks glossy.