Roasted bell pepper halves turn tender at the edges, stay just firm enough to hold their shape, and give you a built-in bowl for all the good stuff: seasoned beef, rice, black beans, salsa, and a thick layer of melted cheese. The best versions don’t taste like a pile of leftovers tucked into a pepper. They taste like a proper Tex-Mex dinner with enough contrast in texture to keep every bite interesting.
The part that makes these work is the first roast on the peppers themselves. That quick blast of heat softens the walls before they’re filled, so you don’t end up with crunchy pepper undercooked filling. The beef mixture also needs a little time in the pan after the salsa and corn go in; that’s when the filling tightens up and stops tasting loose or watery once it bakes.
Below, I’ve laid out the part that matters most: how to keep the peppers from turning soggy, how to make the filling hold together, and what to swap if you want to lean this toward lighter, spicier, or meatless.
The peppers softened perfectly without collapsing, and the filling held together instead of sliding out when I served them. My husband went back for a second half and kept talking about the cheesy top with the fresh tomato and cilantro.
Save these Mexican stuffed peppers for the nights when you want a cheesy Tex-Mex dinner with tender peppers and a filling that actually stays put.
The Step That Keeps the Peppers Tender Instead of Crunchy
The first roast is not optional here. Bell peppers hold a lot of water, and if you stuff them raw, the filling finishes before the pepper does. Pre-roasting cut-side down gives the skins a little head start on softening and lets some of that moisture cook off before the filling goes in.
The other mistake is overfilling a pepper that hasn’t been roasted yet and expecting it to cook evenly. Once the peppers come back out of the oven, they should be pliable enough to cradle the filling without buckling. That’s the line you’re looking for: tender, not limp.
What the Beef, Rice, and Beans Are Each Doing Here
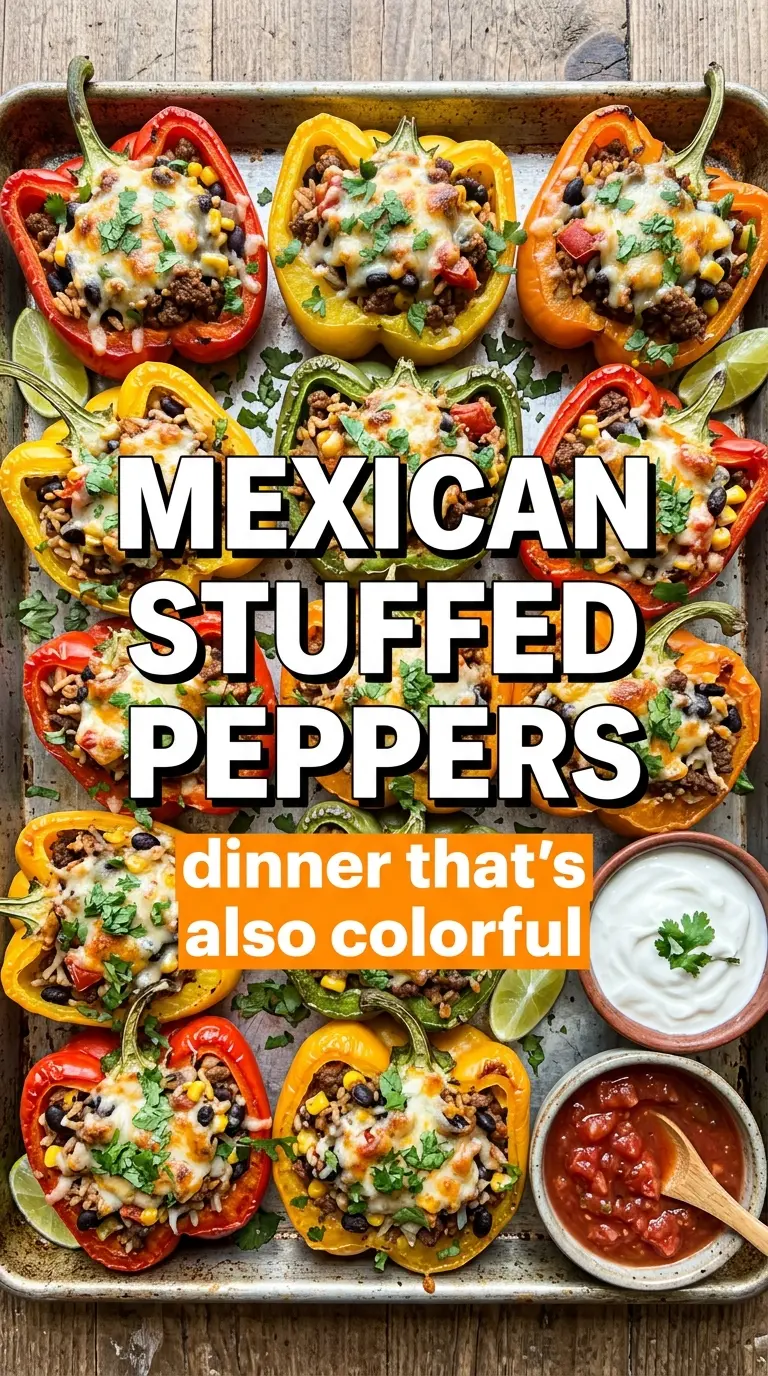
- Ground beef — This gives the filling its savory base and helps everything taste like a finished meal instead of a rice mixture. An 85/15 or 90/10 blend works well; if you go much leaner, the filling can taste dry unless you’re generous with the salsa.
- Cooked white rice — The rice soaks up the seasoned juices and keeps the filling from collapsing inside the peppers. Day-old rice works fine and often holds its shape better than freshly cooked rice.
- Black beans — These add body and make the filling feel hearty without needing more meat. Rinse them well so the filling doesn’t turn muddy or overly salty.
- Salsa — This is your moisture and your seasoning in one ingredient. Thick salsa is best because thin, watery salsa can pool in the pepper shells and make the bottom soggy.
- Mexican cheese blend — This melts into a stretchy, browned cap that seals in the filling. Pre-shredded is convenient, but a freshly shredded block melts more smoothly if you have the time.
Building the Filling So It Stays Hearty After Baking
Brown the Beef and Onion Together
Cook the onion with the beef so it softens in the fat and picks up that savory base flavor. You want the meat browned, not gray and steamed, because browning is what gives the filling depth. If there’s a lot of grease in the pan, drain it off before you add the garlic and seasoning or the filling can taste heavy.
Let the Salsa and Corn Cook Down
Once the rice, beans, salsa, and corn go in, stir until the mixture looks thick and cohesive. The pan should smell cooked through, and you shouldn’t see a loose puddle of liquid at the bottom. If it looks soupy, keep it on the heat for another minute or two; that extra reduction is what keeps the peppers from leaking filling onto the pan.
Fill, Top, and Bake Until the Cheese Blisters
Spoon the filling in generously, mounding it slightly over the top because it settles a bit in the oven. Cover the surface with cheese all the way to the edges so it melts into the filling instead of falling off in clumps. Bake just until the cheese is melted and the peppers are hot through; if you leave them too long, the peppers lose their shape and the filling dries out.
Make Them Spicier Without Changing the Base Recipe
Add diced jalapeño to the skillet with the onion or stir chipotle powder into the taco seasoning. That gives the filling a deeper, smokier heat without changing the texture. The fresh toppings can stay the same, but the peppers will finish with a sharper kick.
Make It Dairy-Free
Skip the cheese or use a good dairy-free shred that melts well, then finish with avocado and cilantro instead of sour cream. You’ll lose the browned cheesy top, but the filling itself still carries the dish. This works best if your salsa has enough body to keep the peppers satisfying.
Turn Them Meatless
Swap the beef for an extra can of beans or a mix of black beans and crumbled cooked lentils. The filling will be a little softer and earthier, which works well with the salsa and cheese. If you go this route, reduce the salsa slightly so the mixture doesn’t get loose.
Storage and Reheating
- Refrigerator: Store leftovers in an airtight container for up to 4 days. The peppers soften a bit more after chilling, but the flavor holds up well.
- Freezer: These freeze well, especially if you freeze them before adding the fresh toppings. Wrap each pepper half tightly and freeze for up to 2 months.
- Reheating: Reheat covered in a 350°F oven until hot in the center, or microwave in short bursts. The common mistake is blasting them uncovered, which dries out the filling before the middle warms through.
Answers to the Questions Worth Asking
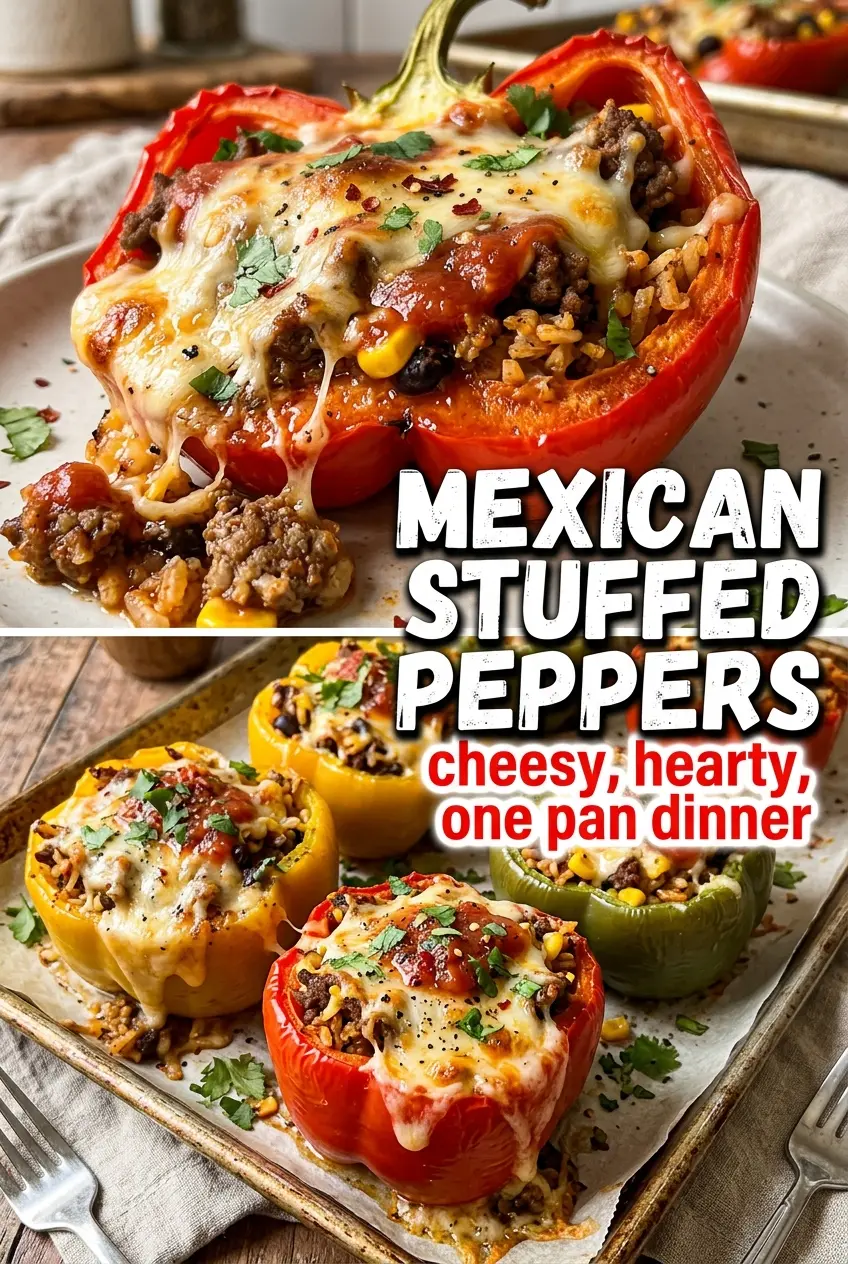
Mexican Stuffed Peppers
Ingredients
Equipment
Method
- Preheat oven to 400°F, then place the pepper halves cut-side down in a baking dish with 1/4 cup water. Roast for 15 minutes with a slight softened look, then flip cut-side up.
- Continue roasting until the peppers are ready to receive the filling and hold their shape. Keep an eye on the edges so they stay slightly tender rather than fully collapsing.
- Brown ground beef and diced onion in a skillet over medium-high heat until the beef is no longer pink. Drain the fat from the skillet to keep the filling from getting greasy.
- Stir in minced garlic and taco seasoning for about 30-60 seconds until fragrant. Add cooked white rice, black beans, salsa, and frozen corn, then cook for 3-4 minutes until hot and cohesive.
- Taste and ensure the filling is well seasoned, with visible beans and corn throughout. Turn off the heat once everything is warmed through and lightly thickened.
- Spoon the beef-and-rice mixture generously into each pepper half, filling them to the top. Use the spoon to press the filling in so it stays mounded during baking.
- Top each pepper with shredded Mexican cheese blend in an even layer. Make sure the cheese covers the filling so it melts and browns on top.
- Bake for 15-18 minutes at 400°F until the cheese is melted and bubbling. Look for a lightly browned, blistered surface.
- Top with sour cream, diced tomatoes, cilantro, and jalapeño just before serving. Serve right away so the toppings stay fresh and bright.