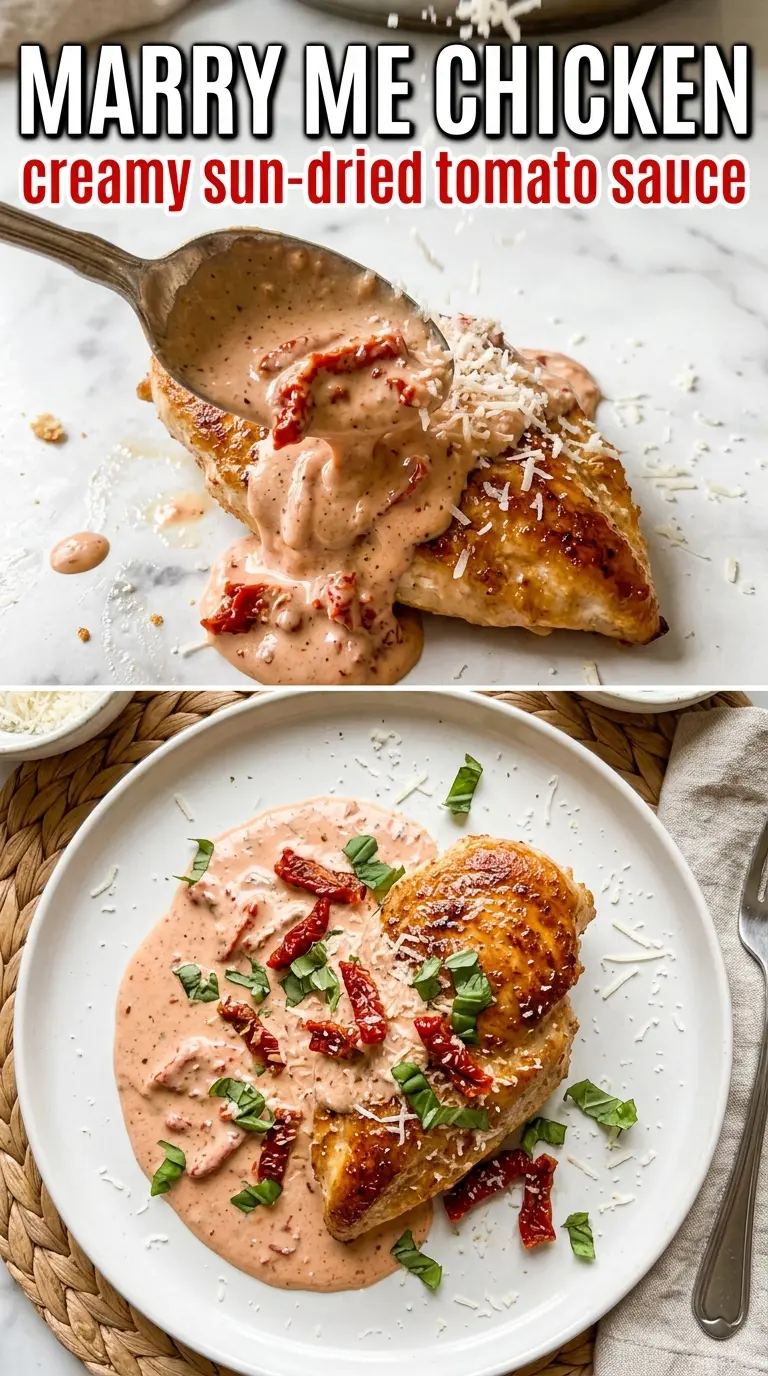
Golden seared chicken breasts tucked into a sun-dried tomato cream sauce earn their reputation fast. The sauce turns glossy and clingy, the chicken stays juicy, and the whole skillet smells like garlic, Parmesan, and basil the second it hits the table. It’s the kind of dinner that looks like you worked much harder than you did.
What makes this version work is the order. The chicken gets a hard sear first, which builds the browned bits that flavor the sauce, and the garlic only cooks long enough to turn fragrant so it doesn’t go bitter. The cream goes in after the broth has loosened the pan, then the Parmesan melts in over a gentle simmer so the sauce stays smooth instead of grainy.
Below you’ll find the little details that matter: how to keep the chicken from drying out, why the sauce thickens the way it does, and what to change if you want a lighter skillet dinner or a dairy-free version that still feels rich.
The sauce thickened up beautifully and coated the chicken instead of running all over the plate. I used a cast iron skillet like suggested, and those browned bits made the whole dish taste restaurant-level.
Save this Marry Me Chicken for the nights when you want a creamy sun-dried tomato sauce and golden chicken in one skillet.
The Difference Between a Silk-Smooth Sauce and a Broken One
Marry Me Chicken only has a few moving parts, which means every one of them matters. The most common mistake is cranking the heat too high once the cream goes in. Cream doesn’t like a rolling boil, and Parmesan gets grainy fast if it’s rushed. Keep the simmer low and steady, and the sauce will thicken because of reduction and emulsification, not because it was bullied on the stove.
The other place people run into trouble is the chicken itself. If the breasts are uneven, the thin ends dry out before the thick center is done. Pounding them lightly to an even thickness helps them sear at the same pace, which means you get a browned outside and a juicy middle without overcooking one side of the pan.
- The sear is doing more than adding color. It leaves flavor in the pan that becomes the backbone of the sauce.
- Sun-dried tomatoes bring concentrated sweetness and tang, which keeps the cream from tasting flat.
- Parmesan thickens and seasons at the same time, but it needs low heat to melt smoothly.
- Chicken broth gives the sauce enough looseness to deglaze the pan before the cream goes in.
What Each Ingredient Is Actually Doing in This Skillet
- Boneless skinless chicken breasts — These give you the classic look and quick cook time. If yours are very thick, slice them in half horizontally or pound them so they cook evenly before the sauce reduces too far.
- Sun-dried tomatoes in oil — This is the ingredient you don’t want to swap casually. The oil-packed kind has a richer texture and deeper flavor than dry-packed tomatoes, and that little bit of oil clinging to them helps carry the sauce.
- Heavy cream — Half-and-half won’t hold the sauce the same way. Heavy cream gives you the body that lets the sauce coat the chicken instead of pooling thinly under it.
- Parmesan cheese — Freshly grated Parmesan melts far better than the shelf-stable stuff in a shaker. If all you have is pre-grated, it’ll work in a pinch, but the sauce won’t turn as silky.
- Chicken broth — This loosens the browned bits on the bottom of the pan and keeps the sauce from becoming too heavy. Use low-sodium broth if you want control over the seasoning, since Parmesan already brings salt.
- Fresh basil — Don’t skip the garnish. Basil lifts the whole dish at the end and keeps the cream sauce from tasting one-note.
Building the Sauce After the Chicken Comes Out
Getting the Sear First
Season the chicken generously, then get it into a hot skillet with the olive oil. You’re looking for a deep golden crust that releases cleanly from the pan, not pale chicken that’s been steamed by a pan that wasn’t hot enough. If the chicken sticks when you try to flip it, leave it alone for another minute; it usually means the crust isn’t set yet. Pull the chicken when it reaches 165°F, then set it aside while you build the sauce.
Softening the Garlic and Tomatoes
Use the same skillet and don’t wipe it out. Those browned bits are the best part of the dish. Add the garlic and sun-dried tomatoes and stir for about a minute, just until the garlic smells sweet and the tomatoes look glossy. If the garlic starts to brown, lower the heat right away, because burnt garlic will carry a harsh note through the whole sauce.
Reducing the Creamy Base
Pour in the broth and scrape the bottom of the pan until the dark bits dissolve into the liquid. That’s where the flavor is hiding. Stir in the cream, Parmesan, Italian seasoning, and red pepper flakes, then let the sauce simmer gently until it coats the back of a spoon. If it looks thin at first, keep going; it tightens as the water cooks off. If it starts to bubble aggressively, lower the heat so the cream stays smooth.
Finishing the Chicken in the Sauce
Slide the chicken back into the pan and spoon the sauce over the top. Let it simmer for a couple of minutes so the chicken picks up the flavor again and the sauce clings to every piece. This final simmer is short on purpose; the chicken is already cooked, and leaving it in too long will dry it out. Finish with basil right before serving so the herb stays bright against the rich sauce.
How to Adapt This Skillet When You Need a Different Finish
Dairy-Free Version
Use full-fat canned coconut milk instead of heavy cream and swap in a dairy-free Parmesan-style cheese if you have one that melts well. The sauce will taste a little less sharp and a touch more mellow, but the sun-dried tomatoes and garlic still carry the dish. Keep the heat low so the coconut milk doesn’t separate.
Gluten-Free Serving
The skillet itself is naturally gluten-free as written, so this one is mostly about what you serve with it. Spoon the chicken and sauce over mashed potatoes, rice, or gluten-free pasta. The sauce is rich enough that you won’t miss the bread basket.
Chicken Thigh Swap
Boneless skinless thighs work well if you want a juicier cut with a little more richness. They usually need a few extra minutes in the pan, but they’re more forgiving than breasts and stay tender even if you take them a little past perfect.
Storage and Reheating
- Refrigerator: Store leftovers in an airtight container for up to 3 days. The sauce will thicken as it chills.
- Freezer: It freezes, but the cream sauce can separate a bit when thawed. For the best texture, freeze the chicken and sauce for up to 1 month and rewarm gently.
- Reheating: Warm it slowly in a covered skillet over low heat with a splash of broth or cream. High heat is what makes the sauce break and the chicken toughen.
Questions I Get Asked About This Recipe

Marry Me Chicken
Ingredients
Equipment
Method
- Season chicken breasts generously on both sides with salt, pepper, garlic powder, Italian seasoning, and smoked paprika, covering the surfaces evenly.
- Heat the olive oil in a large cast iron skillet over medium-high heat until shimmering, then sear chicken for 5-6 minutes per side until golden with an internal temperature of 165°F.
- Remove the chicken to a plate while you make the sauce in the same skillet.
- Cook garlic and sun-dried tomatoes in the same pan for 1 minute, scraping any browned bits as they form a fragrant base.
- Pour in the chicken broth and deglaze, stirring to lift the fond from the pan until the liquid looks cohesive.
- Stir in heavy cream, Parmesan, dried Italian seasoning, and red pepper flakes, then simmer 4-5 minutes until the sauce thickens to a spoon-coating consistency with visible bubbling at the edges.
- Return the chicken to the pan and spoon the sauce over each breast, then simmer 2 minutes until the chicken is heated through and the sauce clings to it.
- Garnish with fresh basil and serve over pasta or mashed potatoes, letting the glossy sauce pool around the chicken.