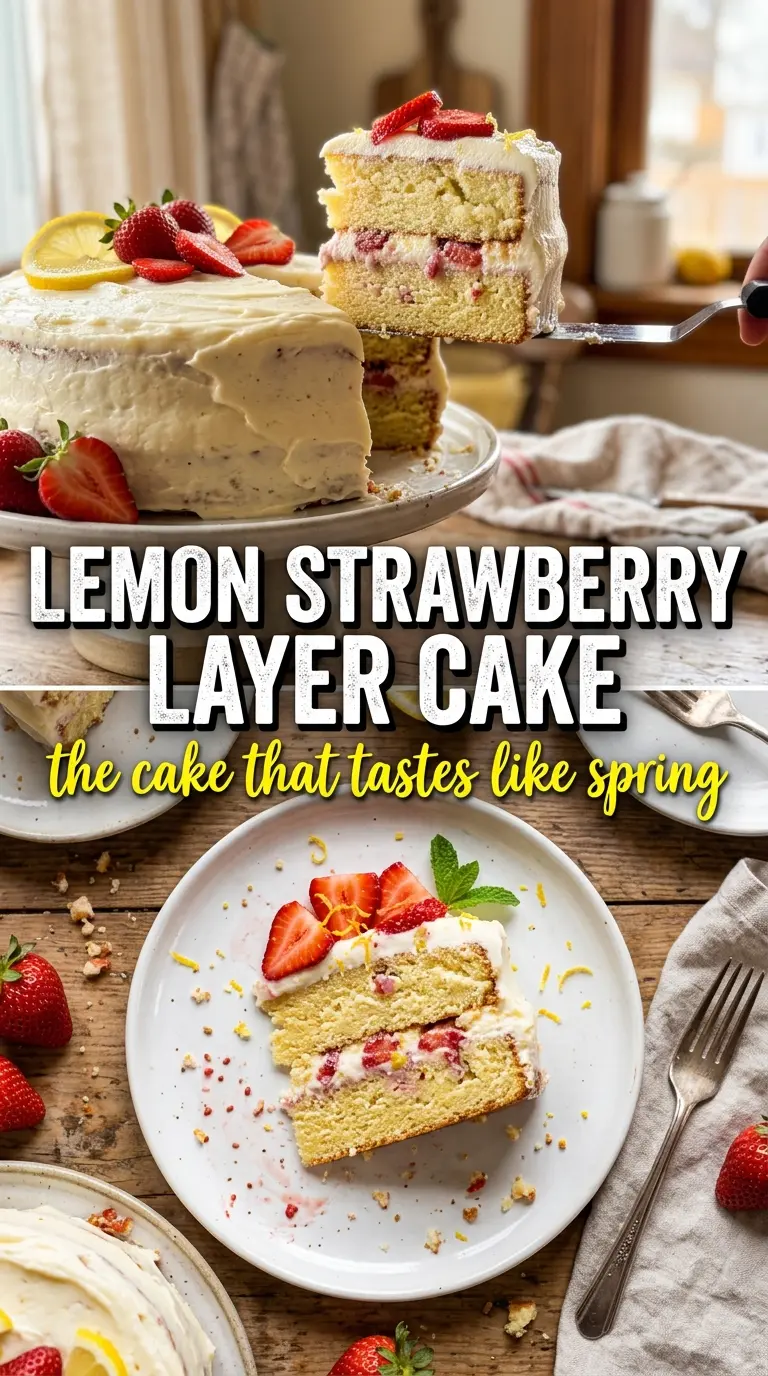
Lemon strawberry cake lands with the kind of bright, soft crumb that keeps people sneaking one more slice from the fridge. The cake layers stay tender and fragrant with lemon, while the strawberry-lemon cream cheese frosting brings enough tang to keep the whole dessert from tipping into sugar overload. Fresh strawberry slices tucked between the layers add little bursts of juiciness that make every bite feel built, not just frosted.
What makes this version work is balance. Lemon zest goes into the batter for a deeper citrus note than juice alone can give, and buttermilk keeps the crumb fine and moist without making it heavy. The frosting uses freeze-dried strawberry powder instead of fresh berries, which gives a stronger strawberry flavor and a stable pink color without thinning out the cream cheese base.
Below you’ll find the small details that matter most here: how to keep the layers even, when to stop beating the frosting, and how to use fresh strawberries without making the cake slippery. Those are the places where this recipe goes from pretty good to the kind of cake people ask for again.
The frosting held its shape beautifully and the lemon zest in the cake came through without tasting sharp. I also loved that the fresh strawberry slices in the middle didn’t make the layers slide around.
Love the tall layers and strawberry-lemon frosting on this cake? Save it to Pinterest for birthdays, showers, or any day that needs a bright homemade centerpiece.
The Part That Keeps Lemon Cake From Tasting Flat
The biggest mistake in a lemon layer cake is leaning on juice alone and hoping it reads as bright. Juice adds acidity, but zest carries the oils that taste like actual lemon cake, not just lemon frosting. Here, the zest goes into the butter-sugar mixture early, where the friction helps release those oils and spread them through the batter.
Butter and sugar need to beat until the mixture looks pale and fluffy, because that step traps air and gives the cake its lighter crumb. If the batter ever looks curdled after the eggs go in, keep going. That usually means the ingredients were a little cooler than ideal, not that the batter is ruined. The final batter should look smooth and thick, then loosen just enough once the buttermilk goes in.
- Fresh lemon zest — This is where most of the lemon flavor lives. Use a fine grater and only take the yellow part; the white pith turns bitter fast.
- Buttermilk — It keeps the crumb soft and gives the cake a gentle tang. Whole milk works in a pinch, but the cake loses some tenderness.
- Freeze-dried strawberry powder — This gives the frosting its strawberry flavor without watering it down. Fresh strawberry puree sounds tempting, but it makes cream cheese frosting loose and harder to spread.
- Cream cheese — Use full-fat block cream cheese, not the spreadable tub kind. The tub version is too soft and often throws off the frosting texture.
What Each Ingredient Is Actually Doing in This Recipe
- Primary ingredient (the star) — Quality matters most. Choose the best you can find.
- Cooking medium (oil, butter, or broth) — This carries flavors and prevents dryness.
- Seasonings (salt, pepper, spices, herbs) — Layer flavors so nothing overpowers. Build depth gradually.
- Aromatics (garlic, onion, herbs) — Cook with fat to bloom flavors. Become the foundation.
- Supporting ingredients — Complement the main ingredient without overpowering it.
- Sauce or liquid (if applicable) — Brings flavors together. Balance richness with acid.
- Acid (lemon, vinegar, wine, or other) — Brightens and prevents flat-tasting results.
- Final finish (garnish, glaze, or sauce) — Prevents one-dimensional taste and adds visual appeal.
Building the Layers So They Stay Clean and Tall
Mix the Batter Just Until It Comes Together
Start by creaming the butter and sugar until the mixture looks fluffy and lighter in color. Add the eggs one at a time so the batter can absorb them without breaking. Once the flour and buttermilk start going in, switch to a gentler hand and stop as soon as the streaks disappear. Overmixing here builds gluten and gives you a tougher cake with domed, dry edges.
Watch the Pans, Not the Clock Alone
Divide the batter evenly between two greased 9-inch pans and smooth the tops so they bake at the same rate. The cakes are done when the centers spring back lightly and a tester comes out with a few moist crumbs, not wet batter. If the edges pull away and the middle still looks shiny, give them a few more minutes. Pulling them too early leads to a gummy center that collapses as it cools.
Cool Completely Before the Frosting Goes On
This cake needs a full cool-down before assembly. Warm layers melt the cream cheese frosting and make the fresh strawberries slide around inside the cake. If you’re short on time, pop the layers in the fridge for a bit after they reach room temperature. Even slightly warm cake will soften the frosting enough to turn the sides messy.
Beat the Frosting Only Until It Turns Smooth and Spreadable
Beat the cream cheese and butter first until there are no lumps, then add the powdered sugar, strawberry powder, lemon juice, and zest. Stop once the frosting looks fluffy and holds soft peaks. If you beat it too long, cream cheese frosting can loosen and look glossy instead of creamy. The texture should spread easily but still cling to the spatula.
How to Adapt This Cake Without Losing the Bright, Fresh Finish
Gluten-Free Version
Swap the all-purpose flour for a good 1:1 gluten-free baking blend that includes xanthan gum. The cake will still be soft, though it may be a touch more delicate when slicing, so let it cool fully before assembling.
Dairy-Free Changes
Use plant-based butter and a dairy-free cream cheese made for frosting, not soft tub spreads. The cake layer itself still bakes up well with a neutral non-dairy milk plus a teaspoon of lemon juice in place of the buttermilk, but the frosting may be a little softer and should be chilled before serving.
Make It Ahead for a Party
Bake the cake layers a day ahead, wrap them once cool, and frost the next day. You can also make the frosting ahead and chill it, then let it soften slightly at room temperature before beating it briefly to restore the texture.
If You Want a Stronger Strawberry Flavor
Add a little more freeze-dried strawberry powder, one teaspoon at a time, until the frosting tastes like berries instead of just pink frosting. Don’t add fresh puree unless you’re ready to adjust the sugar and chill time, because the texture softens fast.
Storage and Reheating
- Refrigerator: Store covered for up to 4 days. The cake stays moist, and the frosting firms up a bit in the fridge.
- Freezer: Freeze the unfrosted cake layers tightly wrapped for up to 2 months. The finished frosted cake can be frozen in slices, but the fresh strawberry garnish won’t hold up well.
- Reheating: This cake is best served chilled or at cool room temperature, not warmed. Let refrigerated slices sit out for 20 to 30 minutes so the frosting softens and the lemon flavor comes forward.
Answers to the Questions Worth Asking
Lemon Strawberry Cake
Ingredients
Equipment
Method
- Preheat the oven to 350°F, then grease two 9-inch round pans and prepare for batter. Make sure the pans are greased evenly so the layers release cleanly.
- Beat the butter and granulated sugar until fluffy, scraping the bowl as needed for even aeration. Stop when the mixture looks lighter in color and thicker in texture.
- Add the eggs, lemon zest, fresh lemon juice, and vanilla extract, then beat until smooth. Look for a glossy batter with no visible streaks.
- Add the flour mixture and buttermilk alternately, mixing just until incorporated after each addition. Keep the texture tender—stop once the batter is uniform.
- Divide the batter between the two pans, then bake at 350°F for 32-35 minutes. The cakes are done when the tops are golden and a toothpick in the center comes out clean.
- Cool the cakes completely in the pans before assembling. Cool fully for about 1 hour so the frosting won’t melt or slide.
- Beat the cream cheese and butter until smooth, with no lumps remaining. Scrape the bowl so the frosting stays uniform.
- Add powdered sugar, freeze-dried strawberry powder, fresh lemon juice, and lemon zest, then beat until fluffy and pink. Mix until the frosting holds its shape when lifted.
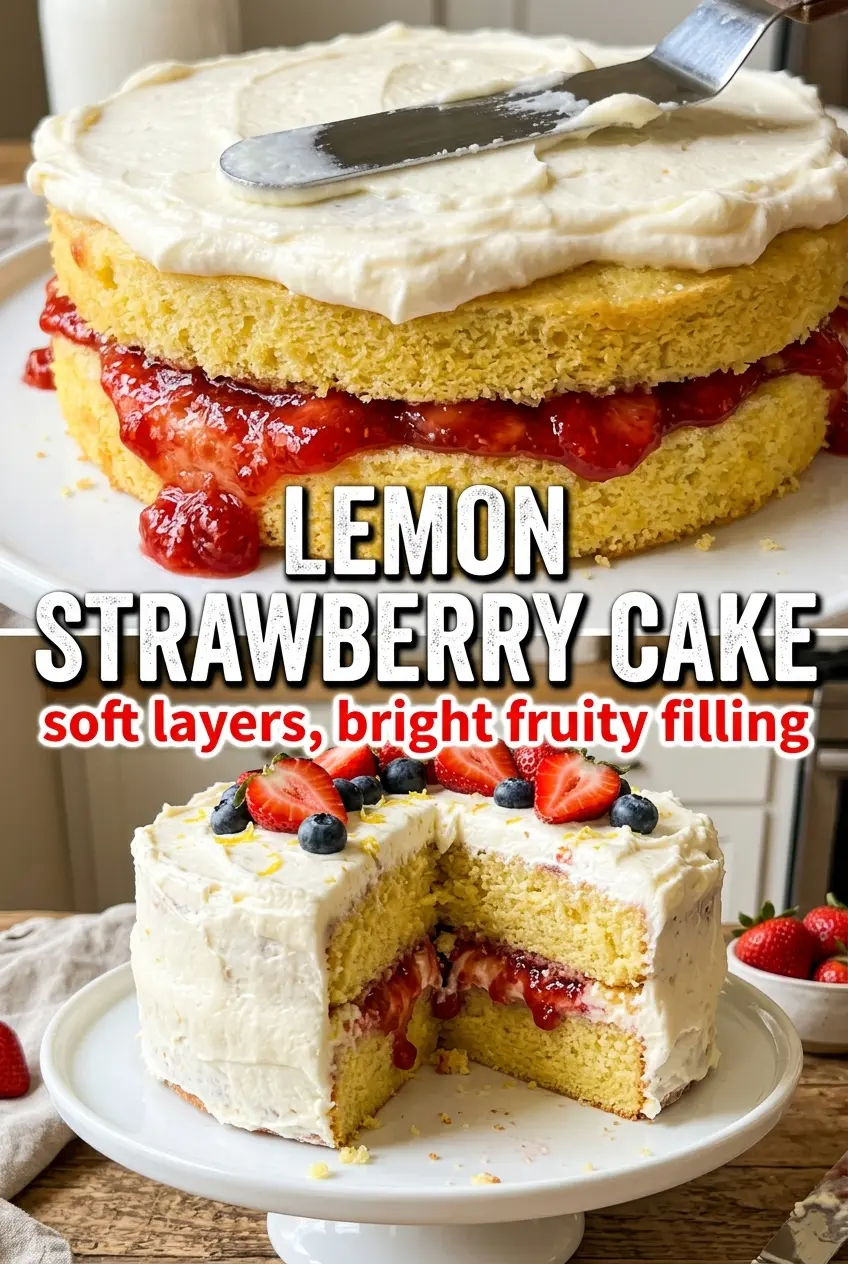
- Place one cooled cake layer on a serving plate and fill it with frosting and fresh strawberry slices. Add enough frosting to form an even strawberry layer throughout.
- Frost the outside of the cake generously with the pink frosting. Spread and swirl the frosting so the sides are coated and the top looks dramatic.
- Arrange fresh strawberries and lemon slices decoratively on top. Use the garnish to mirror the layer colors and create a vibrant finish.