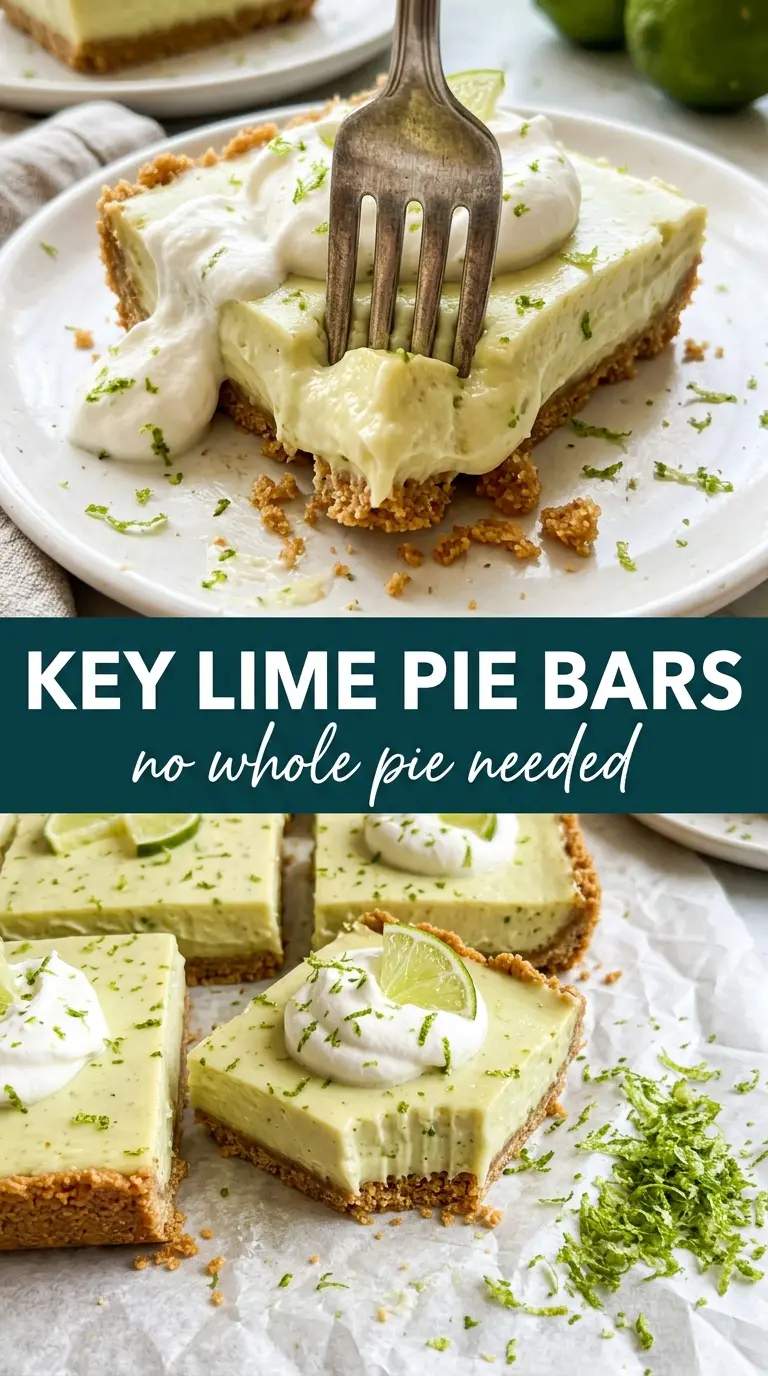
Key lime pie bars hit that sweet spot between tangy and creamy, with a crumbly graham cracker base that holds up under a silky citrus filling. The best version has a clean slice, a bright lime bite, and just enough sweetness to keep every square balanced instead of sharp.
What makes these work is the contrast: a firmly packed crust that bakes long enough to set, and a filling that uses egg yolks plus sweetened condensed milk to turn thick and smooth in the oven. Fresh key lime juice brings the sharpness, but regular lime juice works well when that’s what you have on hand. A little zest goes a long way here because it lifts the whole pan without making the bars taste bitter.
Below, I’ve included the small details that matter most for bars that slice cleanly, plus a few smart swaps if you need to adjust for what’s in your kitchen.
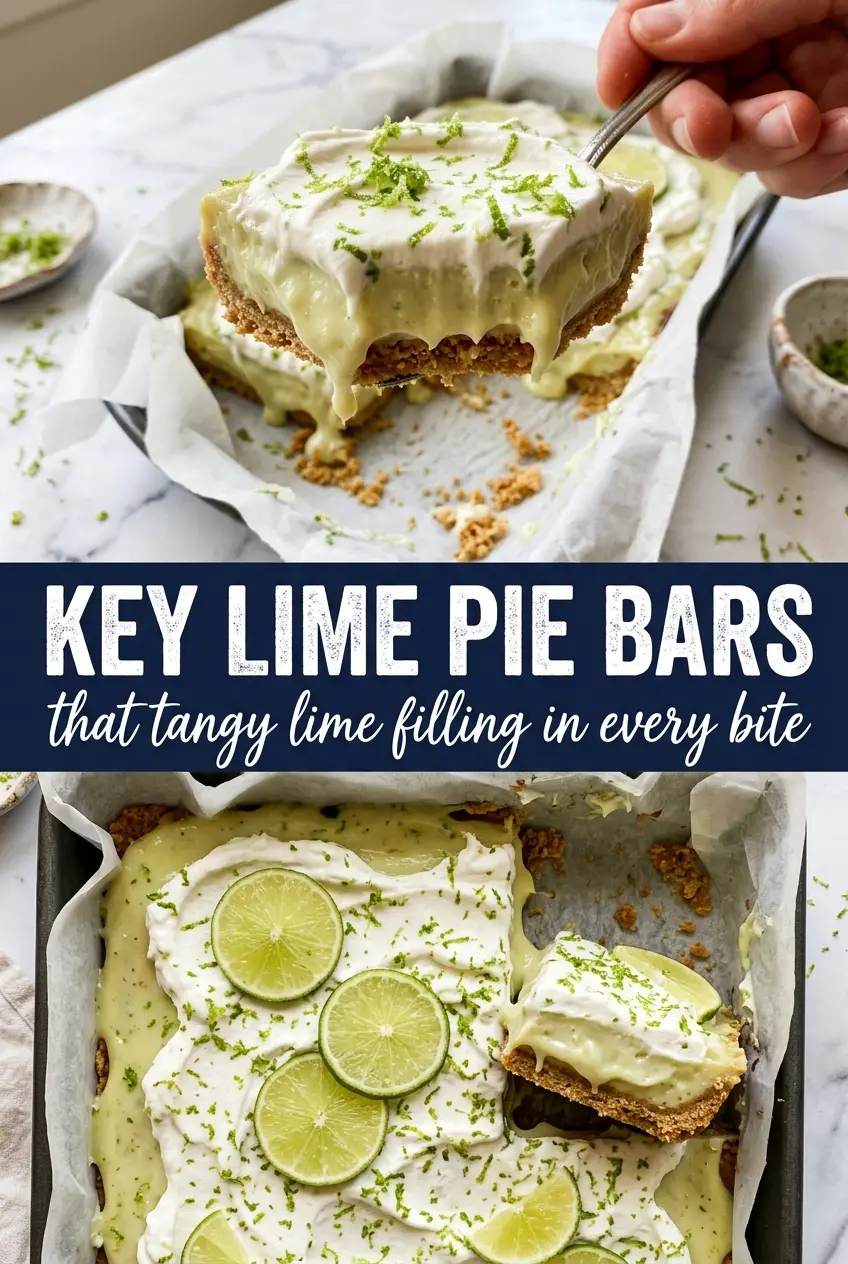
The filling set up smooth and neat, and the bars cut into clean squares after chilling overnight. That graham crust stayed crisp even under the creamy lime layer, which is exactly what I was hoping for.
Save these key lime pie bars for the chill-and-slice dessert bars that stay creamy, tangy, and crisp at the edges.
The Reason Key Lime Bars Set Cleanly Instead of Going Soupy
The filling in bars like this can go wrong in two places: the crust can slump, or the custard can stay loose after baking. The answer is a crust that gets pressed in firmly and baked before the filling goes on, plus a filling that only needs to set, not brown. If you chase color on top, you’ll overbake the center before it firms up.
That slight jiggle in the middle is the cue you want. It should look set around the edges and just barely move in the center when you nudge the pan. The carryover heat finishes the job as the bars cool, and the long chill in the fridge is what gives you those neat, bakery-style squares.
What the Crust and Filling Are Each Doing Here
- Graham cracker crumbs — These give the bars their classic pie flavor and a sandy, sturdy base that won’t fight the filling. Fine crumbs pack best; if yours are coarse, pulse them a little more so the crust cuts cleanly.
- Butter — Melted butter binds the crust and helps it bake into a firm layer instead of a loose crumb. Don’t cut it back here; too little fat leaves the crust dry and fragile.
- Sweetened condensed milk — This is the body of the filling. It thickens as it bakes and gives the bars their smooth, creamy texture without needing extra starch.
- Egg yolks — Yolks help the filling set with a custard-like finish. Whole eggs will make the texture firmer and less lush, so keep the yolks if you want that classic pie-bar feel.
- Key lime juice — This is where the sharp, bright flavor comes from. Fresh juice tastes best, but regular lime juice works well if key limes aren’t available; bottled juice can taste flat and sometimes a little metallic.
- Lime zest — Zest adds the aromatic top note that juice alone can’t give you. Use a microplane and only grate the green part; the white pith turns bitter fast.
Building the Custard So It Slices Instead of Slumps
Pressing and Prebaking the Base
Mix the crust until every crumb looks evenly moistened, then press it into the pan like you mean it. An even layer matters more than a thick one, and the bottom of a measuring cup helps compact the crumbs into a tight surface. Bake it until it smells toasty and the top looks set, not pale and sandy. If the crust isn’t pre-baked, the filling can soak in and leave you with a soft bottom layer.
Whisking the Filling Without Beating in Too Much Air
Whisk the yolks, condensed milk, juice, zest, and food coloring just until smooth. You don’t want a foamy mixture, because extra air can make the bars puff in the oven and settle unevenly as they cool. The filling should look thick, glossy, and uniform. If streaks of yolk remain, keep whisking; if bubbles cover the top, tap the bowl gently on the counter before pouring.
Baking Until Just Set
Pour the filling over the warm crust and bake until the edges are set and the center still has the faintest wobble. Pull the pan too late and the bars become rubbery instead of creamy. Pull it too early and the center won’t firm up in the fridge. The filling should look matte on top, with no liquid sheen in the middle when the pan comes out.
Chilling for a Clean Cut
Let the bars cool completely before they go into the refrigerator. Cutting warm bars is the fastest way to get smears and broken edges. Three hours is the minimum chill time, but longer is better if you want sharp squares. Dust with powdered sugar and add lime zest right before serving so the topping stays bright.
How to Adapt These Bars Without Losing the Tangy Center
Regular lime bars instead of key lime bars
Use regular lime juice in the same amount if key limes aren’t available. The bars will still be bright and tangy, just a little less floral and intense than the key lime version.
Gluten-free crust
Swap the graham crackers for gluten-free graham-style crumbs in the same amount. Keep the butter the same and pack the crust firmly, since GF crumbs can be a little more delicate once baked.
Dairy-free version
This one is harder to convert because sweetened condensed milk does the heavy lifting in the filling. A dairy-free condensed milk alternative can work, but the texture is usually a little softer and the flavor less rich, so chill it overnight before slicing.
Firmer bars for cleaner squares
If you want extra-neat edges, chill the bars overnight and cut them with a sharp knife wiped clean between slices. The flavor doesn’t change, but the texture firms up enough to make them easier to plate for a crowd.
Storage and Reheating
- Refrigerator: Store covered for up to 5 days. The crust softens a little after day two, but the bars still slice well.
- Freezer: These freeze well. Wrap individual bars tightly and freeze for up to 2 months, then thaw in the refrigerator so the filling doesn’t weep.
- Reheating: No reheating needed. Serve chilled; warming these bars will loosen the filling and ruin the clean, creamy texture.
Questions I Get Asked About This Recipe
Key Lime Pie Bars
Ingredients
Equipment
Method
- Preheat oven to 350°F. Mix graham cracker crumbs, granulated sugar, and melted butter, then press firmly into a parchment-lined 9x13 pan.
- Bake the crust for 8 minutes at 350°F. Cool slightly before adding the filling.
- Whisk egg yolks, sweetened condensed milk, key lime juice, lime zest, and a drop of green food coloring until smooth and combined.
- Pour the key lime filling over the warm crust and spread evenly across the surface.
- Bake for 18-20 minutes at 350°F until the filling is just set with a slight jiggle in the center.
- Cool completely at room temperature, then refrigerate at least 3 hours until firm.
- Dust the chilled bars with powdered sugar and scatter lime zest over the top.
- Cut into 16 bars and serve.