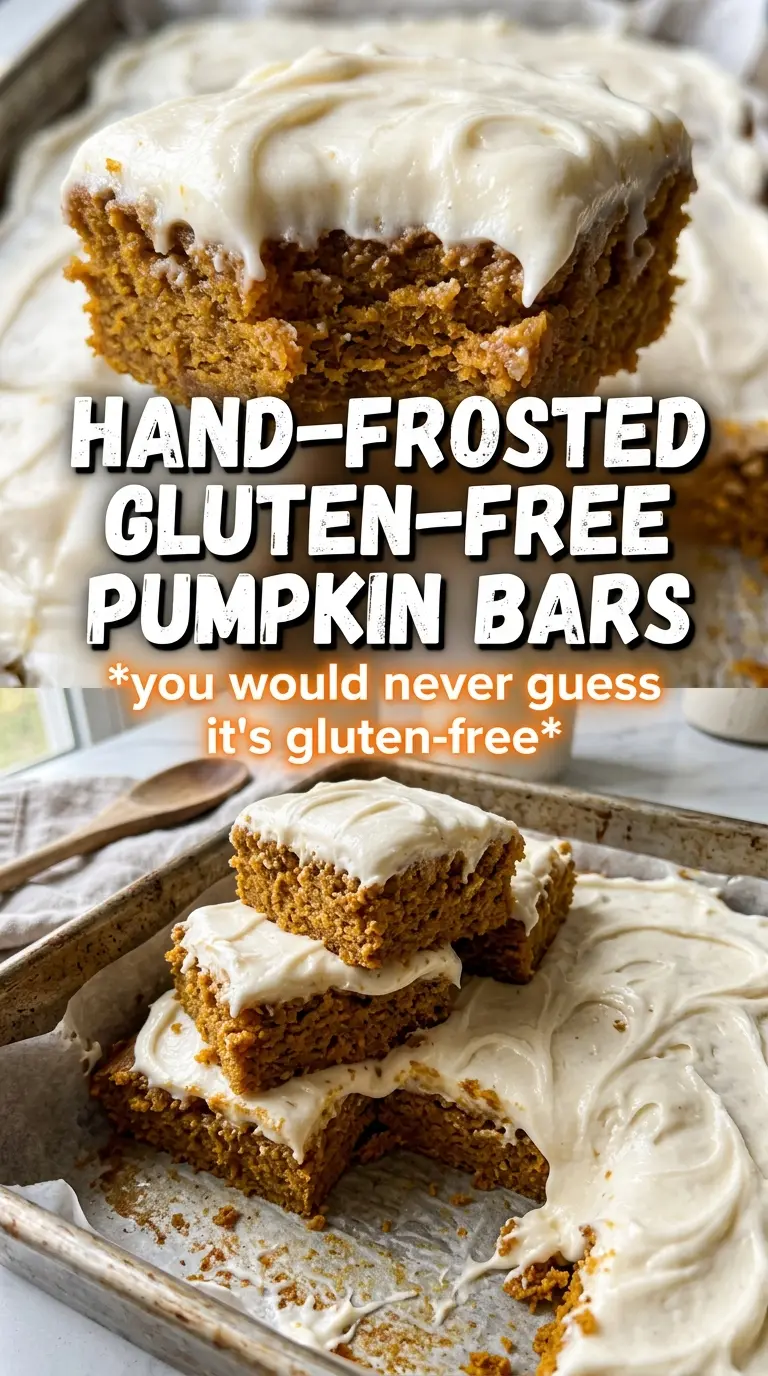
These gluten-free pumpkin bars bake up soft, plush, and deeply spiced, with a tender crumb that stays moist under a thick layer of cream cheese frosting. They slice cleanly, hold their shape, and taste every bit as rich and cozy as the classic version, which is exactly why they disappear so fast from a dessert tray.
The key is balancing a sturdy gluten-free flour blend with enough pumpkin puree and oil to keep the bars from turning dry or gritty. A little baking soda helps the batter rise against the acidity of the pumpkin, while the eggs give the bars their structure so they don’t collapse in the center. The frosting gets its flavor from more than just cream cheese; cinnamon and nutmeg give it that pumpkin-pie finish that makes the whole pan feel complete.
Below, I’ll walk you through the one step that keeps the bars tender instead of dense, plus the best way to frost and chill them so you get neat squares every time.
The bars baked up soft all the way through, and the frosting set just enough after chilling that I could cut perfect squares without the topping sliding around.
Save these gluten-free pumpkin bars with cream cheese frosting for the dessert table, bake sale tray, or any time you want a tender pumpkin square that tastes classic without the wheat.
The Trick to Keeping Gluten-Free Pumpkin Bars Tender, Not Gritty
The biggest mistake with gluten-free bars is overmixing once the flour goes in. Gluten-free flour blends don’t need the same development as wheat flour, and beating the batter too long can make the finished bars heavy instead of soft. Mix just until the flour disappears and the batter looks thick and smooth.
The other thing that matters here is the pan. A 15×10 rimmed baking sheet gives you bars that bake through without drying out at the edges. If you use a smaller pan, the center stays soft too long and the edges can overbake before the middle is set.
- Gluten-free all-purpose flour blend with xanthan gum — This gives the bars their structure. A blend without xanthan gum can work only if you add it separately, because the bars need something to hold the crumb together once they cool.
- Pumpkin puree — Use pure pumpkin, not pumpkin pie filling. The puree brings moisture and that dense pumpkin texture that makes the bars slice neatly instead of baking up like cake.
- Vegetable oil — Oil keeps these bars softer than butter would. Butter tastes great, but oil gives you that plush, moist crumb that stays tender in the fridge.
- Eggs — They’re doing the heavy lifting for structure here. Don’t reduce them; gluten-free bars need the eggs to keep the center from sinking after baking.
What Each Ingredient Is Actually Doing in This Recipe
- Primary ingredient (the star) — Quality matters most. Choose the best you can find.
- Cooking medium (oil, butter, or broth) — This carries flavors and prevents dryness.
- Seasonings (salt, pepper, spices, herbs) — Layer flavors so nothing overpowers. Build depth gradually.
- Aromatics (garlic, onion, herbs) — Cook with fat to bloom flavors. Become the foundation.
- Supporting ingredients — Complement the main ingredient without overpowering it.
- Sauce or liquid (if applicable) — Brings flavors together. Balance richness with acid.
- Acid (lemon, vinegar, wine, or other) — Brightens and prevents flat-tasting results.
- Final finish (garnish, glaze, or sauce) — Prevents one-dimensional taste and adds visual appeal.
Building the Batter and Frosting Them at the Right Moment
Whisking the Dry Ingredients
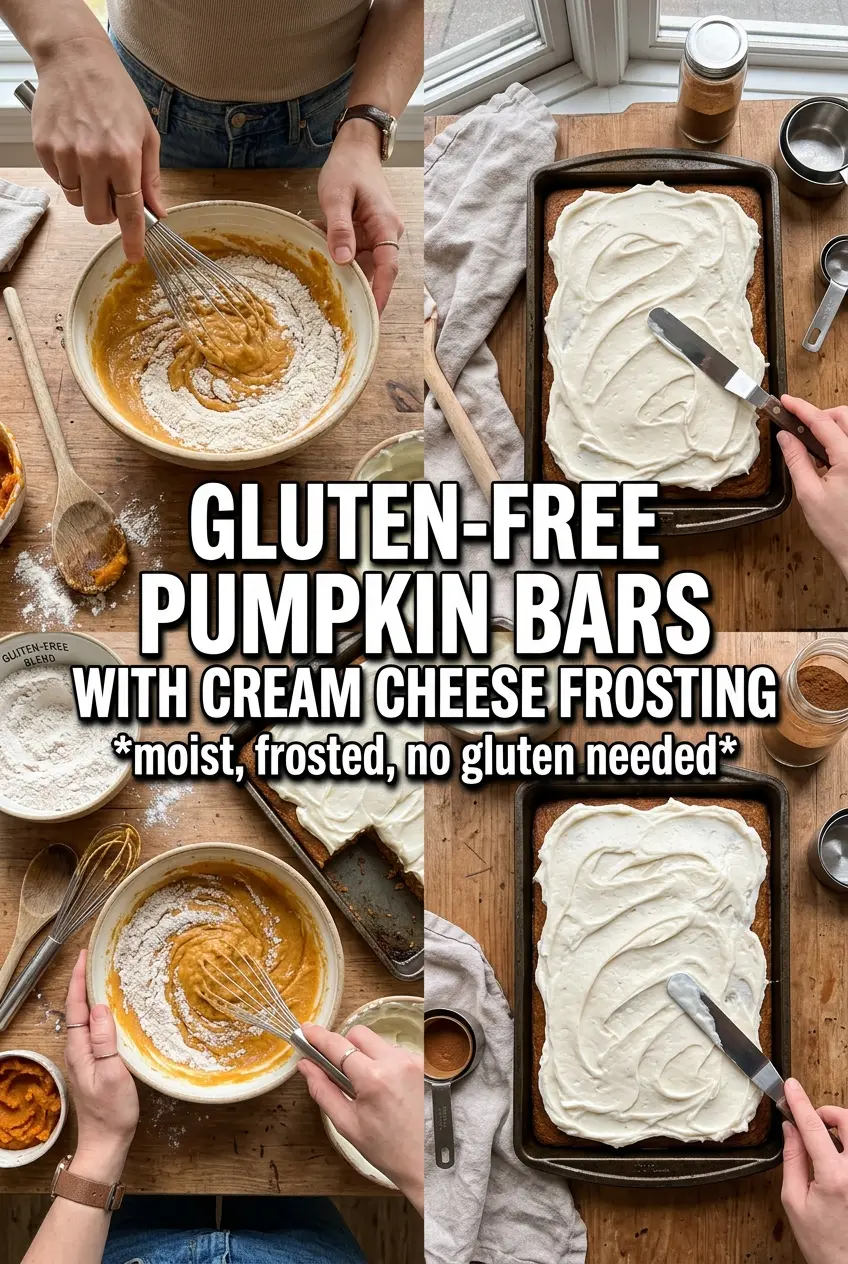
Start by whisking the flour blend, baking powder, baking soda, spices, and salt until the mixture looks evenly speckled. That quick whisk matters because cinnamon and pumpkin pie spice can clump, and uneven spice distribution shows up fast in a dessert like this. If you see little pockets of flour later in the batter, you didn’t mix the dry ingredients enough at the start.
Mixing the Pumpkin Base
Beat the eggs, sugar, oil, pumpkin puree, and vanilla until the mixture looks smooth and glossy. It should look loose and fully combined, with no streaks of egg white or separated oil around the bowl. Once the dry ingredients go in, switch to folding and stop as soon as the batter comes together; overbeating at this point can make the bars denser than you want.
Baking Until Just Set
Spread the batter evenly in the pan so the corners don’t bake thinner than the center. The bars are done when the top springs back lightly and a toothpick comes out clean or with a few moist crumbs, not wet batter. If you wait until the center looks completely dry, the bars will end up overbaked once they cool.
Making the Frosting and Finishing the Pan
Beat the cream cheese and butter until there are no lumps before adding the sugar. If either one is too cold, the frosting will fight you and turn grainy no matter how long you mix it. Spread it over fully cooled bars only; even a little warmth will soften the frosting and make cutting messy. A short chill in the refrigerator gives the frosting enough body to slice cleanly.
Dairy-Free Frosting Swaps
Use a dairy-free cream cheese and plant-based butter block, not tub margarine. The texture will be a little softer and less tangy, but the frosting still spreads well if you chill it before slicing.
Making Them a Little Less Sweet
You can cut the frosting sugar slightly, but don’t go too far or it won’t hold its shape. The bars themselves depend on the full sugar amount for a soft, balanced crumb, so adjust the topping first before changing the batter.
Turning Them Into Muffin-Tin Pumpkin Cakes
Line a muffin tin and fill each cup about two-thirds full for individual portions. They’ll bake faster than the sheet-pan version, so start checking early, and frost them only after they’ve cooled completely or the tops will slide.
Storage and Reheating
- Refrigerator: Store covered for up to 5 days. The frosting stays neat, and the bars actually slice even cleaner after a night in the fridge.
- Freezer: These freeze well. Freeze the cut bars on a tray first, then wrap them tightly and store in a container for up to 2 months. Thaw in the refrigerator so the frosting doesn’t weep.
- Reheating: These are best served chilled or at cool room temperature, not heated. If you warm them, the frosting softens and the bars lose their clean edges.
Questions I Get Asked About This Recipe
Gluten-Free Pumpkin Bars With Cream Cheese Frosting
Ingredients
Equipment
Method
- Preheat the oven to 350F and grease a 15x10 rimmed baking sheet. Set the pan aside so it’s ready for spreading batter.
- Whisk together gluten-free all-purpose flour blend (with xanthan gum), baking powder, baking soda, pumpkin pie spice, cinnamon, and salt. Whisk until evenly speckled and there are no visible clumps.
- Beat the eggs, granulated sugar, vegetable oil, pumpkin puree, and vanilla until smooth. Keep mixing until the batter looks uniform and glossy.
- Fold the flour mixture into the wet ingredients until just combined. Stop as soon as no dry streaks remain.
- Spread the batter evenly in the prepared pan. Smooth the top so it bakes consistently.
- Bake for 25-28 minutes at 350F until a toothpick comes out clean. Look for a set center and lightly golden edges.
- Cool the bars completely before frosting. Let them cool fully so the frosting doesn’t melt or slide.
- Beat the cream cheese and unsalted butter until smooth. Mix until no lumps are visible.
- Add powdered sugar, vanilla, cinnamon, nutmeg, and milk. Beat until the mixture comes together as a thick frosting.
- Beat the frosting until very fluffy. The texture should look lighter and hold soft peaks.
- Spread the frosting over the cooled bars. Swirl or smooth the top for an even layer.
- Dust the top with cinnamon. Add it lightly so it looks like a finishing sprinkle.
- Refrigerate for 30 minutes before cutting. Chill until the frosting firms up for clean slices.