Chocolate Peanut Butter Pumpkins disappear fast because they hit that sweet spot between candy and cookie dough: a soft peanut butter center, a crisp chocolate shell, and just enough pumpkin spice to make the whole bite taste like fall without turning muddy or heavy. The shape is playful, but the texture is what keeps people reaching for another one.
The trick is drying the pumpkin puree until it stops adding extra moisture. Once that puree is blotted well, the filling stays thick enough to shape into little pumpkins and holds its ridges after chilling. A short freeze before dipping helps the coating set quickly, which keeps the pumpkins from slumping or losing their shape in the chocolate.
Below, I’ll walk through the one step that matters most, which coating works best, and how to store these so the shells stay neat and the filling stays smooth.
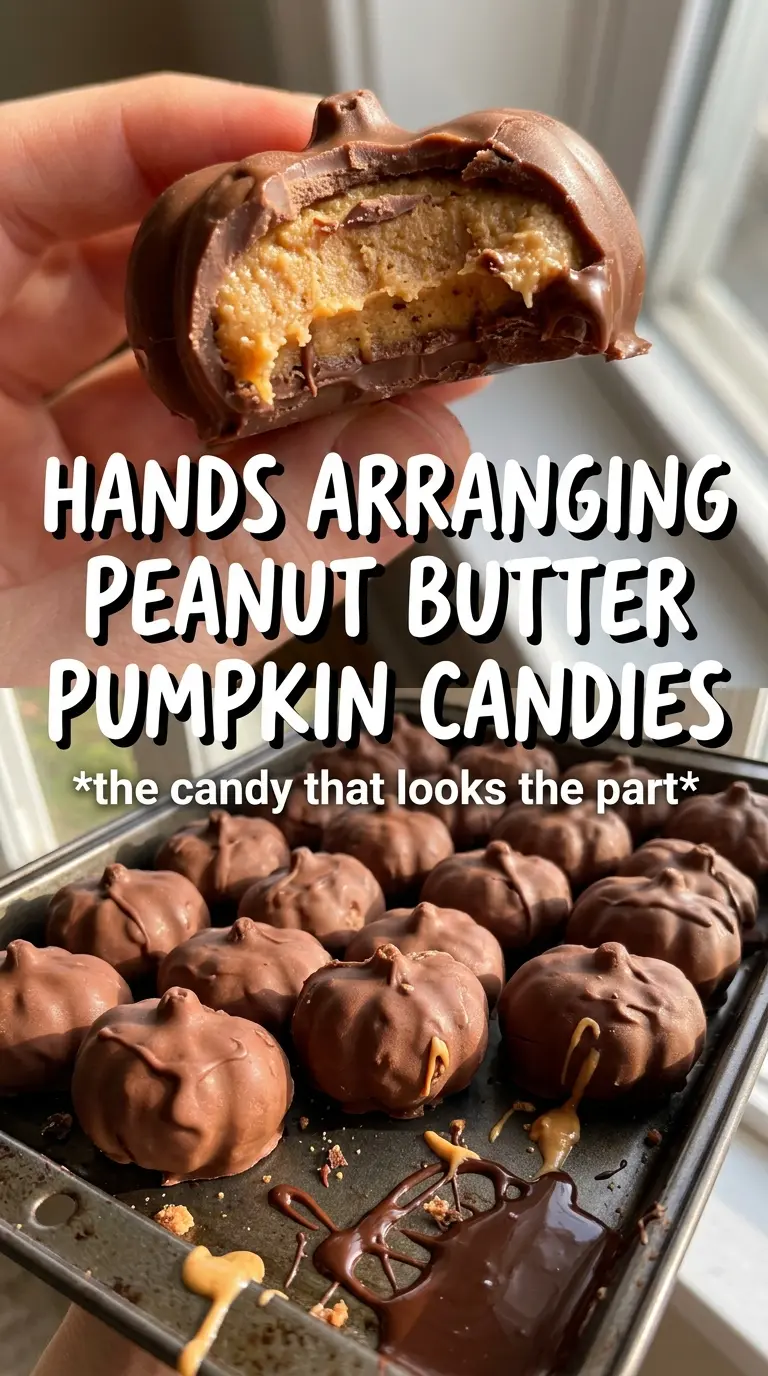
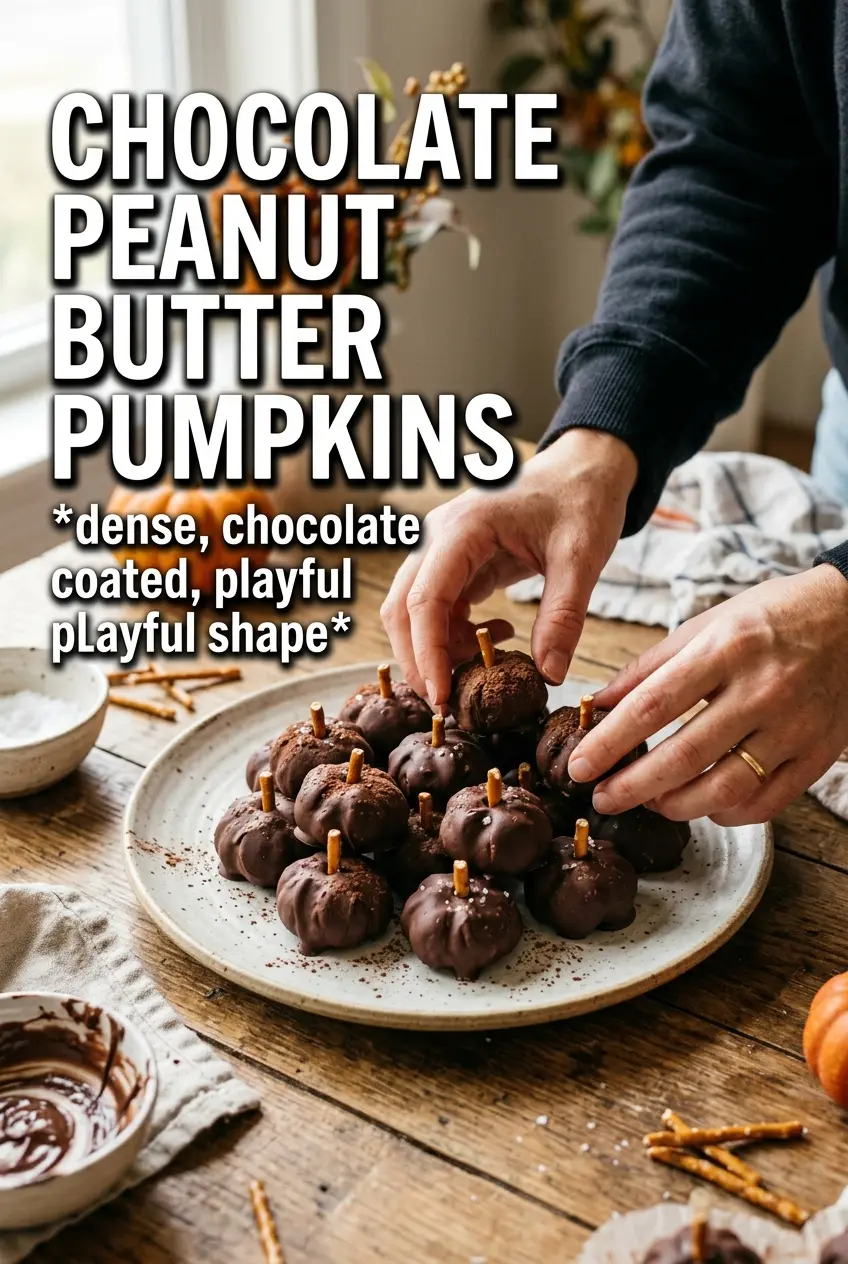
The filling held its shape after chilling and the orange coating set up smooth without cracking. I used the pretzel stems and they looked adorable on the platter.
Save these Chocolate Peanut Butter Pumpkins for a no-bake treat with a smooth PB center, pretzel stems, and a clean orange shell.
The One Step That Keeps the Pumpkins from Going Soft
These look simple, but the filling can turn sticky fast if the pumpkin puree goes in wet. That’s the part that trips people up. Pumpkin puree carries a lot of moisture, and if you add it straight from the can, the mixture never firms up enough to shape cleanly. Blot it on paper towels until it stops leaving a wet mark. That small step is what gives you pumpkin-shaped candies instead of soft peanut butter blobs.
The other thing that matters is chilling in stages. First the filling needs time in the fridge to tighten, then the shaped pumpkins need a short freeze before dipping. Skip the freeze and the coating stays on too long, which can smear the ridges you worked to make. The shape sets best when the filling is cold and the coating goes on in one smooth dip.
What Each Ingredient Is Actually Doing in This Recipe
- Primary ingredient (the star) — Quality matters most. Choose the best you can find.
- Cooking medium (oil, butter, or broth) — This carries flavors and prevents dryness.
- Seasonings (salt, pepper, spices, herbs) — Layer flavors so nothing overpowers. Build depth gradually.
- Aromatics (garlic, onion, herbs) — Cook with fat to bloom flavors. Become the foundation.
- Supporting ingredients — Complement the main ingredient without overpowering it.
- Sauce or liquid (if applicable) — Brings flavors together. Balance richness with acid.
- Acid (lemon, vinegar, wine, or other) — Brightens and prevents flat-tasting results.
- Final finish (garnish, glaze, or sauce) — Prevents one-dimensional taste and adds visual appeal.
What Each Ingredient Is Actually Doing in These Pumpkin Candies
- Creamy peanut butter — This is the base of the filling, and the creamy style keeps the mixture smooth enough to shape. Natural peanut butter can work, but only if it’s stirred extremely well and not oily; otherwise the texture turns loose.
- Blotted pumpkin puree — This adds the pumpkin note without making the centers taste wet or grainy. The blotting step matters more than the brand. If the puree still looks shiny, keep pressing moisture out before it goes into the bowl.
- Powdered sugar — This is what firms the filling and gives it that candy-center bite. If your kitchen runs warm, you may need a spoonful or two more to get a rollable dough, but add it gradually so the mixture doesn’t turn dry and crumbly.
- Pumpkin pie spice and cinnamon — These give the filling warmth and keep the pumpkin from tasting flat. Cinnamon on its own works in a pinch, but the spice blend gives a fuller bakery-style flavor.
- Orange candy melts or chocolate with food coloring — Candy melts are the easiest route because they coat smoothly and set fast. If you use milk chocolate, add oil-based coloring or an orange candy color made for chocolate; water-based coloring can seize the coating.
- Pretzel sticks and green candy — These are decoration, but they also make the pumpkins read instantly on the plate. Add the stems while the coating is still soft so they anchor instead of falling off later.
Shaping, Dipping, and Finishing Without Losing the Pumpkin Ridges
Mixing the Filling Until It Holds Together
Beat the peanut butter, blotted pumpkin puree, powdered sugar, pumpkin pie spice, and cinnamon until the mixture looks smooth and thick, almost like soft cookie dough. If it feels sticky enough to cling to your hands, it needs more chilling time, not more mixing. A 30-minute rest in the refrigerator lets the sugar hydrate and the fat firm up, which makes shaping much easier.
Creating the Pumpkin Shape
Scoop tablespoon-sized portions and roll them into compact balls, then press gentle ridges around the sides with your fingers or a toothpick. You’re looking for definition, not deep grooves that break apart later. If the mixture warms up while you work, put it back in the fridge for a few minutes before finishing the batch.
Dipping and Decorating Fast
Melt the orange coating until it’s fluid and glossy, then dip each pumpkin and tap off the excess. A thick coating hides the ridges, so let the extra drip away before placing it on the tray. Press a pretzel stick into the top while the shell is still soft, then add the green candy leaf right away so both pieces set in place together.
Make Them Dairy-Free with the Right Chocolate
The filling is already dairy-free if your peanut butter is, so the main swap is the coating. Use dairy-free candy melts or dairy-free chocolate colored with an oil-based orange coloring. The texture stays the same, but chocolate can be a little less shiny than candy melts, so work quickly once it’s melted.
Use Almond Butter for a Different Nutty Finish
Almond butter gives a slightly drier, less salty center and a flavor that’s a little more restrained than peanut butter. It works best when the almond butter is smooth and not separated. You may need a touch less powdered sugar because almond butter often thickens the mixture faster.
Skip the Pumpkin Spice for a Cleaner Peanut Butter Bite
If you want these to taste more like classic peanut butter pumpkins than pumpkin pie candy, leave out the pumpkin pie spice and cinnamon. The pumpkin puree still gives a subtle autumn note, but the peanut butter becomes the lead flavor. This version is a good choice if you’re serving kids who prefer a simpler filling.
Storage and Reheating
- Refrigerator: Store in an airtight container for up to 1 week. The coating may lose a little shine, but the texture stays firm.
- Freezer: Freeze in a single layer, then transfer to a container with parchment between layers. They keep well for about 2 months.
- Reheating: No reheating needed. Let frozen pumpkins sit at room temperature for 10 to 15 minutes before serving so the centers soften slightly without sweating on the outside.
Questions I Get Asked About This Recipe
Chocolate Peanut Butter Pumpkins
Ingredients
Equipment
Method
- Blot pumpkin puree very dry, then beat it with peanut butter, powdered sugar, pumpkin pie spice, and cinnamon until smooth with no grainy sugar streaks.
- Refrigerate the mixture for 30 minutes until it is firm enough to shape.
- Scoop about 1 tablespoon-sized portions and shape into pumpkin rounds, creating ridges by pressing with a toothpick or lightly with your fingers.
- Freeze the shaped pumpkins for 20 minutes until solid so the coating doesn’t melt the filling.
- Melt orange candy melts or milk chocolate until fully smooth, then dip each frozen pumpkin and tap off excess coating while it is still wet.
- Press a pretzel stick into the top of each pumpkin as a stem before the coating sets.
- Add a small green candy leaf and refrigerate until set, about 30 minutes.