Chicken chimichangas earn their place in the dinner rotation the first time you bite through that shattering crust and hit the hot, seasoned filling inside. The contrast is the whole point: crisp tortilla outside, tender chicken and rice inside, with melted cheese holding everything together so the filling doesn’t spill out the second you cut in.
This version keeps the filling sturdy and flavorful without turning soggy. The chicken gets tossed with salsa and taco seasoning before it ever hits the tortilla, which seasons every bite and keeps the meat from tasting dry. The rice and beans add body, and the cheese melts into the gaps so the chimichanga slices cleanly after frying instead of collapsing into a mess.
Below you’ll find the small details that matter most: how to keep the filling from tearing the tortillas, why seam-side-down is nonnegotiable in the skillet, and how to bake them if frying isn’t your thing.
The tortilla got that perfect crackly shell in the oil, and the filling stayed together when I cut into it. The salsa mixed into the chicken kept everything moist without making the bottom soggy.
Save these crispy chicken chimichangas for the night you want a crackly fried shell, cheesy filling, and a Tex-Mex dinner that eats like a treat.
The One Trick That Keeps Chimichangas From Bursting Open
Most chimichangas fail for the same reason: they’re overfilled and rolled too loosely. A tortilla this size can handle a generous filling, but it still needs room to fold in the sides and form a tight seam. If the roll feels stuffed to the point of strain, it will split in the oil before the outside has a chance to set.
The second thing that matters is moisture control. The chicken is already mixed with salsa, so the rest of the filling needs to stay balanced. Too much wet filling on one side creates steam, and steam is what softens the tortilla from the inside while you’re trying to crisp it from the outside.
- Start with cooled rice and chicken. Warm filling steams the tortilla and makes it harder to seal cleanly.
- Keep the filling centered. Leave a border around the edges so you can tuck and roll without forcing the tortilla to tear.
- Seal with the seam down first. That sets the shape before the chimichanga has a chance to unwind in the oil.
- Use toothpicks only as a temporary brace. They help during the first flip, but the seam should do the real work.
What Each Filling Ingredient Is Doing in the Pan
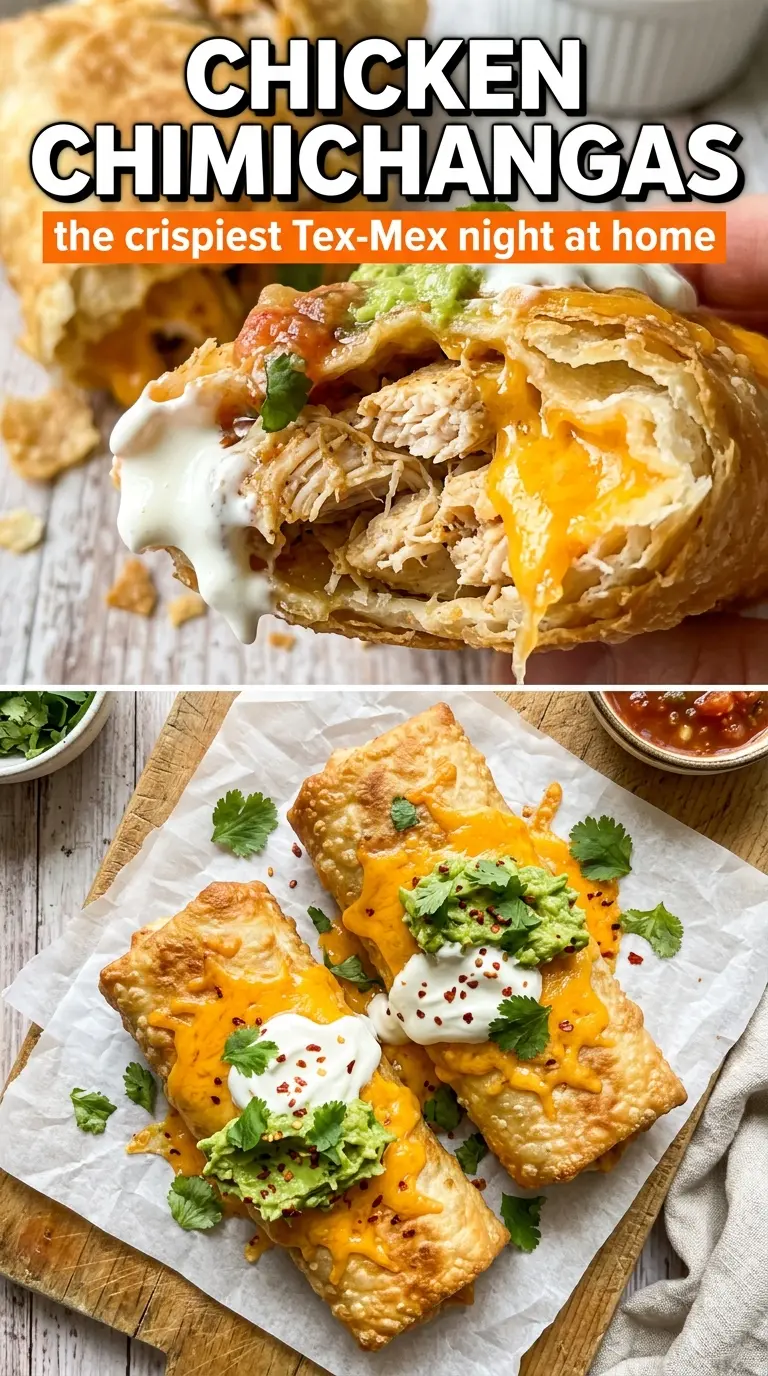
- Shredded chicken — This is the backbone of the filling. Use cooked chicken that shreds into strands instead of chunks, because it tucks into the tortilla more evenly and holds together better when you bite through the crust.
- Mexican rice — Rice gives the filling structure and keeps the chimichanga from feeling heavy with just meat and cheese. Leftover rice works especially well as long as it’s not wet or freshly steamed.
- Black beans — Beans add creaminess and help anchor the filling. Drain and rinse them well; any extra liquid will puddle inside the tortilla and soften the bottom.
- Taco seasoning and salsa — These season the chicken without needing a separate sauce. Salsa is the ingredient that keeps the meat juicy, but don’t drown it. You want the chicken coated, not soupy.
- Monterey Jack cheese — This melts smoothly and helps bind the filling. A good melting cheese matters here; pre-shredded cheese works in a pinch, but freshly shredded melts cleaner and has a better stretch.
- Flour tortillas — Large burrito-size tortillas are the only smart choice. Smaller tortillas can’t hold enough filling to make a proper chimichanga, and corn tortillas won’t fold and fry the same way.
Getting the Shell Crisp Without Greasing Out the Filling
Mix the Filling First
Combine the shredded chicken with the taco seasoning and salsa until every strand is coated. That step does more than flavor the meat; it creates a cohesive filling that spreads evenly and doesn’t leave dry pockets in the center. Stir in the rice, beans, and cheese after that so the heavier ingredients stay intact. If the mixture looks wet enough to spoon, hold back on the salsa next time.
Roll Them Tight and Even
Spoon the filling into the center of each tortilla and shape it into a compact line, not a mound. Fold the sides inward first, then roll from the bottom up with firm pressure so the seam lands underneath. If a tortilla cracks while rolling, it usually means it was cold or the filling was piled too high in one spot. A quick warm-up in the microwave or a dry skillet makes the tortilla more flexible.
Fry Until the Surface Sets
Heat the oil to 375°F and fry seam-side down first. That first contact is what locks the roll together and keeps the seams from opening in the oil. The chimichanga should sizzle immediately; if the oil is too cool, the tortilla drinks it up and turns greasy instead of crisp. Fry just until the shell is deep golden and audibly crisp, then drain on paper towels.
Bake for a Lighter Finish
Brush the chimichangas all over with oil and bake at 425°F, flipping halfway through. They won’t have the same blistered crunch as fried, but the shell still turns crisp and sturdy if you give the tortilla enough oil to brown properly. If the tops look pale at the end, keep them in the oven a few more minutes. Underbaking here leaves the bottom soft and the seam weak.
Use rotisserie chicken for a fast weeknight version
Shredded rotisserie chicken saves time and brings built-in seasoning, which works nicely with the taco seasoning and salsa. Pull off the skin before mixing so the filling doesn’t get greasy. The texture stays tender, and the chimichangas still fry up crisp.
Make it gluten-free with sturdy corn tortillas? Not this one
This style of chimichanga depends on large flour tortillas that can bend, seal, and fry without falling apart. Corn tortillas crack before they can hold this much filling, so they don’t make a workable swap here. If gluten is the issue, use certified gluten-free flour tortillas that are large enough for burrito filling.
Swap the frying oil for baking spray and the oven
Baking spray gives the tortilla enough fat to brown, but the crust will be a little less dramatic and less blistered than the fried version. It’s the better choice when you want something easier to manage or lighter on cleanup. Flip them halfway so both sides color evenly, and don’t crowd the pan or they’ll steam.
Storage and Reheating
- Refrigerator: Store leftovers in an airtight container for up to 3 days. The tortilla softens a bit as it sits, but the filling stays flavorful.
- Freezer: Chimichangas freeze well after cooking. Wrap them individually, then freeze for up to 2 months; thaw in the fridge before reheating for the best texture.
- Reheating: Reheat in a 375°F oven or air fryer until the shell crisps back up. The mistake to avoid is microwaving them straight from the fridge, which makes the tortilla limp and steamy.
Questions I Get Asked About This Recipe
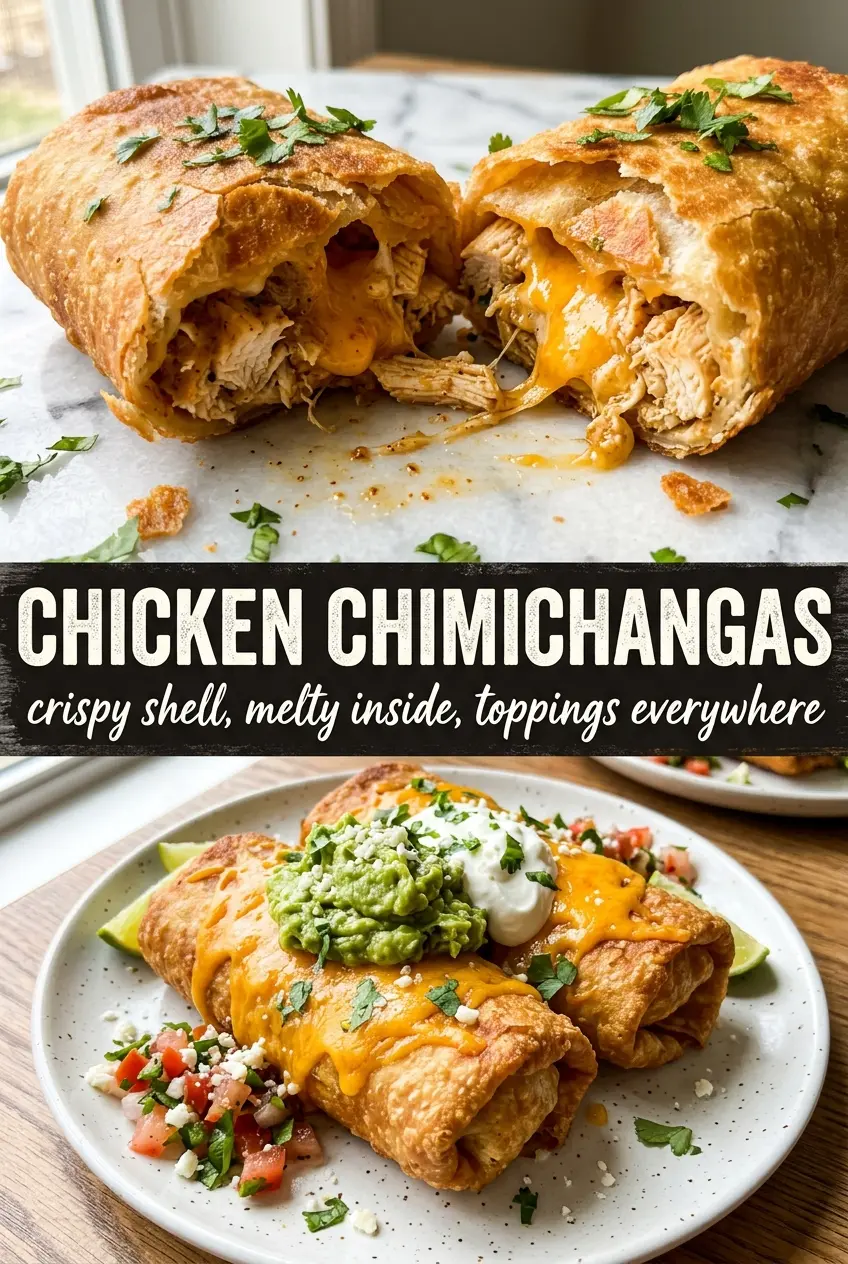
Chicken Chimichangas
Ingredients
Equipment
Method
- Mix shredded cooked chicken with taco seasoning and salsa until well combined, so the chicken looks evenly coated with spices.
- Lay tortillas flat and pile Mexican rice, black beans, seasoned chicken, and shredded Monterey Jack cheese in the center of each, keeping the filling centered for tight rolls.
- Fold sides in and roll tortillas tightly like a burrito, then secure each chimichanga with a toothpick so it holds during frying.
- Heat about 2 inches of vegetable oil to 375°F in a deep skillet or Dutch oven.
- Fry chimichangas seam-side down for 2-3 minutes until golden, using the seam to seal the roll as the shell starts crisping.
- Turn and fry another 2-3 minutes until all sides are crispy and deep golden, then drain on paper towels.
- Preheat oven to 425°F, then lightly brush chimichangas with oil so they brown and crisp.
- Bake for 20-22 minutes, flipping halfway, until golden and crisp at the edges.
- Remove toothpicks and serve immediately with sour cream, guacamole, and pico de gallo.