Soft, pillowy apple cinnamon rolls bring the best parts of a bakery breakfast into your own kitchen: tender spirals of dough, caramelized apple pieces tucked into every layer, and a cream cheese glaze that melts into the warm swirls. The apples stay visible instead of disappearing into the filling, so every bite has a little sweetness, a little spice, and a bit of texture that keeps these from tasting flat.
What makes this version work is the balance. The apples are cooked first, which pulls off extra moisture and concentrates the flavor before they ever hit the dough. That keeps the rolls from turning soggy in the center. The dough itself is rich but not heavy, and the rise times give you those soft, airy layers without making the rolls taste bready.
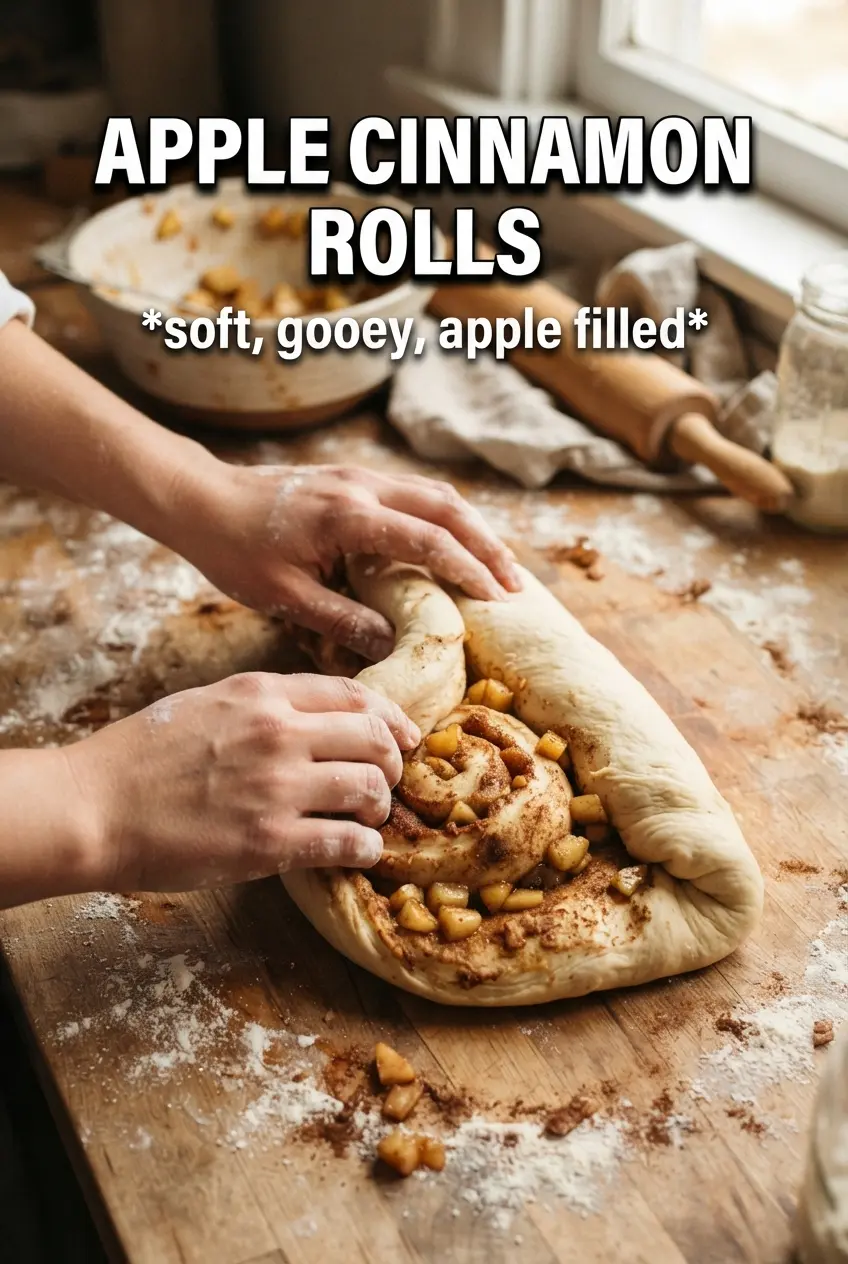
Below, I’ll walk through the part that matters most: getting the apple filling cooked just enough, then rolling the dough tight so the spirals bake up tall instead of loose.
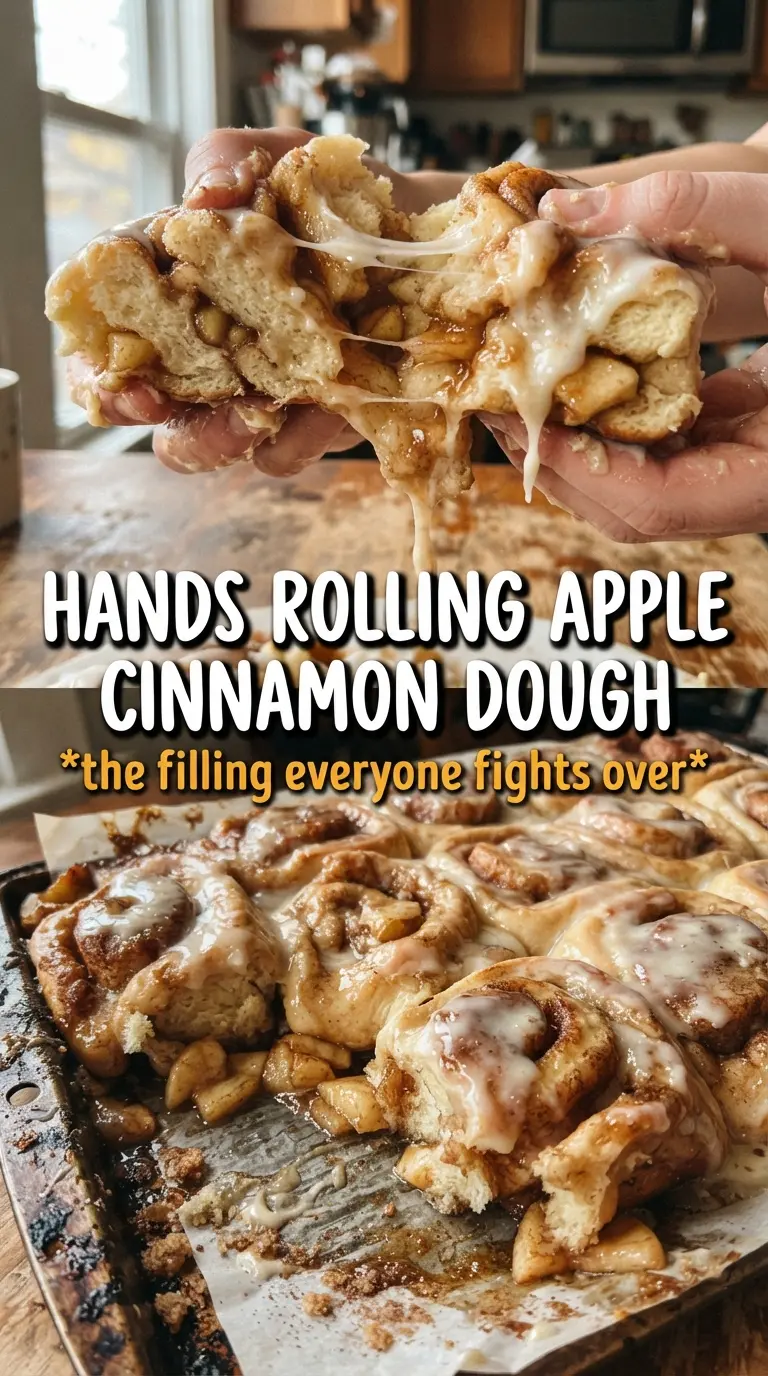
The apples cooked down just enough that the rolls stayed neat, and the glaze melted into every swirl while they were still warm. I’ve made a few apple rolls before, but these were the first ones that held their shape and still tasted gooey in the middle.
These apple cinnamon rolls bake up tall, soft, and sticky with caramelized apple layers in every swirl.
The Part Most Apple Rolls Get Wrong: Too Much Moisture
The filling is where these rolls either turn out bakery-soft or collapse into a sticky mess. Raw apples release a lot of liquid as they bake, and if that moisture goes straight into the dough, the center turns gummy before the rolls ever finish setting. Cooking the apples first solves that problem and gives you a filling that tastes like pie filling instead of chopped fruit inside bread.
Rolling the dough tightly matters just as much. Loose spirals let the filling leak out and the rolls unravel in the pan, which means uneven baking and dry edges. A snug roll keeps the layers stacked so the centers stay tender while the tops turn golden.
- Cooked apples, not raw — This step keeps the rolls from weeping liquid into the dough. You want softened apples with a little caramelization on the edges, not a watery skillet.
- Brown sugar — It brings molasses depth and helps the filling turn glossy as it bakes. White sugar won’t give you the same sticky finish.
- Nutmeg — You only need a little, but it makes the cinnamon taste warmer and fuller. Too much can take over, so keep it in the background.
- Softened cream cheese for the glaze — Cold cream cheese leaves tiny lumps that never fully smooth out. Let it sit at room temperature until it blends easily with the sugar and milk.
What Each Ingredient Is Actually Doing in These Rolls
- Warm milk — This wakes up the yeast and helps the dough start rising. It should feel comfortably warm, not hot; too much heat can kill the yeast before it gets going.
- Active dry yeast — The foam after five minutes tells you the yeast is alive. If it doesn’t look foamy, stop and start over before you waste the rest of the ingredients.
- All-purpose flour — This gives the rolls structure without making them stiff. Bread flour will make them a little chewier, which works, but all-purpose keeps the crumb softer.
- Apples — Use a firm baking apple if you can, since it holds shape better after the quick skillet cook. Softer apples will work, but they break down faster and give you more of a jammy filling.
- Butter in the filling — It carries the spices and helps the sugar coat the apples instead of drying them out in the pan. Don’t skip the cooling step after cooking, or it can melt into the dough and create slick layers that slide apart.
- Cream cheese glaze — This is more than a topping; it softens the top layer of the rolls and brings the whole pan together. Add the milk a little at a time so you can control whether it drizzles or spreads thickly.
Building the Rolls So They Rise Tall and Bake Evenly
Activating the Yeast
Stir the warm milk and yeast together first, then wait for a foamy layer to form on top. That foam is your proof that the yeast is active and ready to work. If the surface stays flat and dull, the milk was probably too hot, too cold, or the yeast was old. Fix that before you add the rest of the dough ingredients, because an inactive start never catches up later.
Making the Dough
Add the sugar, melted butter, eggs, and vanilla, then mix in the flour and salt until a soft dough forms. It should feel tacky but manageable, not dry and stiff. If you add too much flour at this stage, the rolls bake up dense instead of plush, so stop as soon as the dough pulls away from the bowl. Knead until it turns smooth and elastic, about eight minutes, which gives the gluten enough strength to hold the filling.
Cooking and Cooling the Apple Filling
Cook the diced apples with butter, brown sugar, cinnamon, and nutmeg until the pieces soften and the mixture looks glossy and thick. You’re looking for tender apples with very little free liquid left in the pan. Spread the filling out to cool completely before using it. Warm filling melts the dough surface and makes rolling messy, which leads to leaks during baking.
Rolling, Cutting, and Proofing
Roll the dough into a 12×18-inch rectangle and spread the cooled apple filling evenly over the surface. Roll from the long side so you get more spirals in each piece, then cut into 12 equal rolls with a sharp knife or unflavored dental floss. Place them in the pan with a little space between each one, cover, and let them rise until puffy. They should look expanded and touch lightly at the edges before they go into the oven.
Baking and Glazing
Bake until the rolls are golden on top and set in the center, about 22 to 25 minutes. If the tops brown too quickly, cover loosely with foil for the last few minutes so the middle can finish baking without scorching the surface. Beat the glaze until smooth, then drizzle it over the rolls while they’re still warm so it melts into the swirls instead of sitting on top in a thick cap.
How to Adapt These Rolls Without Losing the Soft, Sticky Center
Dairy-Free Version
Swap the milk for an unsweetened non-dairy milk and use plant-based butter in both the dough and filling. The rolls will still rise well, but the glaze won’t taste quite as rich unless you use a dairy-free cream cheese that melts smoothly.
Extra-Spiced Apple Filling
Add an extra 1/4 teaspoon of cinnamon and a pinch of cloves if you want the filling to lean more like apple pie. That gives the rolls a deeper spice note, but keep the cloves light or they’ll overpower the apples.
Make-Ahead Overnight Rolls
After you shape the rolls in the pan, cover them tightly and refrigerate overnight instead of doing the final rise at room temperature. In the morning, let them sit out until they look puffy again before baking. Cold dough needs that extra time or the centers can bake up tight and under-risen.
Storage and Reheating
- Refrigerator: Store covered for up to 4 days. The rolls stay soft, though the glaze firms up a bit in the fridge.
- Freezer: Freeze baked rolls without the glaze for best texture. Wrap them well and freeze for up to 2 months, then thaw before reheating.
- Reheating: Warm individual rolls in the microwave for 20 to 30 seconds or cover the pan with foil and heat in a 300F oven until warmed through. Don’t blast them too long or the dough turns dry before the center heats up.
Answers to the Questions Worth Asking
Apple Cinnamon Rolls
Ingredients
Equipment
Method
- Combine warm milk and active dry yeast in a bowl, then let sit for 5 minutes until foamy.
- Mix in granulated sugar, melted unsalted butter, eggs, and vanilla extract, then add all-purpose flour and salt until a soft dough forms.
- Knead the dough for 8 minutes until smooth, then place it in a greased bowl, cover, and let rise for 1 hour until doubled.
- Cook diced apples with unsalted butter, brown sugar, cinnamon, and nutmeg in a skillet over medium heat for 5–7 minutes until softened and caramelized.
- Cool the caramelized apple filling completely before spreading on the dough.
- Roll the risen dough into a 12x18 inch rectangle, then spread the apple filling evenly over the surface.
- Roll tightly from the long side and cut into 12 equal rolls.
- Arrange the rolls in a greased 9x13 baking dish, cover, and rise for 45 minutes.
- Bake at 375°F for 22–25 minutes until golden.
- Beat cream cheese, powdered sugar, milk, and vanilla extract together, then drizzle the glaze over warm rolls for a glossy finish.