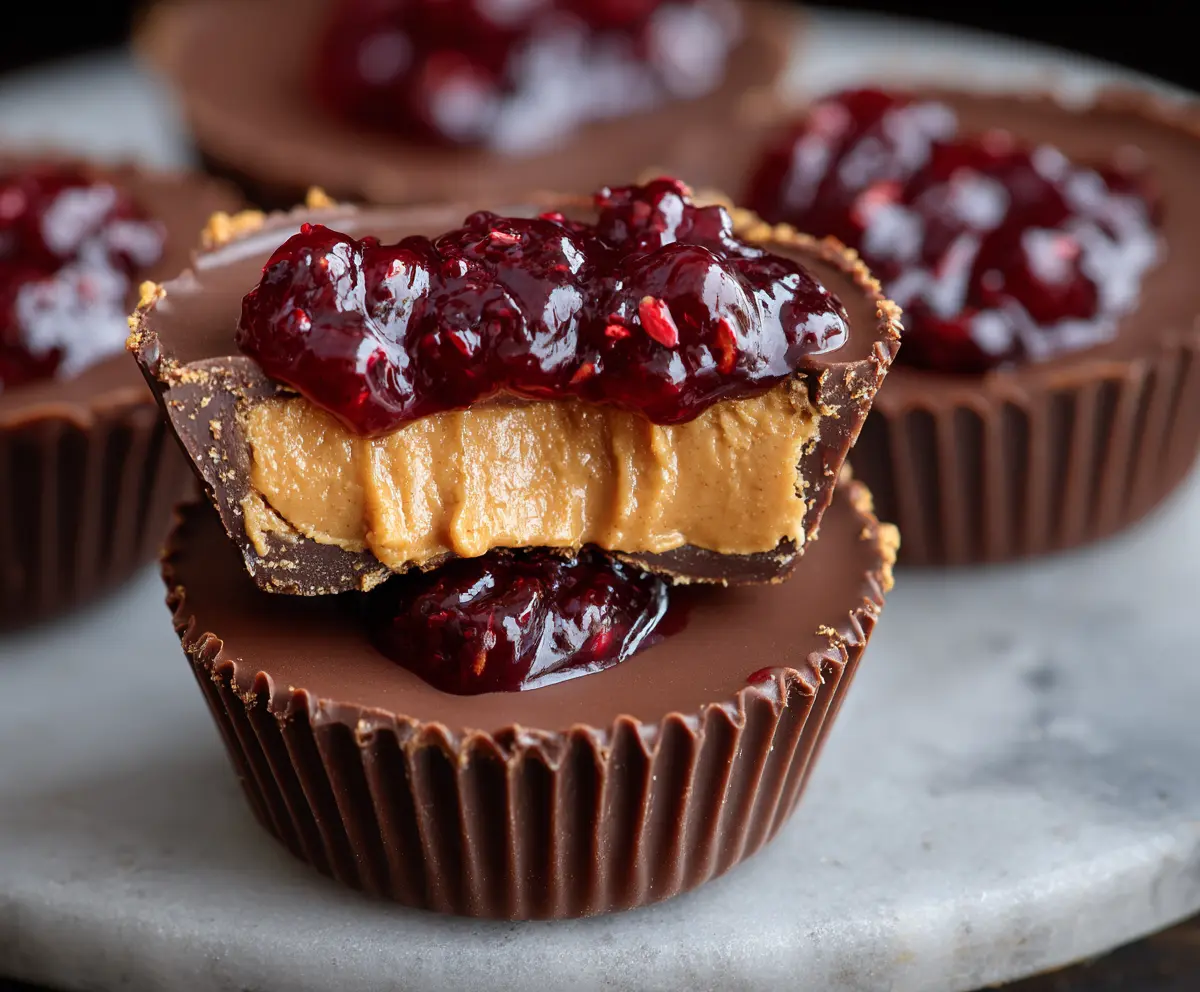
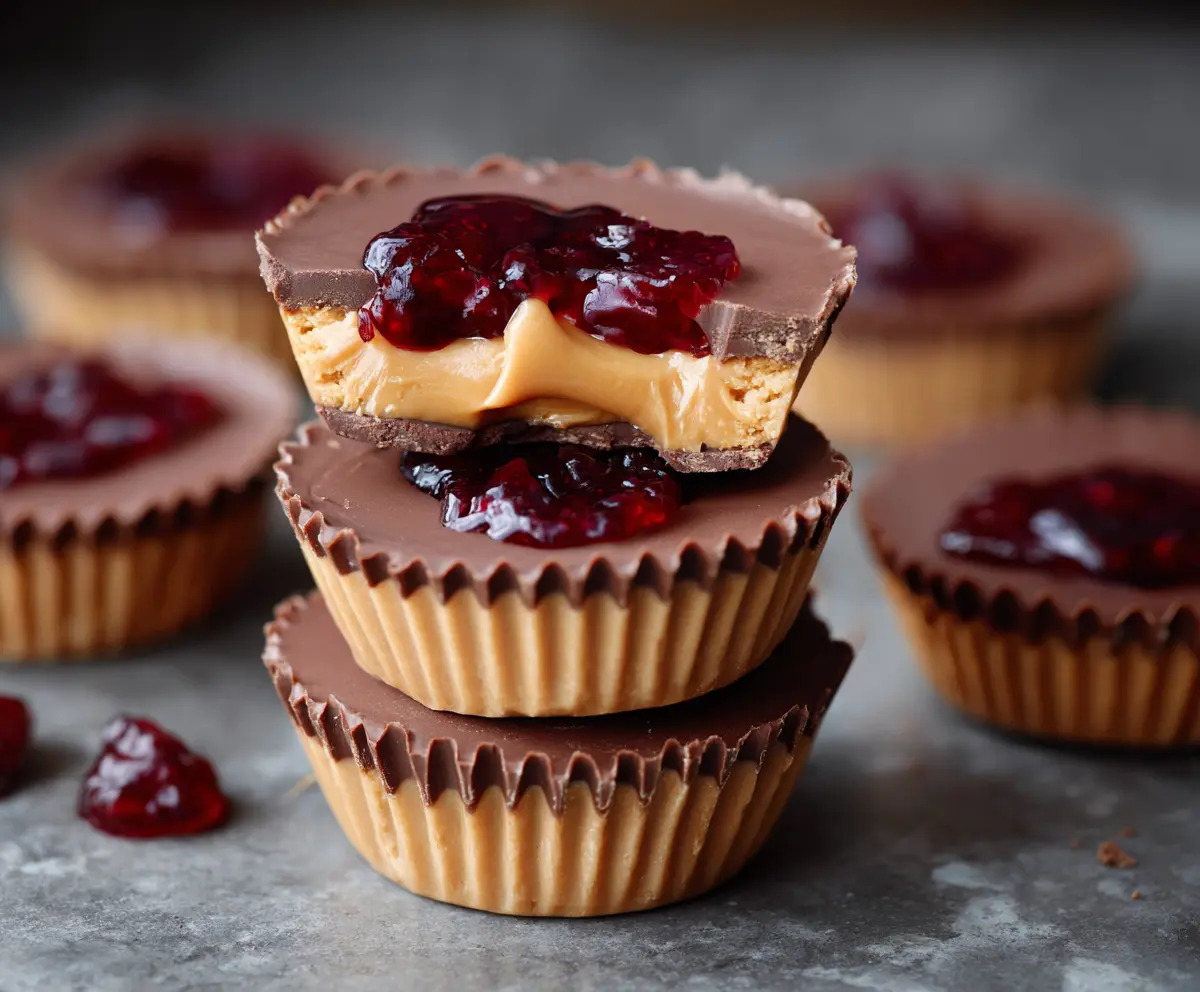
These Peanut Butter and Jelly Cups are a real treat! Imagine creamy peanut butter wrapped in a thick chocolate shell, with a delicious jelly surprise inside. Yum!
They’re like a fun twist on a classic sandwich! I love making these for snacks or desserts—super easy to whip up and totally indulgent. Don’t be surprised if they disappear fast! 😄
Key Ingredients & Substitutions
Peanut Butter: Use creamy peanut butter for a smooth filling. If you’re a bit adventurous, crunchy peanut butter can add some fun texture! For a nut-free option, try sunflower seed butter.
Powdered Sugar: This helps sweeten the peanut butter mix and gives it a nice smooth texture. You can substitute it with honey or maple syrup if you prefer a more natural sweetener—just adjust the amount based on your taste.
Unsalted Butter: It adds richness to the filling. If you’re dairy-free, coconut oil or vegan butter works well!
Chocolate Chips: Semi-sweet or milk chocolate are both amazing choices. If you want something darker, dark chocolate or even white chocolate can work—keep in mind that this will change the flavor slightly.
Jelly or Jam: I love raspberry for its tartness, but strawberry is classic too. Feel free to use any flavor you love, even orange marmalade for a unique spin!
How Do You Get the Perfect Chocolate Shell?
Creating a smooth chocolate shell is essential for these cups. Here’s how to make it easy:
- Melt chocolate gently in small time intervals (20 seconds) to avoid burning.
- Make sure to coat both the bottom and sides of the liners completely—don’t rush this step!
- After coating, pop them in the fridge for about 10 minutes. This helps the chocolate to set firmly before adding the filling.
- If the chocolate isn’t thick enough, you can add a second layer for a sturdier shell.
Peanut Butter And Jelly Cups
Ingredients You’ll Need:
- 1 cup creamy peanut butter (natural or smooth)
- 1/4 cup powdered sugar
- 1/4 cup unsalted butter, softened
- 2 cups semi-sweet or milk chocolate chips
- 1/2 cup jelly or jam (raspberry or strawberry recommended)
- Mini paper cupcake liners
How Much Time Will You Need?
This fun and tasty treat takes about 15 minutes of prep time, plus an additional 40 minutes for chilling. You’ll spend a bit of time melting, mixing, and assembling, but the wait will be worth it when you taste these delectable cups!
Step-by-Step Instructions:
1. Prepare the Liners:
Start by lining a muffin tin or tray with mini paper cupcake liners. This helps shape your cups and makes for easy serving and clean-up!
2. Melt the Chocolate:
In a microwave-safe bowl, melt the chocolate chips in 20-second intervals. Stir well between each interval until the chocolate is completely smooth and glossy.
3. Coat the Liners:
Once your chocolate is melted, use a spoon or small brush to evenly coat the bottom and sides of each cupcake liner with the chocolate. Make sure to cover everything well! Then, place the tray in the refrigerator for about 10 minutes to let the chocolate set.
4. Make the Peanut Butter Mixture:
While the chocolate is setting, combine the peanut butter, softened butter, and powdered sugar in a mixing bowl. Stir or mix until you have a smooth and creamy texture. This filling is going to be delicious!
5. Fill the Chocolate Shells:
Once the chocolate shells have set, it’s time to fill them! Scoop a dollop of the peanut butter mixture into each chocolate shell and gently flatten the tops with the back of the spoon.
6. Add the Jelly:
Next, add a spoonful of your favorite jelly or jam on top of the peanut butter layer. This fruity layer really makes it taste like a peanut butter and jelly sandwich!
7. Seal the Cups:
Now, pour any remaining melted chocolate over the peanut butter and jelly to fully cover the layers, sealing them in. This creates a sweet, chocolatey shell.
8. Chill to Set:
Place the tray back in the refrigerator for at least 30 minutes, or until fully set. This helps everything hold together nicely.
9. Enjoy:
Once firm, carefully peel off the paper liners from the cups, and they are ready to serve! Enjoy these delightful peanut butter and jelly cups as a sweet treat that combines your favorite sandwich flavors in a chocolatey bite!
Can I Use Natural Peanut Butter for This Recipe?
Absolutely! Just keep in mind that natural peanut butter can be a bit more oily. It might need a little extra mixing to ensure the filling holds together well. Make sure to stir it before measuring!
Can I Substitute the Jelly with Something Else?
Yes, you can use any flavor of jelly or jam that you love! Consider trying alternatives like Nutella, honey, or even a fruit spread if you want to mix things up. Just keep the flavor profile in mind to complement the peanut butter.
How Should I Store Leftovers?
Store any leftover cups in an airtight container in the refrigerator for up to a week. They’re great chilled, but you can also let them sit at room temperature for a few minutes before enjoying for a softer bite.
Can I Make These Cups Ahead of Time?
Definitely! These cups can be made a few days in advance. Just prepare them, store them in the fridge, and they’ll be ready to go when you’re craving a sweet treat!