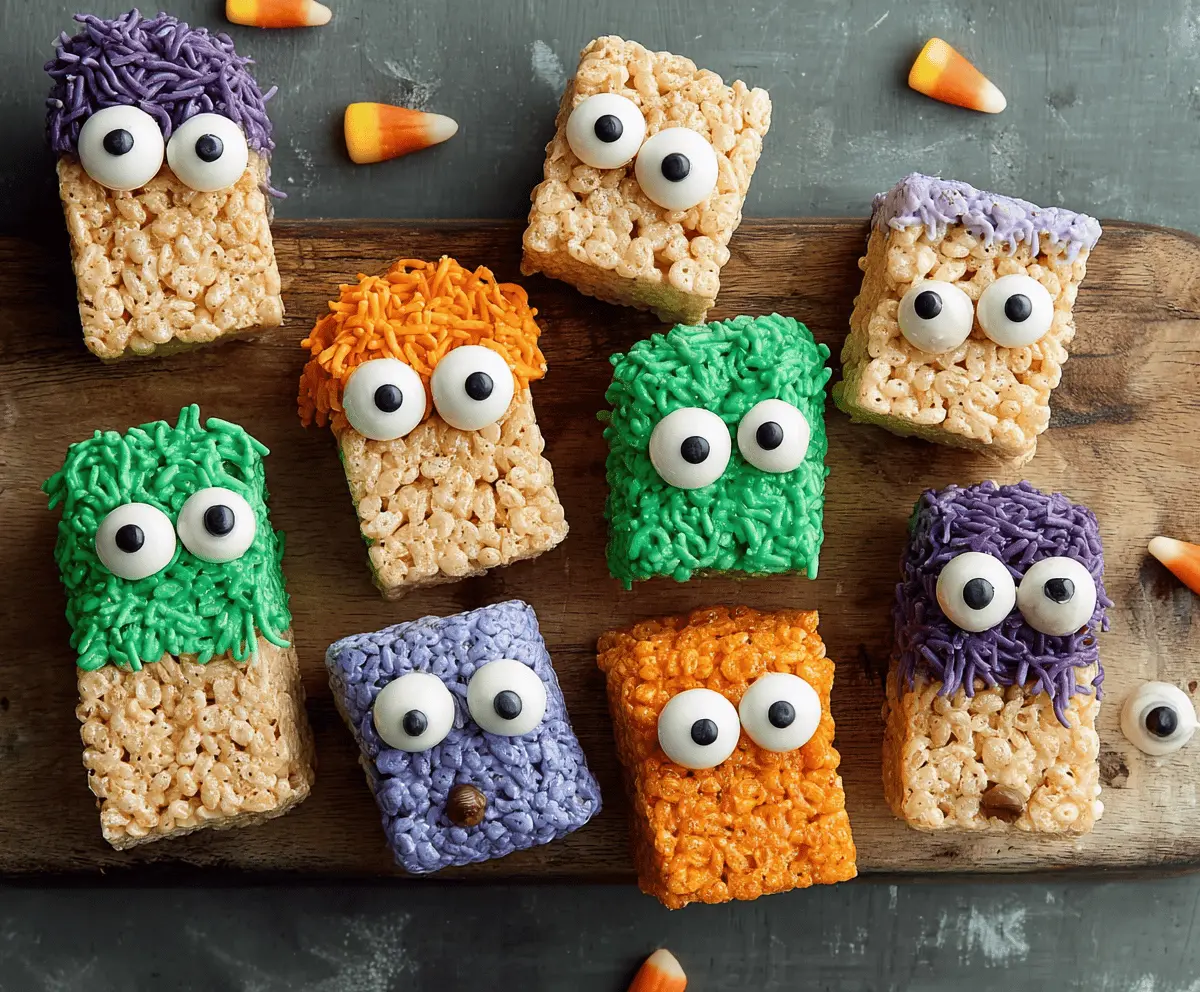
These Monster Rice Krispie Treats are a fun twist on the classic snack! With gooey marshmallows and colorful candy mixed in, they’re perfect for parties or a tasty afternoon treat.
Who can resist those cute monster faces? I love making these with my kids—it’s a great way to get everyone involved and a little messy! Plus, they disappear fast, so grab one quick! 😄
Key Ingredients & Substitutions
Rice Krispies Cereal: This is the base of the recipe. However, you can use any similar puffed cereal, like Cocoa Krispies for a chocolatey twist, or even gluten-free puffed rice if needed.
Marshmallows: The classic choice is large marshmallows, but mini ones work just fine too. For a vegan option, look for vegan marshmallows made from plant-based ingredients!
Gel Food Coloring: These colors add fun and vibrancy! If you want to avoid food coloring, consider using natural coloring from fruit or veggie purees, such as beet juice for pink or spinach for green, though this may alter the flavor slightly.
Candy Eyeballs: If you can’t find candy eyeballs, you can use chocolate chips, M&M’s, or cut pieces of white chocolate with a dot of dark chocolate for the pupils.
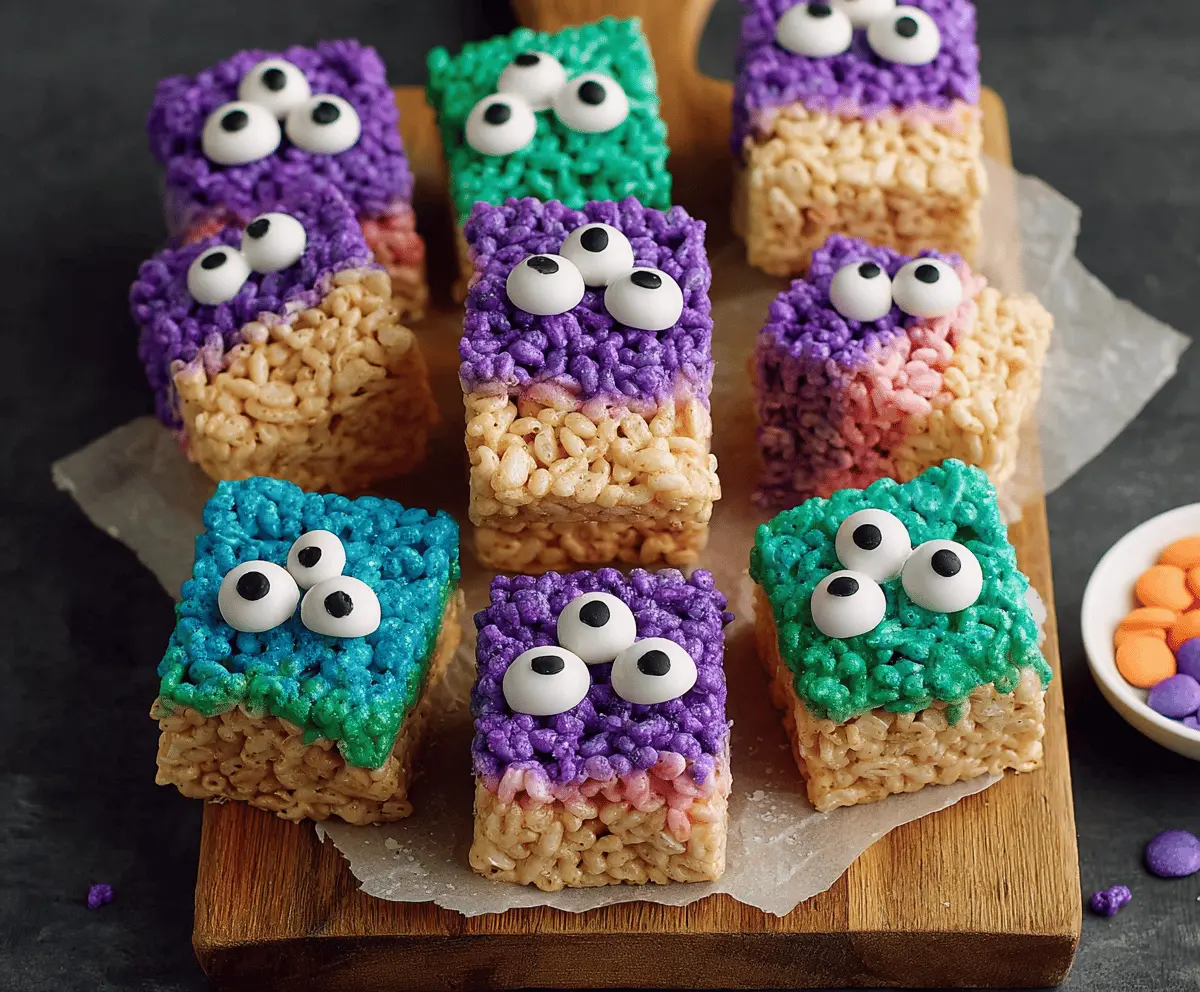
How Can You Achieve Perfect Layers in Your Rice Krispie Treats?
Creating distinct layers is key to making these treats visually appealing. Here are some tips to ensure your layers are well defined:
- Work quickly! The marshmallow mix will begin to set as it cools, so aim to form your layers while it’s still warm.
- Use a greased spatula or buttered hands to press down each layer gently. Don’t squish it too hard, or the layers may blend together.
- Be careful when adding the cereal; fold the cereal in to avoid breaking it and make sure it stays airy.
- For the top layer, press a little less firmly when smoothing it out, so it keeps that soft, fluffy texture.
Follow these steps, and your Monster Rice Krispie Treats will look as good as they taste!
Monster Rice Krispie Treats
Ingredients You’ll Need:
For the Treats:
- 6 cups Rice Krispies cereal
- 10 oz (about 40) large marshmallows
- 3 tbsp unsalted butter
- Gel food coloring (purple, blue, green, or any colors you like)
For Decoration:
- Candy eyeballs (3 per treat for “monsters” with 3 eyes, or 2 per treat for 2-eyed monsters)
Additional Supplies:
- Non-stick spray or butter (for greasing the pan)
- Optional: 1/4 tsp vanilla extract for extra flavor
How Much Time Will You Need?
This fun recipe takes about 15 minutes to prepare and about 30 minutes to cool and set, so you’ll be enjoying your treats in around 45 minutes total! Perfect for a quick snack or party treat!
Step-by-Step Instructions:
1. Prepare Your Pan:
Start by lightly greasing a 9×13 inch baking pan with non-stick spray or butter. This will help your Rice Krispie Treats come out easily later. Set the pan aside for now.
2. Melt the Butter:
In a large pot or saucepan, melt the butter over low heat. Stir it occasionally so it doesn’t burn. Once it’s melted, you’re ready for the marshmallows!
3. Melt the Marshmallows:
Add the marshmallows to the melted butter and stir constantly until they are fully melted and smooth. When everything is combined, remove the pot from the heat.
4. Optional Flavor Boost:
If you want an extra hint of flavor, stir in the vanilla extract now. It adds a delightful touch!
5. Color It Up:
Divide the melted marshmallow mixture into 3 separate bowls (or more if you’d like to get creative with colors!). Add a few drops of gel food coloring to each bowl. Mix until you have pretty, bright colors—purple, blue, and green are great options!
6. Mix in the Cereal:
Take one bowl of colored marshmallows and quickly add about one-third of the Rice Krispies cereal. Stir until the cereal is well coated with the marshmallow mixture. You’ll want to work quickly so the mixture stays warm and easy to handle.
7. Press into the Pan:
Spread the colored mixture evenly into one-third of the prepared baking pan. Use a spatula or your hands (greased) to gently press it down.
8. Repeat with Other Colors:
For the second layer, repeat the mixing and spreading process with the second color. Gently add it on top of the first layer, and then do the same with the third color for the top layer. Make sure to keep those layers distinct by being gentle!
9. Compact the Layers:
Using a spatula coated with non-stick spray or butter, gently press down the combined mixture so it is compact, but not squished. You want it to hold together nicely.
10. Let Set:
Allow the treats to cool and set at room temperature for about 30 minutes. This will help them firm up so they’re easier to cut.
11. Cut into Squares:
Once set, use a sharp knife to cut the treats into squares. You can make them as big or as small as you’d like!
12. Add Monster Eyes:
Now for the fun part! Take your candy eyeballs and gently press 2 or 3 into the top of each square to make silly monster faces.
13. Serve and Enjoy!
Serve your Monster Rice Krispie Treats right away or store them in an airtight container at room temperature for up to 2 days. They’re sure to be a hit, so grab one before they disappear!
Enjoy creating and sharing these colorful, delightful treats!
Can I Use Different Types of Cereal?
Absolutely! While Rice Krispies are the classic choice, feel free to experiment with other puffed cereals, such as Cocoa Krispies for chocolate flavor, or even gluten-free puffed rice to accommodate dietary needs.
How Do I Store Leftover Treats?
Store any leftover Monster Rice Krispie Treats in an airtight container at room temperature for up to 2 days. They’re best enjoyed fresh, but will still be tasty for a short time after making!
Can I Make These in Advance?
Yes, you can prepare these treats a day ahead of time! Simply let them set and store them in an airtight container until you’re ready to serve. Just make sure to keep them away from heat and humidity for maximum freshness.
What If I Don’t Have Gel Food Coloring?
If gel food coloring isn’t available, you can use liquid food coloring or even natural coloring from pureed fruits or vegetables, though this may change the flavor a bit. Just use sparingly until you reach your desired shade!