This creamy homemade eggnog ice cream is a holiday dream! It’s rich, sweet, and has that classic eggnog flavor everyone loves, perfect for celebrating with family.
I love scooping this delightful treat on chilly evenings. Plus, making it is so simple—you just mix, freeze, and enjoy! Who needs the store when you can whip this up? 🍦
Key Ingredients & Substitutions
Eggnog: You can use store-bought eggnog for convenience, but homemade eggnog offers fresher flavors. If you’re dairy-free, choose a coconut or almond-based eggnog, but keep in mind it might change the taste slightly.
Heavy Cream: This adds richness to the ice cream. If you want a lighter version, you could replace it with half-and-half, though it might be less creamy. For a dairy-free option, try coconut cream.
Granulated Sugar: Regular sugar works, but for a different sweetness, you might try maple syrup or honey. Just keep in mind, using liquid sweeteners may affect the texture slightly.
Spices: Ground cinnamon and nutmeg give this ice cream its classic holiday flavor. If you don’t have these, pumpkin pie spice is also a great blend to use. Personal preference: I love grating fresh nutmeg for an extra kick!
How Do I Ensure My Ice Cream is Creamy and Smooth?
The key to creamy ice cream is the churning process! Using an ice cream maker allows air to be incorporated, which makes the texture light and prevents ice crystals from forming.
- Make sure all your ingredients are well-mixed before churning. This helps with even freezing.
- Churn the mixture until it’s thick and has a soft-serve consistency, usually around 20-25 minutes.
- Once you transfer the ice cream to a container, press plastic wrap directly onto the surface to prevent ice crystals from forming while it sets in the freezer.
Easy Homemade Eggnog Ice Cream
Ingredients
- 2 cups eggnog (store-bought or homemade)
- 1 cup heavy cream
- 1/2 cup whole milk
- 1/2 cup granulated sugar
- 1 teaspoon vanilla extract
- 1/2 teaspoon ground cinnamon
- 1/4 teaspoon ground nutmeg
- Pinch of ground cloves (optional)
- Optional: 1-2 tablespoons dark rum or bourbon (for an adult version)
How Much Time Will You Need?
This recipe will take you about 10 minutes to prepare, plus 20-25 minutes for churning in the ice cream maker, and at least 4 hours of freezing time. In total, you’re looking at around 4 hours and 35 minutes, including freezing time, until you can enjoy your creamy treat!
Step-by-Step Instructions
1. Combine the Ingredients
In a medium bowl, whisk together the eggnog, heavy cream, whole milk, sugar, vanilla extract, ground cinnamon, ground nutmeg, and ground cloves (if you’re using them). Keep whisking until the sugar is fully dissolved and your mixture is nice and smooth. This is where the flavors really start to come together!
2. Add the Spirit (Optional)
If you want to give your ice cream a classic boozy touch, now is the time to stir in the dark rum or bourbon. It adds a lovely depth of flavor that pairs perfectly with the spices. If you’re serving it to kids or prefer a non-alcoholic version, just skip this step!
3. Churn the Mixture
Pour your creamy mixture into an ice cream maker and churn it following the manufacturer’s instructions. This usually takes about 20-25 minutes, and you’ll want to keep an eye on it until it reaches a soft-serve consistency. The churning incorporates air into the mix, which helps create that deliciously creamy texture!
4. Freeze the Ice Cream
Once your ice cream reaches the perfect soft-serve texture, transfer it to an airtight container. Make sure to pack it down to minimize air pockets. Then, pop it into the freezer and let it firm up for at least 4 hours. This waiting period is the hardest part—but totally worth it!
5. Serve and Garnish
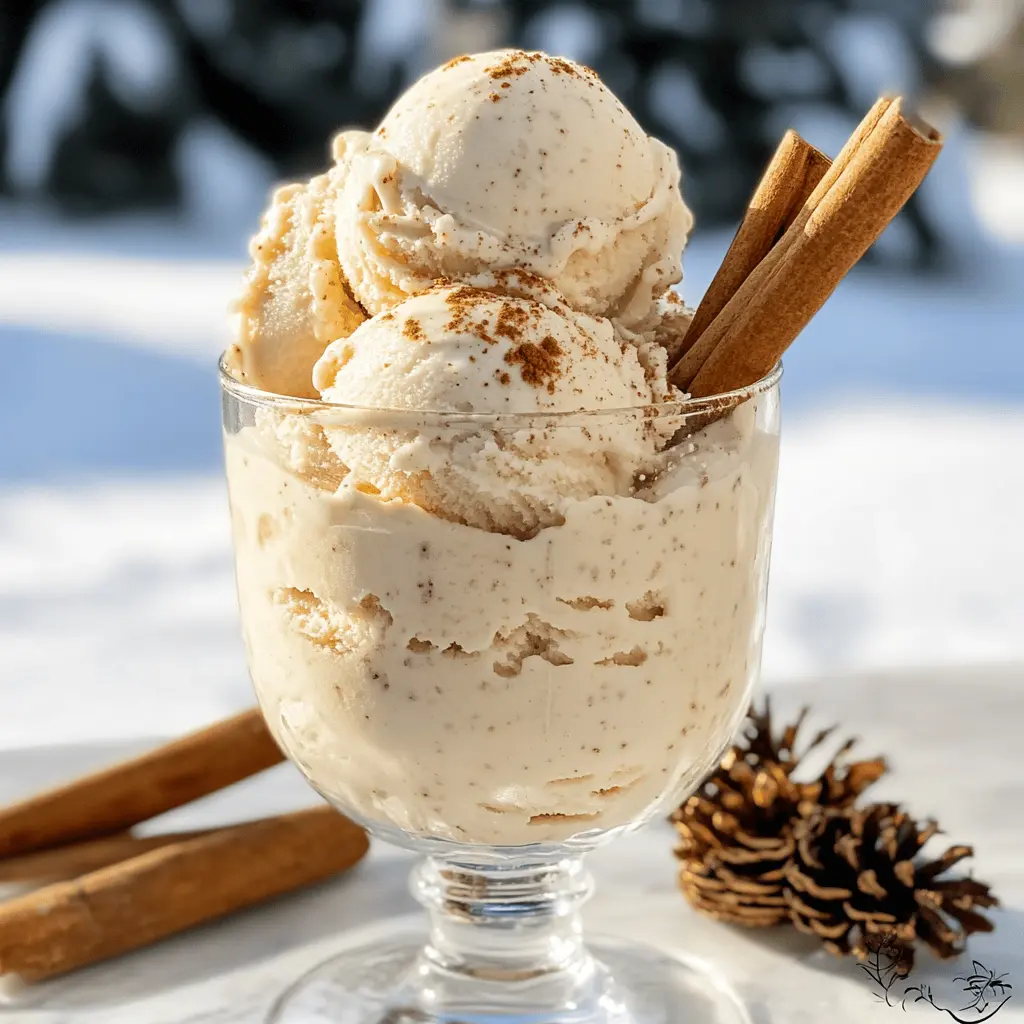
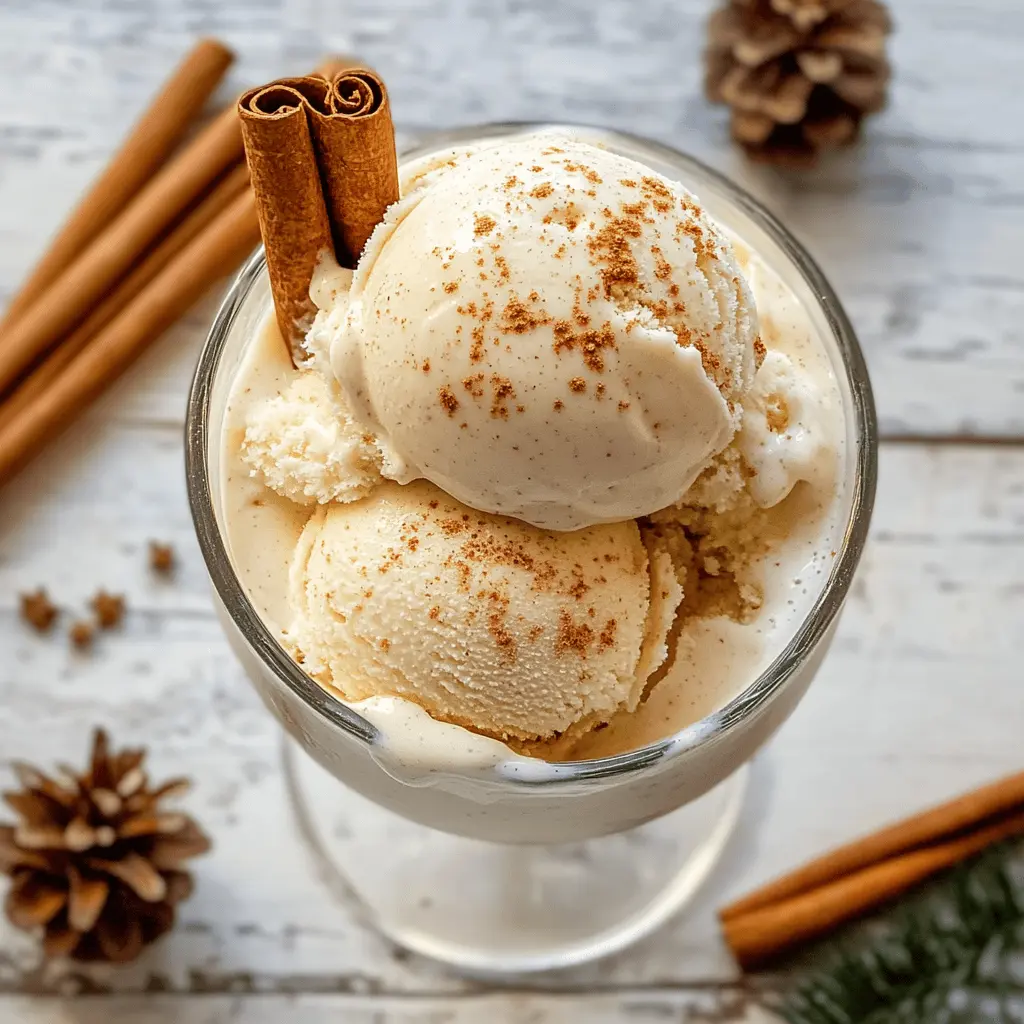
When you’re ready to enjoy your eggnog ice cream, scoop it into bowls or glasses. For that extra festive touch, sprinkle a little bit of nutmeg on top or add a cinnamon stick for garnish. It’s cozy, delicious, and perfect for those chilly holiday nights!
6. Enjoy!
Now, sit back, relax, and enjoy your homemade eggnog ice cream! Share it with family and friends, or keep it all to yourself (no judgment here!). Happy Holidays!
FAQ for Easy Homemade Eggnog Ice Cream
Can I Use Store-Bought Eggnog?
Absolutely! Store-bought eggnog is a convenient option and works perfectly for this recipe. Just make sure to choose a quality brand to ensure great flavor in your ice cream!
Can I Make This Recipe Without an Ice Cream Maker?
Yes, you can! If you don’t have an ice cream maker, pour the mixture into a shallow dish and freeze it. Stir the mixture every 30 minutes for 2-3 hours to break up ice crystals until you achieve a creamy consistency. This method will take a bit longer, but you’ll still enjoy delicious homemade ice cream!
How Long Can I Store Leftover Ice Cream?
This eggnog ice cream can be stored in an airtight container in the freezer for up to 2 weeks. To keep it fresh, cover the surface with plastic wrap before sealing the container. Just remember, the texture may change slightly when thawed.
Can I Add Other Flavors or Mix-Ins?
Definitely! You can customize your eggnog ice cream by adding mix-ins like crushed cookies, chocolate chips, or even a swirl of caramel. Just mix them in during the last few minutes of churning or gently fold them in before transferring to the container.