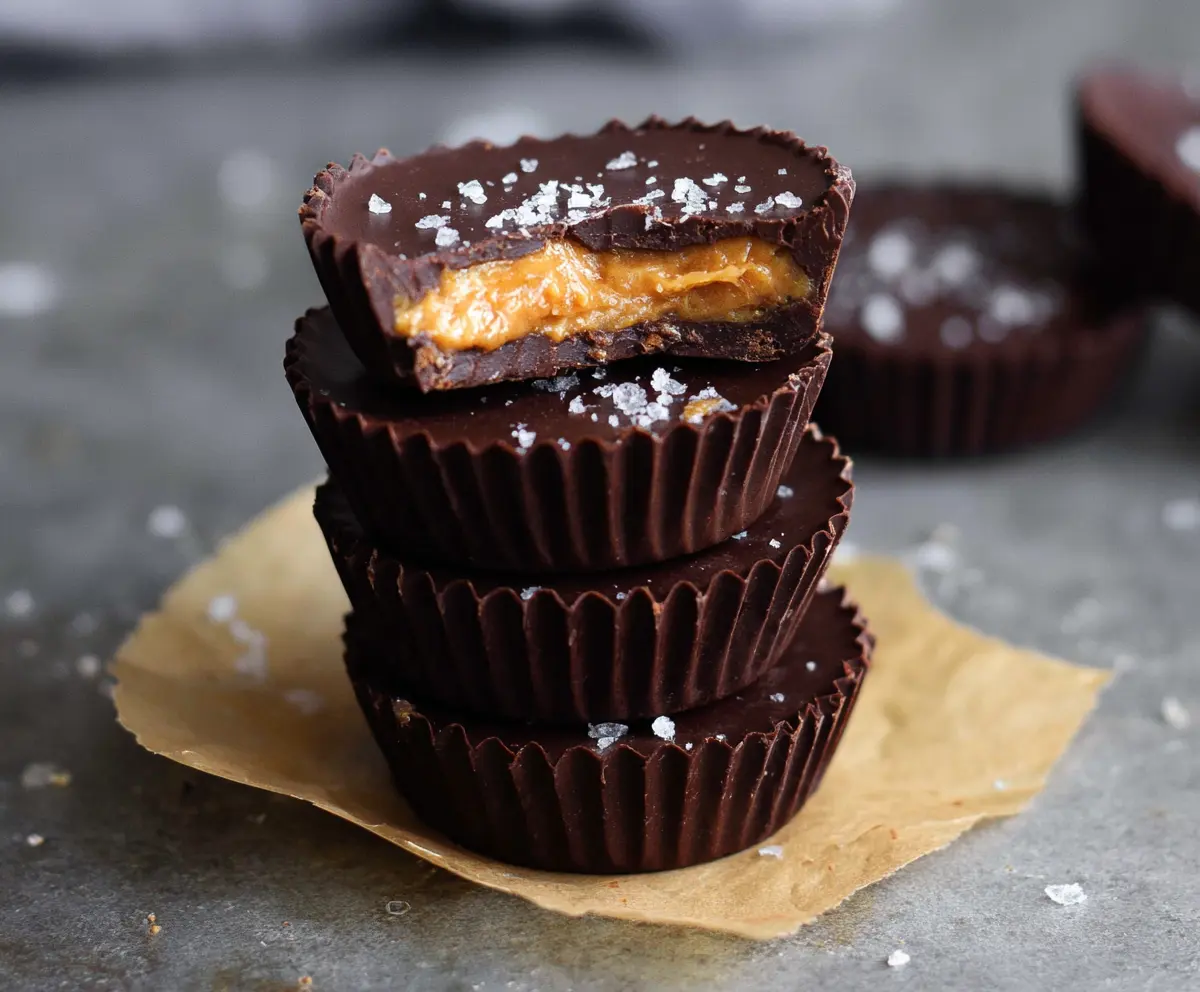
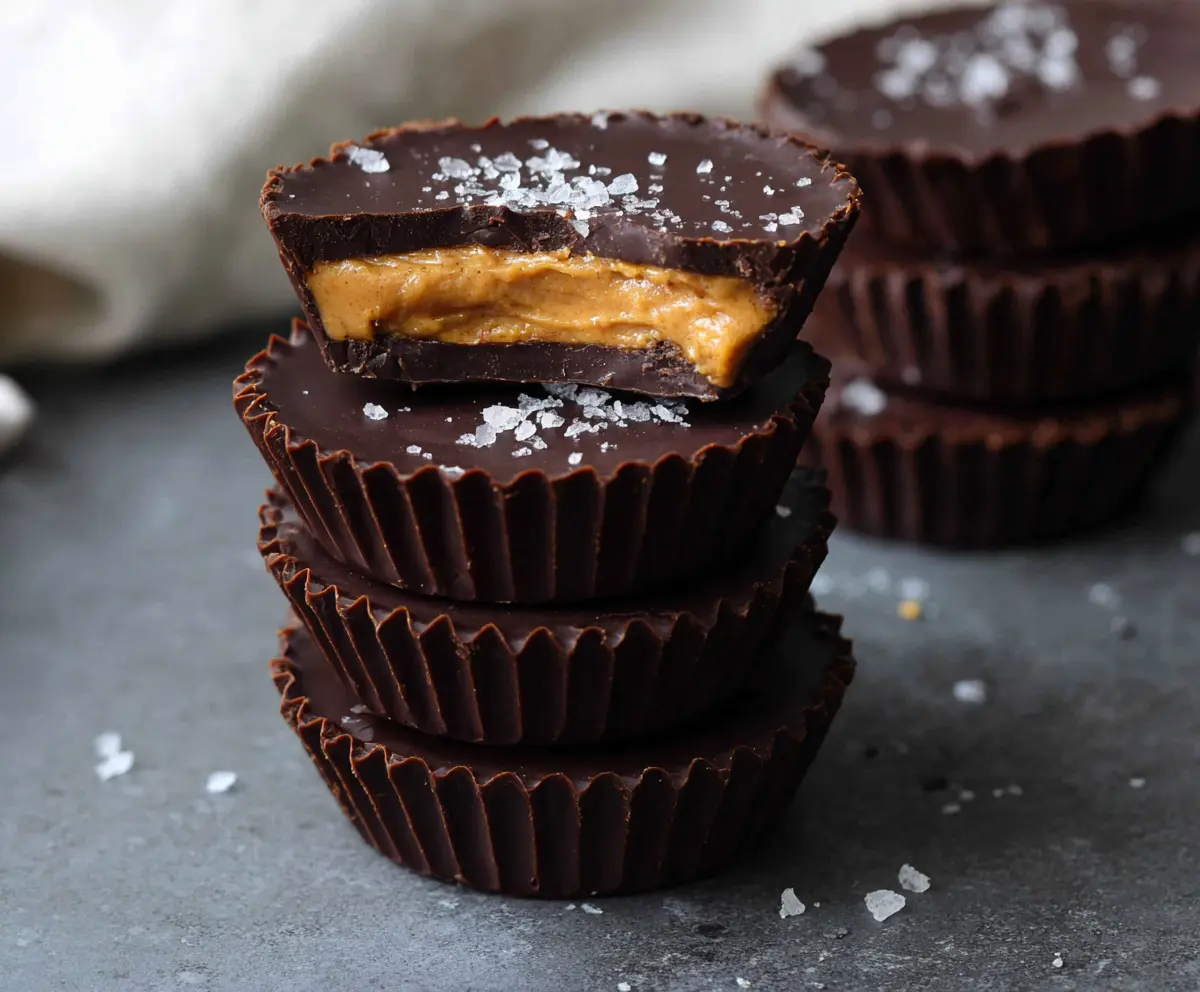
These dark chocolate peanut butter cups are a perfect treat for chocolate lovers! With rich dark chocolate and creamy peanut butter inside, every bite is a delight.
I love making these cups for a quick snack or dessert. They’re so easy to whip up, and they disappear fast—just like my resolve to eat healthy! 😄
Key Ingredients & Substitutions
Dark Chocolate: Aim for chocolate that contains at least 70% cacao for a richer flavor. If you’re looking for a dairy-free option, there are great vegan dark chocolates available. You can substitute with semi-sweet chocolate but note it will be sweeter.
Peanut Butter: I love using smooth, natural peanut butter for a creamy texture. If you need a nut-free option, sunflower seed butter works well! You can skip the powdered sugar if you’d like to keep it healthier.
Powdered Sugar: This is optional but helps sweeten the peanut butter. If you prefer natural sweetness, try a drizzle of honey or maple syrup, or skip it altogether for a less sweet filling.
Flaky Sea Salt: A sprinkle on top elevates the flavor. If you can’t find flaky sea salt, use regular salt but sparingly, as it can be more intense.
What’s the Best Way to Melt Chocolate Without Burning It?
Melt chocolate carefully to avoid scorching it. The microwave is convenient, but the double boiler is my favorite method. Here’s how to do it:
- For microwave: Place chocolate in a microwave-safe bowl in 20-second intervals. Stir in between until just melted.
- For double boiler: Place chocolate in a heat-proof bowl above simmering water, stirring until smooth.
- Always use low heat to ensure even melting and avoid burning.
Taking your time here ensures smooth, glossy chocolate for your cups! Enjoy making these delicious treats!
How to Make Dark Chocolate Peanut Butter Cups
Ingredients You’ll Need:
For the Peanut Butter Cups:
- 1 1/2 cups dark chocolate chips or chopped dark chocolate (70% cacao recommended)
- 3/4 cup smooth peanut butter (natural or creamy)
- 2 tbsp powdered sugar (optional, for sweetness and texture)
- 1/4 tsp salt (if peanut butter is unsalted)
- Flaky sea salt, for garnish (optional)
- Mini muffin liners or silicone molds
How Much Time Will You Need?
This recipe requires about 15-20 minutes of active prep time, plus an additional 30 minutes for chilling in the freezer. All together, you’re looking at roughly 45 minutes to enjoy these delicious treats!
Step-by-Step Instructions:
1. Prepare Your Muffin Tin:
Start by lining a mini muffin tin with paper liners or using silicone molds. This will make it easy to pop the cups out once they’re set. If you’re using paper liners, make sure they’re nice and snug in the tin!
2. Melt the Dark Chocolate:
Melt 1 cup of dark chocolate in a microwave-safe bowl. Heat it in 20-second bursts, stirring in between until it’s smooth and melted. Alternatively, you can melt it over a double boiler to maintain control over the heat.
3. Create the Chocolate Shell:
Once the chocolate is melted, spoon about 1 teaspoon into each liner. Use the back of a spoon to spread the chocolate up the sides slightly, forming a shell. Place the tray in the freezer for about 10 minutes to set the chocolate.
4. Make the Peanut Butter Filling:
In a separate bowl, combine the peanut butter, powdered sugar (if you choose to use it), and salt. Mix until everything is smooth and well blended. This filling is what makes these cups so delicious!
5. Add the Peanut Butter Filling:
After the chocolate has set, take the muffin tin out of the freezer. Place about 1 teaspoon of the peanut butter mixture into the center of each chocolate shell. Don’t worry about being too precise; just aim for a nice dollop!
6. Top with More Chocolate:
Melt the remaining 1/2 cup of dark chocolate the same way you did before. Once melted, spoon it over the peanut butter filling, covering it completely. You want to seal those tasty peanut butter centers with chocolate goodness.
7. Garnish with Sea Salt:
If you like a sweet and salty flavor, sprinkle a little flaky sea salt on top of each cup while the chocolate is still soft. It adds a delightful finish to your treats!
8. Chill to Set:
Return the muffin tin to the freezer and let the cups set for at least 20-30 minutes. This will firm them up nicely. It’s important to wait so they hold their shape when you remove them!
9. Enjoy Your Creation:
Once hardened, carefully remove the peanut butter cups from the liners. Store them in an airtight container in the refrigerator to keep them firm. You can enjoy them chilled or let them sit at room temperature for a softer texture!
This recipe yields about 12-15 peanut butter cups, depending on the size of your liners. Happy snacking!
Can I Use Milk Chocolate Instead of Dark Chocolate?
Yes, you can use milk chocolate if you prefer a sweeter taste! Just keep in mind that it may alter the flavor profile, making the cups less rich. You could also mix both dark and milk chocolate for a balanced flavor!
How Should I Store the Peanut Butter Cups?
Store any leftovers in an airtight container in the refrigerator for up to a week. This will keep them firm. If you want to keep them longer, you can freeze them for up to three months—just make sure to wrap them well to prevent freezer burn!
Can I Change the Nut Butter?
Absolutely! If you want to make these nut-free, try using sunflower seed butter or tahini as alternatives. Just ensure you check for allergies and choose a butter that suits your taste preferences!
What If I’m Allergic to Peanuts?
No worries! You can substitute peanut butter with any other nut or seed butter that you enjoy, such as almond butter, cashew butter, or sunflower seed butter. Just be sure to check for allergies related to those as well!