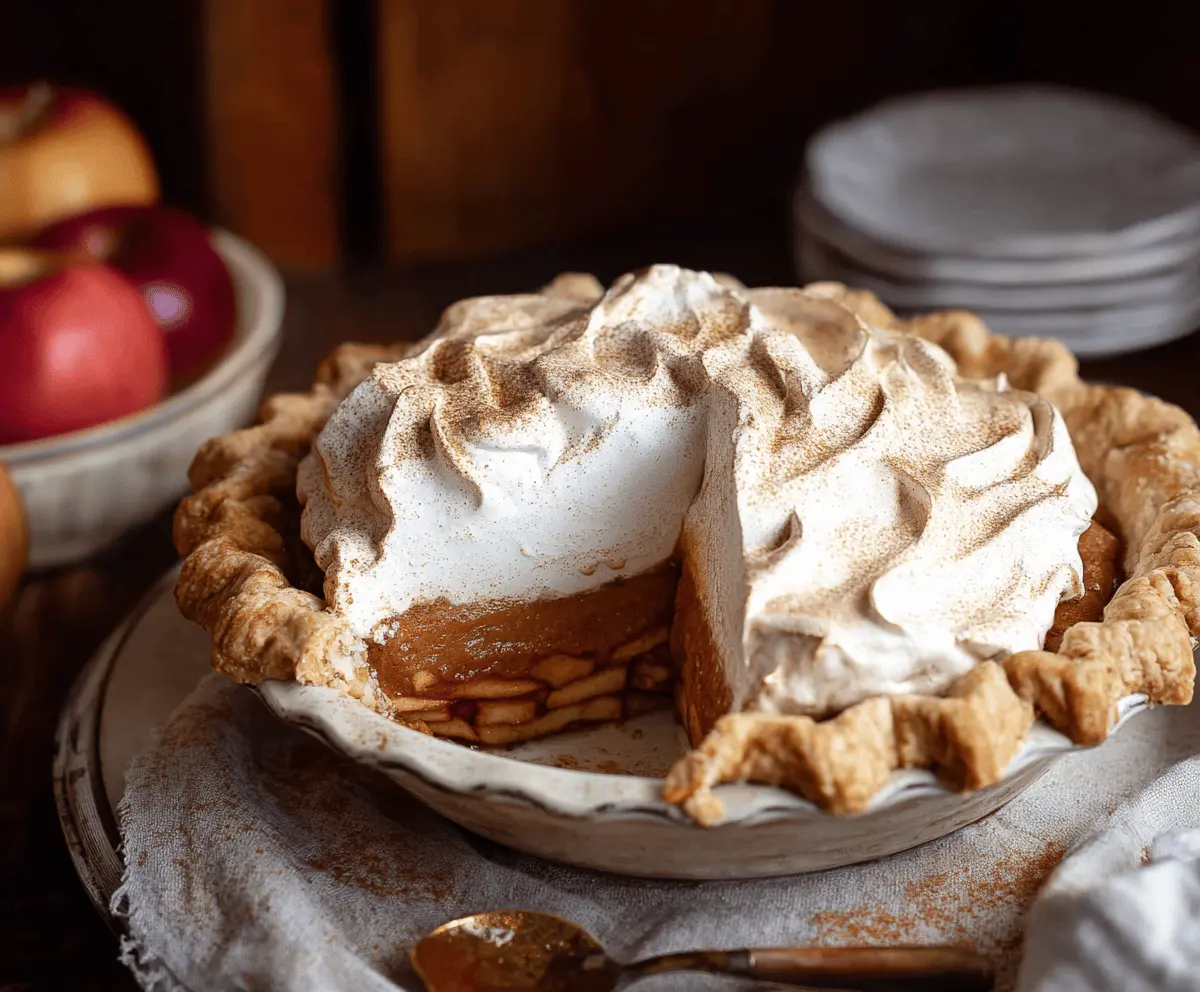
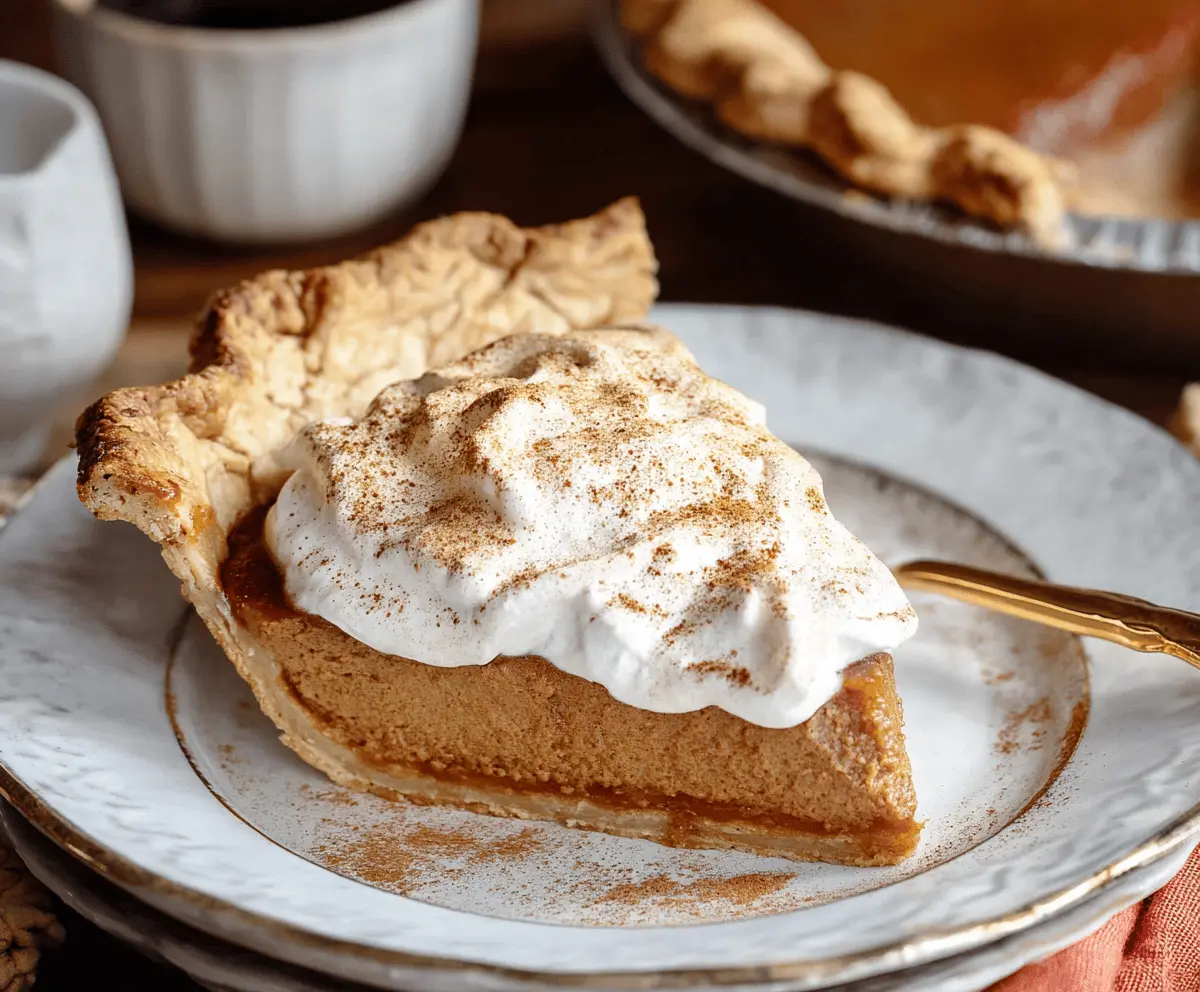
This Apple Butter Pie is a sweet treat that’s easy to make and oh-so-delicious! It features a smooth apple butter filling nestled in a flaky crust, topped with creamy cinnamon whipped cream.
The smell while it bakes is heavenly, and let’s be real, that whipped cream makes everything better! I love serving it warm with a dollop of cinnamon goodness on top—a cozy dessert for all!
Key Ingredients & Substitutions
All-Purpose Flour: This is essential for the pie crust. If gluten-free, you can use a gluten-free baking blend. I’ve used it with great results!
Unsalted Butter: Cold butter is crucial for a flaky crust. If you prefer a dairy-free option, try using coconut oil or a vegan butter substitute.
Apple Butter: Choose a good quality apple butter for rich flavor. If you’re looking for a healthier version, you can use homemade apple butter or even unsweetened applesauce, though that might change the texture a bit.
Granny Smith Apples: Their tartness balances the sweetness of the pie. You can swap in Honeycrisp or Fuji apples for a sweeter profile if you like your pie less tart.
Ground Spices: Cinnamon and nutmeg are classic choices, but feel free to mix it up with pumpkin pie spice for a unique twist!
How Do I Get a Flaky Pie Crust?
Making a flaky pie crust is all about handling the dough carefully. The key is keeping your ingredients cold and not overworking the dough. Here’s how to do it:
- Start with cold butter and chill your mixing bowl. This helps keep the fat from melting.
- Mix the butter into the flour until you see pea-sized pieces. This creates layers for flakiness!
- Add ice water gradually and mix until combined—small bits of butter should remain in the dough.
- Wrap the dough and chill it. This allows the gluten to relax, making it easier to roll out later.
With a little care, you’ll have a buttery crust that’s light and flaky! Trust me, your pie will shine with this crust.
Apple Butter Pie With Cinnamon Whipped Cream
Ingredients You’ll Need:
For The Pie Crust:
- 1 1/4 cups all-purpose flour
- 1/2 teaspoon salt
- 1/2 cup (1 stick) unsalted butter, cold and cut into cubes
- 3 to 5 tablespoons ice-cold water
For The Apple Butter Filling:
- 2 cups smooth apple butter
- 2 large Granny Smith apples, peeled, cored, and thinly sliced
- 1/3 cup granulated sugar
- 1 teaspoon ground cinnamon
- 1/4 teaspoon ground nutmeg
- 1 tablespoon all-purpose flour (optional, for thickening)
- 1 teaspoon lemon juice
For The Cinnamon Whipped Cream:
- 1 cup heavy whipping cream, chilled
- 2 tablespoons powdered sugar
- 1/2 teaspoon ground cinnamon
- 1/2 teaspoon vanilla extract
How Much Time Will You Need?
This delicious pie takes about 30 minutes of prep time and about 40 minutes to bake, plus cooling time. Make sure to set aside some time for chilling the crust! Overall, you can expect to spend about 1 hour and 15 minutes from start to finish, not including chilling time. It’s worth the wait!
Step-by-Step Instructions:
1. Prepare the Pie Crust:
In a medium-large bowl, whisk together the flour and salt. Add the cold butter cubes and use a pastry cutter or your fingertips to blend until the mixture resembles coarse crumbs. Gradually add ice water, one tablespoon at a time, mixing gently until the dough just comes together. Form the dough into a disc, wrap it in plastic wrap, and refrigerate for at least 30 minutes to chill and firm up.
2. Prepare the Filling:
In a bowl, combine the apple butter, granulated sugar, cinnamon, nutmeg, flour (if using), and lemon juice. Toss the sliced apples lightly in this mixture, making sure they are well coated.
3. Assemble the Pie:
Preheat the oven to 375°F (190°C). On a lightly floured surface, roll out the pie dough into a 12-inch circle. Transfer the dough into a 9-inch pie plate, trimming and crimping the edges as desired. Layer the bottom with the sliced apples, arranging them neatly. Pour the apple butter mixture evenly over the apples, pressing gently to ensure it fills in any gaps.
4. Bake the Pie:
Bake for about 40 minutes, or until the crust is golden and the filling is set. Once done, remove from the oven and allow the pie to cool completely on a wire rack. This helps the filling to firm up further for easy slicing!
5. Make the Cinnamon Whipped Cream:
In a chilled bowl, beat the heavy cream with a mixer on medium speed until it starts to thicken. Add the powdered sugar, cinnamon, and vanilla extract. Continue to whip until soft peaks form—don’t overwhip or it could turn to butter!
6. Serve:
Spoon or pipe the cinnamon whipped cream generously over the cooled pie. For a finishing touch, sprinkle a little ground cinnamon on top. Slice and enjoy a wonderful dessert that’s perfect for gatherings, holidays, or just because!
This recipe delivers a rich spiced apple butter filling with layers of tender apples, encased in a buttery flaky crust, topped with fluffy cinnamon-scented whipped cream. It’s an excellent choice for a fall dessert or anytime you crave apple goodness!
Can I Use Store-Bought Pie Crust Instead?
Absolutely! Using a store-bought pie crust can save time and effort. Just follow the package instructions for pre-baking if required, and then fill it with the apple butter and apple mixture before baking.
What If I Don’t Have Apple Butter?
No worries! You can make your own by cooking down apples with sugar and spices until thickened, or you can substitute with unsweetened applesauce mixed with a bit of sugar and cinnamon for similar flavor.
How Do I Store Leftovers?
Store leftover pie in the refrigerator, covered with plastic wrap or in an airtight container, for up to 3 days. You can enjoy it cold or gently warm it in the oven for a delicious treat!
Can I Freeze This Pie?
Yes! You can freeze the pie before baking it. Wrap it tightly in plastic wrap and aluminum foil. When ready to bake, thaw it in the refrigerator overnight and then bake as directed. If it’s already baked, you can freeze slices, but be aware the crust may lose some flakiness upon thawing.