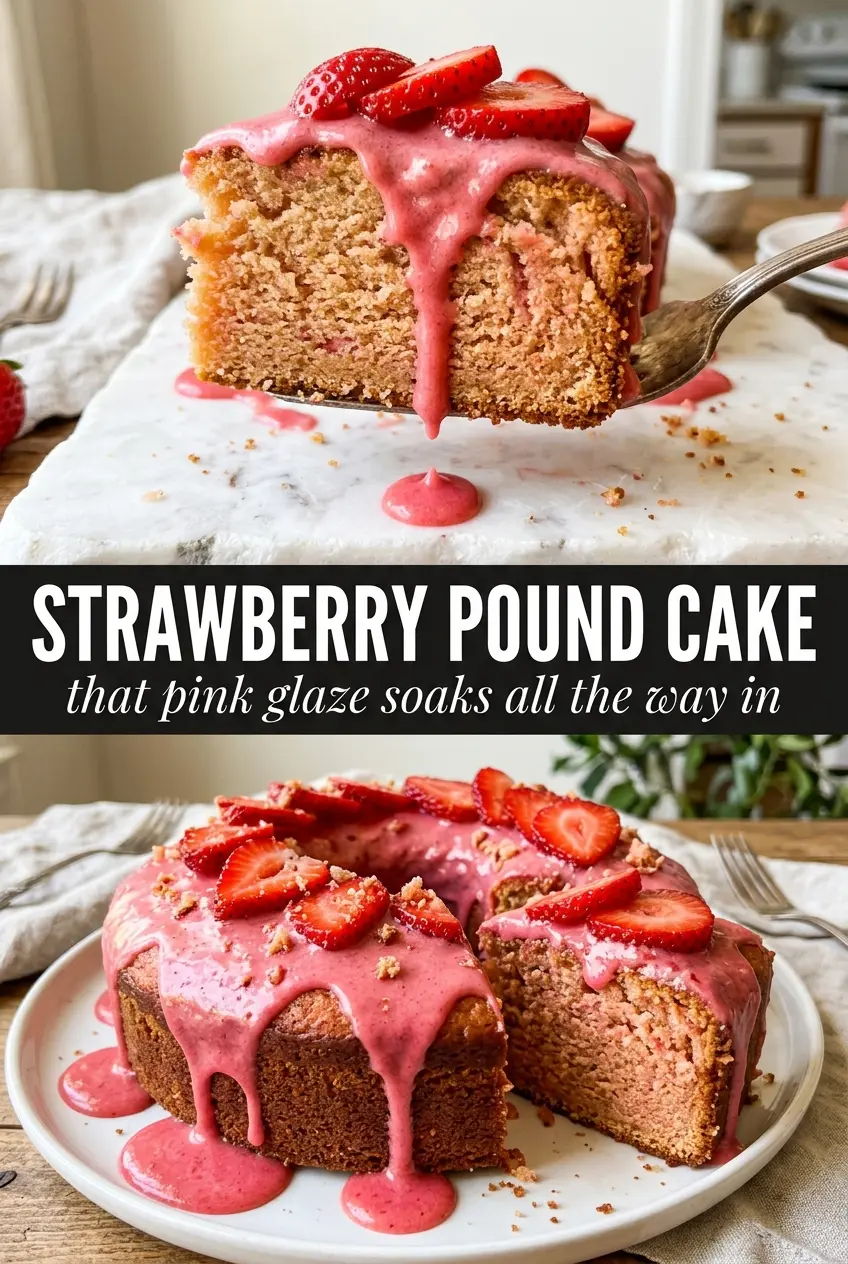
Strawberry pound cake lands in that sweet spot between sturdy and tender: a dense, buttery crumb that slices cleanly, with little pockets of fresh berry in every bite and a pink glaze that sets with just enough sheen to catch the light. It feels old-fashioned in the best way, the kind of cake that shows up looking polished without asking for much more than a bowl, a Bundt pan, and a little patience.
The texture comes from the classic pound-cake method, where butter and sugar are beaten until pale enough to hold air, then eggs are added one at a time so the batter stays smooth. Sour cream keeps the crumb moist without making it heavy, and the strawberries are folded in at the very end after being patted dry so they don’t bleed excess juice into the batter. That extra minute of prep is what keeps the cake from turning gummy around the fruit.
Below, I’ll walk through the part that matters most: how to keep the strawberries from sinking, how to get the loaf-like richness people expect from a pound cake, and how to make the glaze taste like fresh berries instead of just sweet sugar.
The cake stayed so moist for days, and the strawberries didn’t sink like they usually do. The glaze set up beautifully and made each slice look bakery-level.
Pin this strawberry pound cake for the next time you want a buttery Bundt cake with fresh berries and a glossy pink glaze.
The Trick That Keeps the Strawberries from Turning the Crumb Wet
The biggest mistake in strawberry pound cake is treating the fruit like an add-in that can take care of itself. Fresh strawberries carry a lot of juice, and once that juice starts leaking into a rich batter, you get streaks, soggy pockets, and berries that sink before the cake has enough structure to hold them up. Patting the diced strawberries dry matters more than most people think.
The other thing working in your favor here is the batter itself. A pound cake batter is thick enough to suspend fruit if you fold it in at the end and don’t beat it to death after the flour goes in. Overmixing tightens the crumb and makes the cake bake up dense in a bad way, not the tight, sliceable way you want from a Bundt cake.
- Dry the strawberries well — After dicing, blot them with paper towels until the surface juice is gone. That keeps the batter from thinning out.
- Fold, don’t stir hard — The last mix should be gentle. You want berry pieces distributed, not crushed into the batter.
- Use a well-greased Bundt pan — This cake is rich, and rich cakes stick if the pan isn’t fully coated in every ridge.
What Each Ingredient Is Actually Doing in This Cake
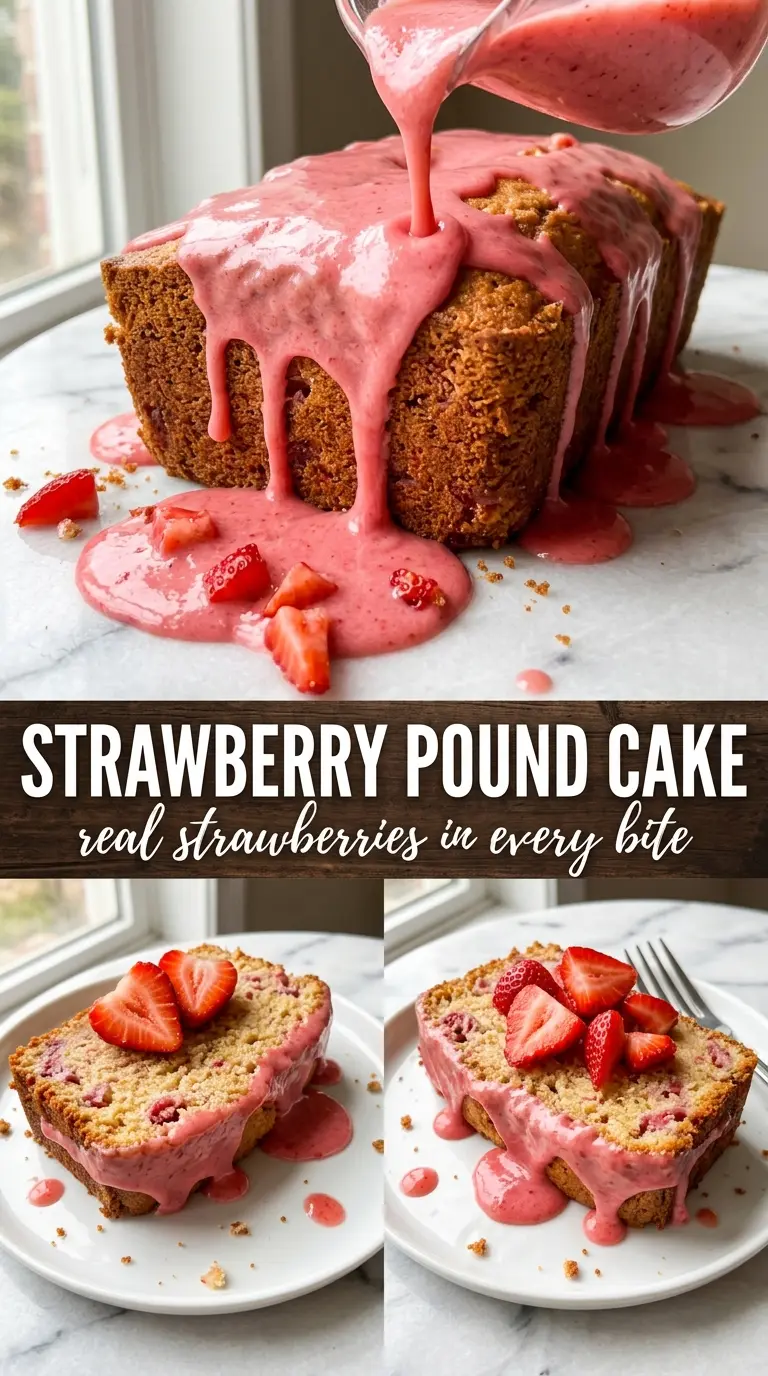
- Butter — This is the backbone of the flavor and the crumb. Softened butter creams properly; melted butter won’t trap air the same way, and the cake will lose that fine, velvety structure.
- Sugar — It’s not just for sweetness. Beating it into the butter creates tiny air pockets that help the cake rise and keeps the crumb tender.
- Sour cream — This is what keeps the cake plush without making it loose. Full-fat sour cream works best here because it adds moisture and a gentle tang that balances the strawberry glaze.
- Strawberry extract — Fresh berries alone don’t always read as strongly once baked. The extract gives the cake a clear strawberry flavor that survives the oven.
- Fresh strawberries — Use ripe but not mushy berries. Extra-soft berries break down too much, while firmer berries hold their shape and leave little juicy bites throughout the crumb.
- Strawberry juice or puree in the glaze — This makes the topping taste like fruit instead of powdered sugar tinted pink. If you only have puree, strain it for a smoother glaze.
Building the Batter So It Bakes Up Tall and Tender
Creaming the Butter and Sugar
Start with butter that gives slightly when pressed but still holds its shape. Beat it with the sugar until the mixture looks paler, fluffier, and almost whipped; that step is doing the lifting work for the whole cake. If you stop too soon, the cake can turn out heavy and a little greasy. Scrape the bowl well, because butter likes to cling to the sides and leave the center uneven.
Adding the Eggs One at a Time
Eggs should go in one by one so the batter stays smooth and emulsified. If you dump them in all at once, the batter can look curdled and separated before the flour is added. That isn’t always ruined, but it’s a warning sign that the fat and liquid aren’t blending properly. Give each egg a moment to disappear before adding the next.
Finishing with Flour, Sour Cream, and Fruit
Alternate the flour mixture and sour cream in a few additions, starting and ending with flour. That keeps the batter stable and prevents the dairy from breaking the butter mixture. Once the batter is combined, fold in the strawberries by hand and stop as soon as they’re distributed. Overmixing at this point can deflate the batter and bruise the berries, which turns the crumb streaky.
Baking and Glazing
Bake until the top is deep golden and a toothpick comes out clean or with a few moist crumbs, not wet batter. Let the cake cool in the pan for about 15 minutes before turning it out; if you invert it too early, it can tear, and if you wait too long, the sugars can glue it to the pan. The glaze goes on only after the cake is fully cool, or it will melt and disappear into the crust instead of sitting in those pretty ridges.
How to Adapt This Strawberry Pound Cake for Different Kitchens
Dairy-Free Version
Use a high-quality plant butter that’s meant for baking and swap the sour cream for a thick dairy-free yogurt. The cake will still bake up tender, but it may be a touch less rich and the crumb won’t have quite the same old-fashioned depth as the butter-and-sour-cream version.
Gluten-Free Adaptation
Use a 1:1 gluten-free baking flour that contains xanthan gum. The texture will be slightly more delicate, so let the cake cool fully before slicing or it can crumble at the edges.
No Strawberry Extract
You can skip it and bump up the strawberry flavor in the glaze with a little extra puree, but the cake itself will taste more like a classic pound cake with strawberries than a deeply strawberry-forward dessert. If you want the flavor to read clearly after baking, the extract is worth keeping.
Storage and Reheating
- Refrigerator: Store covered for up to 5 days. The crumb stays moist, but the glaze may soften after day one.
- Freezer: Freeze the unglazed cake tightly wrapped for up to 2 months. Add the glaze after thawing for the cleanest texture and best color.
- Reheating: Bring slices to room temperature, or warm them for a few seconds in the microwave. Too much heat makes the glaze run and can dry out the butter-rich crumb.