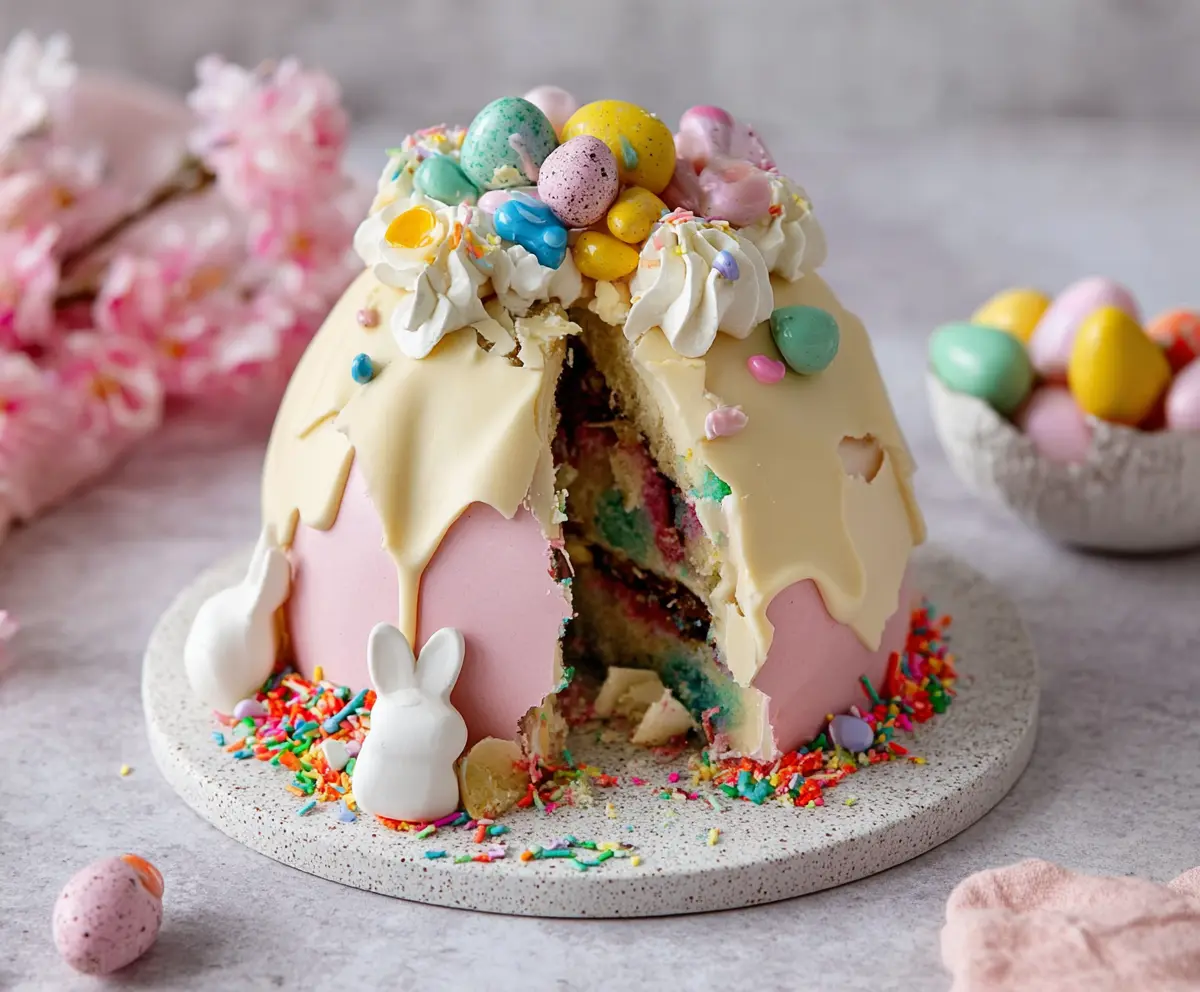
This Epic Easter Egg Smash Cake is a fun treat that’s perfect for the holiday! Covered in colorful frosting and packed with hidden candies inside, it promises a surprise with every slice.
Making this cake is such a blast! When you cut into it, the eggs spill out like a party. Kids and adults both love the flavors and the exciting reveal. It’s a cake that brings smiles all around!
Key Ingredients & Substitutions
All-Purpose Flour: This gives the cake its structure. If you’re gluten-free, substitute with a gluten-free flour blend. I sometimes use a mix of almond and coconut flour for a different flavor.
Unsalted Butter: It’s crucial for creaminess in both the cake and frosting. If you’re dairy-free, try using coconut oil or a vegan butter. I’ve found vegan butters sometimes have a more robust flavor!
Granulated Sugar: This adds sweetness and helps the cake rise. If you prefer, you can use coconut sugar for a slightly caramel-like taste or a sugar substitute like Stevia, but it may affect the texture.
Food Coloring: Get creative! Instead of artificial colors, consider using natural food dyes, like beet juice for red or turmeric for yellow. Your cake will still look vibrant and beautiful!
White Chocolate: It provides a sweet and creamy shell. If you like darker flavors, use semi-sweet chocolate instead. Just be prepared for a richer flavor!
How Can I Ensure My Cake Layers Are Perfectly Baked?
Baking cake layers can sometimes be tricky, but here are my tips to get it just right:
- Preheat your oven! A hot oven cooks the cake evenly.
- Grease and flour your cake pans well to avoid sticking.
- Do not open the oven door too early; it can cause cakes to sink.
- Use a toothpick to check for doneness; if it comes out clean or with crumbs (not gooey batter), the cake is ready!
What’s the Best Way to Make a Smooth Buttercream Frosting?
A smooth buttercream is key for that professional finish. Here’s how to achieve it:
- Start with room temperature butter. Cold butter can create lumps.
- Beat the butter for a few minutes until it’s light and fluffy.
- Add powdered sugar gradually to avoid a sugar cloud. Mix on low speed, then increase to medium to combine completely.
- If your frosting is too thick, add heavy cream or milk, one tablespoon at a time, until it’s creamy.
How Do I Achieve a Beautiful White Chocolate Shell?
The white chocolate shell is a fun finishing touch. Follow these steps for the best results:
- Melt white chocolate gently in short bursts to avoid burning it. Stir frequently!
- Mix in vegetable oil for a glossy finish that helps the chocolate pour smoothly.
- Let the melted chocolate cool slightly before pouring to prevent it from melting your frosting.
- Pour over the cake, allowing it to drip down the sides, creating that delightful “melted” look.
With these insights and tips, you’re all set to create a stunning and delicious Epic Easter Egg Smash Cake! Enjoy decorating and celebrating with this fun treat!
Epic Easter Egg Smash Cake
Ingredients You’ll Need:
For The Cake:
- 2 ¾ cups all-purpose flour
- 2 ½ tsp baking powder
- ½ tsp salt
- 1 cup unsalted butter, room temperature
- 1 ¾ cups granulated sugar
- 4 large eggs
- 1 tbsp vanilla extract
- 1 cup whole milk
- Food coloring (various colors, about 4-5 colors)
For The Buttercream Frosting:
- 1 cup unsalted butter, room temperature
- 4 cups powdered sugar, sifted
- 2-4 tbsp heavy cream or milk
- 2 tsp vanilla extract
- Pinch of salt
- Pink gel or liquid food coloring (for the outer layer)
For The White Chocolate Shell:
- 12 oz white chocolate melts or white chocolate bars, chopped
- 1 tbsp vegetable oil
Decorations and Fillings:
- Assorted candy Easter eggs (chocolate eggs, speckled candy eggs)
- Colorful sprinkles
- Whipped cream or piped buttercream rosettes
- Edible pastel-colored jelly beans or small candies
- Small meringue rabbits or marshmallow bunnies (for side decoration)
How Much Time Will You Need?
This delightful cake will take about 1 hour and 30 minutes in total. You’ll spend about 30 minutes preparing the batter and frosting, followed by 25-30 minutes baking time, and an additional 30 minutes for chilling and decorating. It’s well worth the bit of time for such a festive treat!
Step-by-Step Instructions:
1. Prepare the Cake Batter:
Start by preheating your oven to 350°F (175°C). Grease and flour three 6-inch round cake pans so the cakes don’t stick. In a bowl, mix the flour, baking powder, and salt together. In a large mixing bowl, beat the butter and sugar together until the mixture is light and fluffy. Then, add the eggs one by one, mixing well after each addition, and stir in the vanilla extract. Gradually add the flour mixture alternately with the milk to the butter mixture, starting and ending with the flour.
Divide the batter into 4 or 5 small bowls and add different food coloring to each bowl until you reach the desired vibrant colors. Spoon the colored batters randomly into each pan, swirling them lightly to create a lovely rainbow effect. Bake for about 25-30 minutes, or until a toothpick inserted into the center comes out clean. Once baked, let the cakes cool completely on wire racks.
2. Make the Buttercream Frosting:
In a clean bowl, beat the room temperature butter until smooth and creamy. Gradually add in the sifted powdered sugar while mixing to avoid a cloud of sugar. Then add the vanilla extract, salt, and a bit of heavy cream or milk until the frosting reaches a smooth and spreadable consistency. Don’t forget to tint a portion of the buttercream pink for decorating the outside of the cake!
3. Assemble the Cake:
Once the cakes are completely cool, level the tops if necessary. Place the first layer on your serving platter and spread a layer of buttercream on top. If you want a fun surprise, scatter some candies or mini chocolate eggs in this layer. Continue layering the remaining cakes, spreading buttercream in between each layer. After stacking all layers, cover the entire cake with a thin layer of pink buttercream (this is called a crumb coat) and chill it for about 30 minutes. After chilling, spread a smooth final layer of pink buttercream all over.
4. Prepare the White Chocolate Shell:
Next, melt the white chocolate along with vegetable oil in short bursts in the microwave or over a double boiler until it is smooth. Let it cool slightly, but still be in a pourable state. Carefully pour the melted white chocolate over the top of the chilled cake, allowing it to drip down the sides to create that delicious melted effect. Chill the cake briefly to set the chocolate.
5. Decorate the Cake:
Now comes the fun part! Pipe some whipped cream or buttercream rosettes on top of your cake. Arrange the assorted candy Easter eggs atop the cake, mixing colors and styles. Add a sprinkle of colorful sprinkles around the base of the cake. To make it even more festive, you can place small meringue rabbits or marshmallow bunnies around the cake base. Finally, toss some additional sprinkles and mini candies on top for that joyful Easter touch!
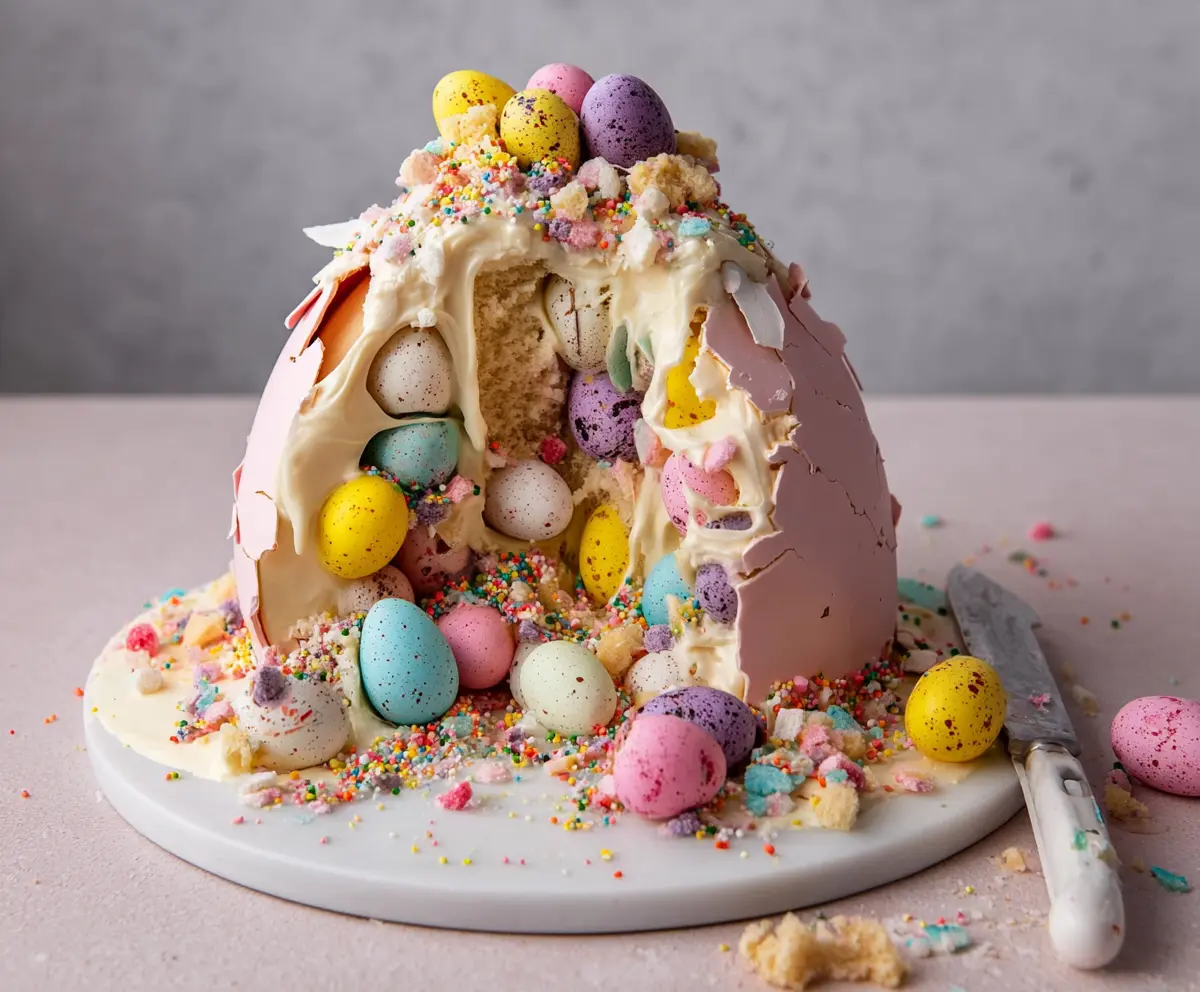
6. Serving:
When it’s time to serve, gently crack or smash the white chocolate shell to reveal the vibrant layers of the cake, along with the candy surprise inside. Cut into slices that perfectly showcase the beautiful layered cake and crunchy candy shell. Enjoy your festive and fun “Epic Easter Egg Smash Cake”!
Can I Use Gluten-Free Flour Instead?
Absolutely! You can substitute all-purpose flour with a gluten-free flour blend. Just make sure to choose one that includes xanthan gum for better texture and structure.
How Long Will Leftovers Stay Fresh?
Store any leftover cake in an airtight container in the refrigerator. It should stay fresh for up to 3-4 days. If you want to freeze it, wrap individual slices in plastic wrap and then aluminum foil to protect it from freezer burn; it can last up to 3 months!
What If I Don’t Have Heavy Cream for the Frosting?
No problem! You can use regular milk or even almond milk if you want a dairy-free option. Just add it a tablespoon at a time until you reach your desired frosting consistency.
Can I Make This Cake in Advance?
Yes! You can prepare the cake layers a day or two ahead. Just make sure to wrap them tightly in plastic wrap after they cool to keep them moist. Frost and decorate the cake just before serving for the best appearance.