
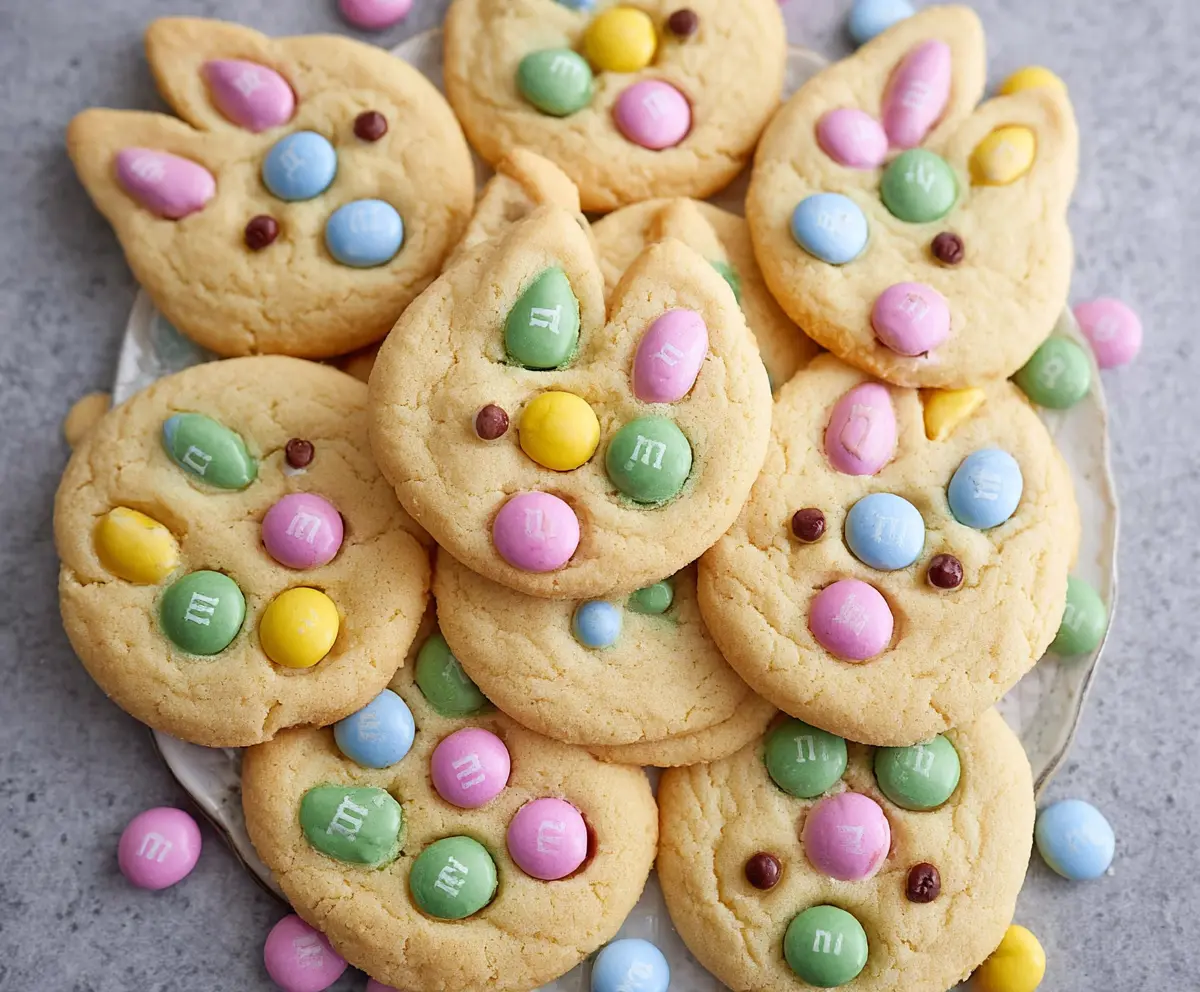
These fun Easter Bunny M&M’s Cookies are a cheerful treat for everyone! Soft and chewy cookies are packed with colorful M&M’s, making them perfect for the holiday.
Baking these cookies always puts me in a good mood. I love to munch on them while hiding Easter eggs—just don’t let the kids see my stash! 😂
These cookies are super easy to make. I mix the dough, toss in the M&M’s, and bake them up in no time. They always disappear fast, so I try to make extra!
Key Ingredients & Substitutions
Unsalted Butter: Softened butter gives cookies that rich, classic flavor. If you’re out, you can use margarine, but it might alter the taste slightly. I find that unsalted butter allows for better control of the saltiness in baked goods.
Granulated Sugar & Brown Sugar: Both add sweetness and moisture. If you’re looking for healthier options, try coconut sugar or maple syrup. Just remember to adjust other liquid ingredients. I prefer the blend of both sugars for that perfect chewiness!
All-Purpose Flour: Essential for structure. If you need a gluten-free option, almond flour or a gluten-free all-purpose blend works well. I’ve had great results with a 1:1 gluten-free flour mix.
M&M’s: These colorful candies are fantastic for decoration and taste. You can swap them out for chocolate chips or other festive candies if you’re looking for variety. Seasonal candy makes these cookies extra special!
Candy Eyeballs: These add a fun touch! If you can’t find them, mini chocolate chips or raisins make great eyes. Get creative and have fun with whatever you have on hand!
How Do I Get My Cookies to Look Like Bunnies?
Shaping these cookies into bunny faces is part of the fun! For the ears, you can pinch the dough or add small pieces shaped like ears. Here’s how to do it step-by-step:
- Once you scoop the dough, flatten it lightly into a disc. This gives the cookie a nice base.
- Pinch or manipulate a small section at the top to create the ears. Don’t stress if they’re not perfect; each bunny can have its own unique look!
- When it comes to the faces, press 3 M&M’s into the lower part for the cheeks and nose, and situate the candy eyeballs above them. Use colored sugar or melted candy to fill in the ears—it’s all about getting creative!
This process not only makes the cookies visually fun, but it also lets you involve kids or friends in the baking! Enjoy making your bunny creations!
How to Make Easter Bunny M&M’s Cookies!
Ingredients You’ll Need:
For the Cookie Dough:
- 1 cup (2 sticks) unsalted butter, softened
- 3/4 cup granulated sugar
- 3/4 cup brown sugar, packed
- 1 large egg
- 1 teaspoon vanilla extract
For the Dry Ingredients:
- 2 1/4 cups all-purpose flour
- 1/2 teaspoon baking soda
- 1/2 teaspoon salt
For the Bunny Decorations:
- Assorted colorful M&M’s candies (for bunny face decorations)
- Candy eyeballs (small, round edible eyes)
- Pink or purple colored sugar or melted candy melts (for coloring ears)
How Much Time Will You Need?
This cookie recipe will take approximately 15 minutes for preparation and around 10 minutes for baking. Allow some extra time for the cookies to cool before serving. In total, you’re looking at about 30-40 minutes to create these delightful treats.
Step-by-Step Instructions:
1. Preheat the Oven:
Start by preheating your oven to 350°F (177°C). While it’s heating, line a baking sheet with parchment paper to prevent sticking and make cleanup a breeze.
2. Make the Cookie Dough:
In a large mixing bowl, cream together the softened butter, granulated sugar, and brown sugar. Use a mixer or a sturdy spoon until the mixture is light and fluffy—this should take about 2-3 minutes. Next, beat in the egg and vanilla extract until they are well combined.
3. Combine Dry Ingredients:
In another bowl, whisk together the flour, baking soda, and salt. This helps to evenly distribute the leavening agent and salt throughout the flour.
4. Mix Everything Together:
Gradually add the dry ingredients to the wet ingredients, mixing until just combined to form your cookie dough. Avoid overmixing to keep your cookies soft.
5. Shape the Cookies:
Using a cookie scoop or tablespoon, take about 2 tablespoons of dough and shape each piece into a round flattened disc. To form the bunny ears, pinch or shape a small section of dough on the top of each disc into ears, or you can attach small ear-shaped pieces of dough on top.
6. Decorate the Bunny Faces:
Place the shaped dough onto the prepared baking sheet. Gently press 3 colorful M&M’s in the lower center of each cookie to represent the bunny’s cheeks and nose. Then, press two candy eyeballs above the M&M’s to create bunny eyes. For added detail, you can use smaller M&M’s or sprinkle the ears with pink or purple colored sugar or melted candy.
7. Bake the Cookies:
Pop the cookies in the preheated oven and bake for about 9-11 minutes. Look for lightly golden edges while keeping the center soft for that perfect chewy texture.
8. Cool and Serve:
Once baked, remove the cookies from the oven and let them cool on the baking sheet for 5 minutes. Afterward, transfer them to a wire rack to cool completely. Once cooled, serve these fun, colorful Easter Bunny M&M’s Cookies and enjoy!
Can I Use Different Types of Sugar?
Absolutely! You can substitute granulated sugar with coconut sugar or cane sugar for a healthier option. However, keep in mind that the texture and sweetness might vary slightly. Brown sugar adds moisture and chewiness, so it’s best to retain it for a traditional flavor!
What If I Don’t Have Candy Eyeballs?
No worries! If you can’t find candy eyeballs, mini chocolate chips or small round candies like Raisins work well too. Just press them on top to create those adorable bunny eyes!
Can I Make the Dough Ahead of Time?
Yes! You can prepare the cookie dough ahead of time and store it in the fridge for up to 48 hours. Just wrap it well in plastic wrap or in an airtight container. When you’re ready to bake, simply scoop and shape the cookies before baking!
How Should I Store Leftover Cookies?
Store your leftover cookies in an airtight container at room temperature for up to 5 days. If you want to keep them fresh longer, you can freeze them for up to 3 months. Just remember to thaw them at room temperature before enjoying!