
These Sweet Thai Chili Ramen Noodles are a fun and tasty treat! With just the right amount of sweetness and a hint of spice, they make the perfect quick meal or snack.
I love how easy these noodles are to whip up after a long day. Just boil, mix in the sauce, and you’re ready to enjoy a bowl of yum! 🍜
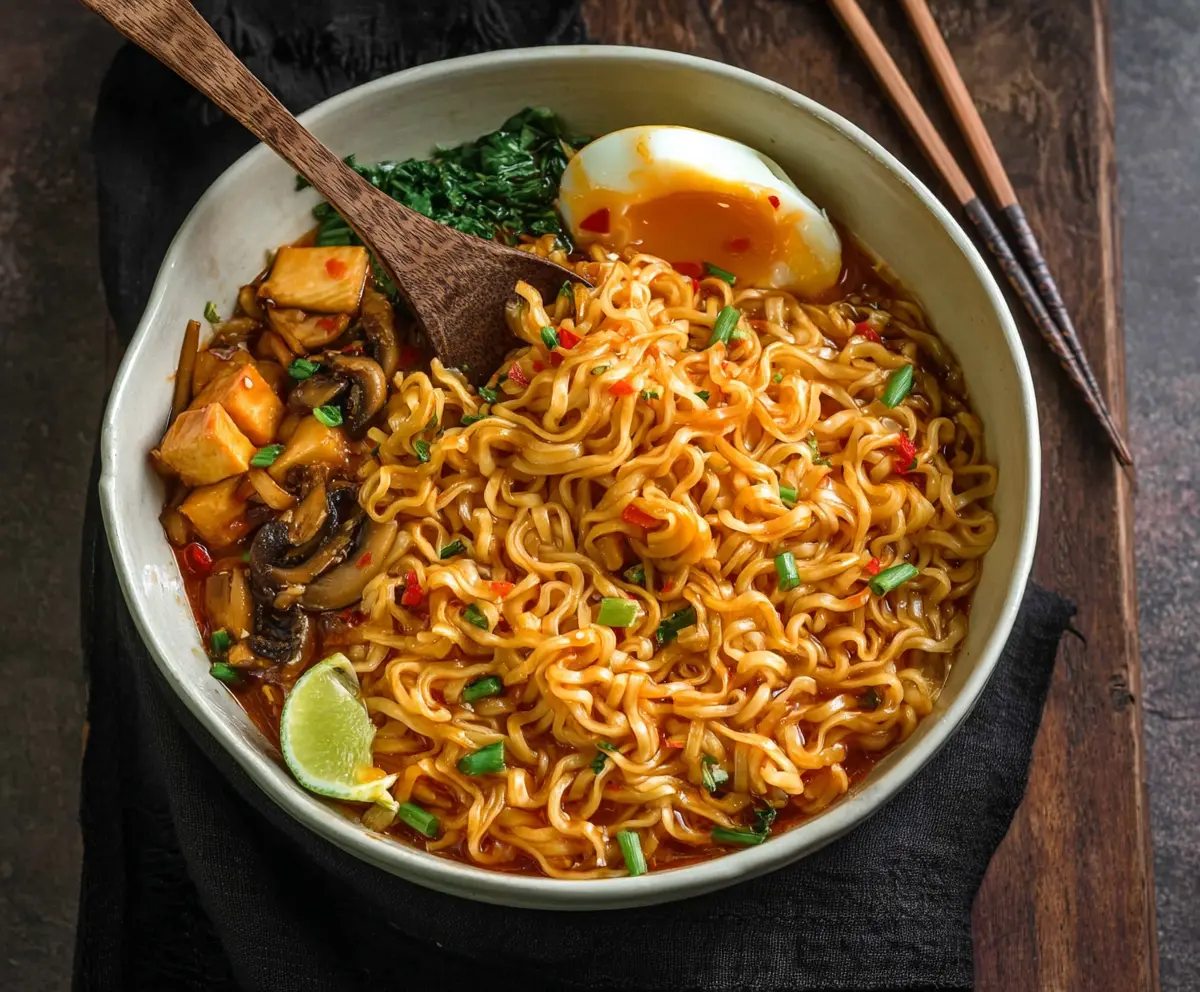
Key Ingredients & Substitutions
Instant Ramen Noodles: The backbone of this dish. I prefer using plain instant ramen without the seasoning packet for a clean base. If you’re gluten-sensitive, try rice noodles or spiralized zucchini!
Tofu or Chicken: If you’re going for vegetarian, stick with tofu. Firm tofu holds up well, and I love pan-frying it for some extra texture. For meat lovers, diced chicken can add flavor. You could also use shrimp or cooked pork as alternatives.
Sweet Thai Chili Sauce: This sauce really brings the sweet and spicy flavor. If you can’t find it, a mix of regular chili sauce and a bit of sugar works in a pinch. I sometimes mix in a bit of ketchup too for a twist!
Spinach or Kale: Fresh greens add color and nutrition. I often use spinach because it wilts quickly and blends in nicely with the noodles. If you want a crunch, consider Swiss chard or bok choy as substitutes.
Egg: A soft-boiled or poached egg adds richness. If you’re avoiding eggs, add some additional tofu or a sprinkle of sesame seeds instead for flavor and texture.
How Do I Get My Garlic to Be Fragrant Without Burning It?
Sautéing garlic can be tricky; it turns bitter if cooked too long. Here’s how to do it perfectly:
- Always use medium heat—this prevents burning.
- Add minced garlic to a pan with hot oil. Stir it quickly for about 30 seconds until fragrant.
- If it starts to brown too quickly, lower your heat immediately.
Getting that garlic just right makes all the difference in this dish!
How to Make Sweet Thai Chili Ramen Noodles
Ingredients You’ll Need:
Main Ingredients:
- 1 package instant ramen noodles (discard seasoning packet)
- 1 tablespoon vegetable oil
- 2 cloves garlic, minced
- ½ cup diced tofu or cooked chicken pieces (optional)
- 2 cups chicken or vegetable broth
Flavorful Additions:
- 1 tablespoon soy sauce
- 2 tablespoons sweet Thai chili sauce
- 1 teaspoon chili garlic sauce (adjust to taste)
- 1 teaspoon rice vinegar
- 1 teaspoon brown sugar or honey
Fresh Ingredients:
- 1 cup chopped spinach or kale
- ½ cup diced firm tofu or cooked potato cubes
- 1 egg (soft boiled or poached)
- 2 green onions, chopped
- Red pepper flakes (optional garnish)
How Much Time Will You Need?
This delicious recipe will take about 20 minutes in total. You’ll need about 5 minutes for prep and another 15 minutes for cooking. It’s a quick and satisfying meal that’s perfect for busy days!
Step-by-Step Instructions:
1. Sautéing the Garlic:
Begin by heating the vegetable oil in a medium pot over medium heat. Once the oil is hot, add the minced garlic. Sauté the garlic for about 30 seconds, or until it becomes fragrant. Be careful not to burn it—keep stirring!
2. Adding Protein:
If you’re using tofu or chicken, it’s time to add it now. Toss in the diced tofu or cooked chicken pieces and cook them in the pot until they are lightly browned. This should take about 3-4 minutes.
3. Making the Broth:
Next, pour in the chicken or vegetable broth and bring the mixture to a gentle boil. This is where all the flavors start to meld together!
4. Adding Sauces and Seasonings:
Stir in the soy sauce, sweet Thai chili sauce, chili garlic sauce, rice vinegar, and brown sugar. Mix everything really well until the sugar dissolves into the broth. This combination is the heart of your dish!
5. Cooking Tofu or Potatoes:
Add the diced tofu or potato cubes to the pot. Let them cook for about 5 minutes, or until they are tender and infused with those yummy flavors.
6. Cooking the Noodles:
Now it’s time for the star of the show—add the ramen noodles to the pot. Cook them according to the package instructions, which usually takes around 3 minutes.
7. Adding Greens:
In the final minute of cooking, toss in the chopped spinach or kale. Stir it around and let it wilt down—it’ll add color and nutrition to your ramen!
8. Preparing the Egg:
If you’re having a soft boiled or poached egg, this is a good time to prepare it. Soft-boil the egg in a separate pot or poach it until the yolk is runny, if that’s what you prefer.
9. Serving Up the Ramen:
Once everything is cooked, ladle the ramen noodles and broth into a bowl. Make sure to scoop up those tasty veggies and protein!
10. Topping It Off:
Gently place the soft boiled or poached egg on top of the noodles. It looks beautiful and will add creaminess to the dish!
11. Garnishing:
Sprinkle the chopped green onions over your bowl, and if you like a bit of spice, don’t forget the red pepper flakes!
12. Enjoy Your Meal!
Your sweet and spicy Thai chili ramen noodles are ready to be devoured! Serve hot and enjoy every flavorful bite!
Can I Use a Different Type of Noodle?
Absolutely! If you prefer a gluten-free option, rice noodles work wonderfully. You could also try whole grain or egg noodles if you want a different texture. Just adjust the cooking time based on the type of noodles you use.
How Can I Customize the Protein?
You can easily swap the tofu for any protein you like! Grilled shrimp, sliced beef, or even edamame for a plant-based option work well. Just make sure to cook them properly for food safety.
What If I Don’t Have Sweet Thai Chili Sauce?
No problem! You can mix regular chili sauce with a little sugar, or use a combination of sriracha and honey to mimic the sweet and spicy flavor.
How Should I Store Leftovers?
Store any leftovers in an airtight container in the fridge for up to three days. When reheating, add a splash of broth or water to loosen up the noodles, as they may absorb liquid while sitting.