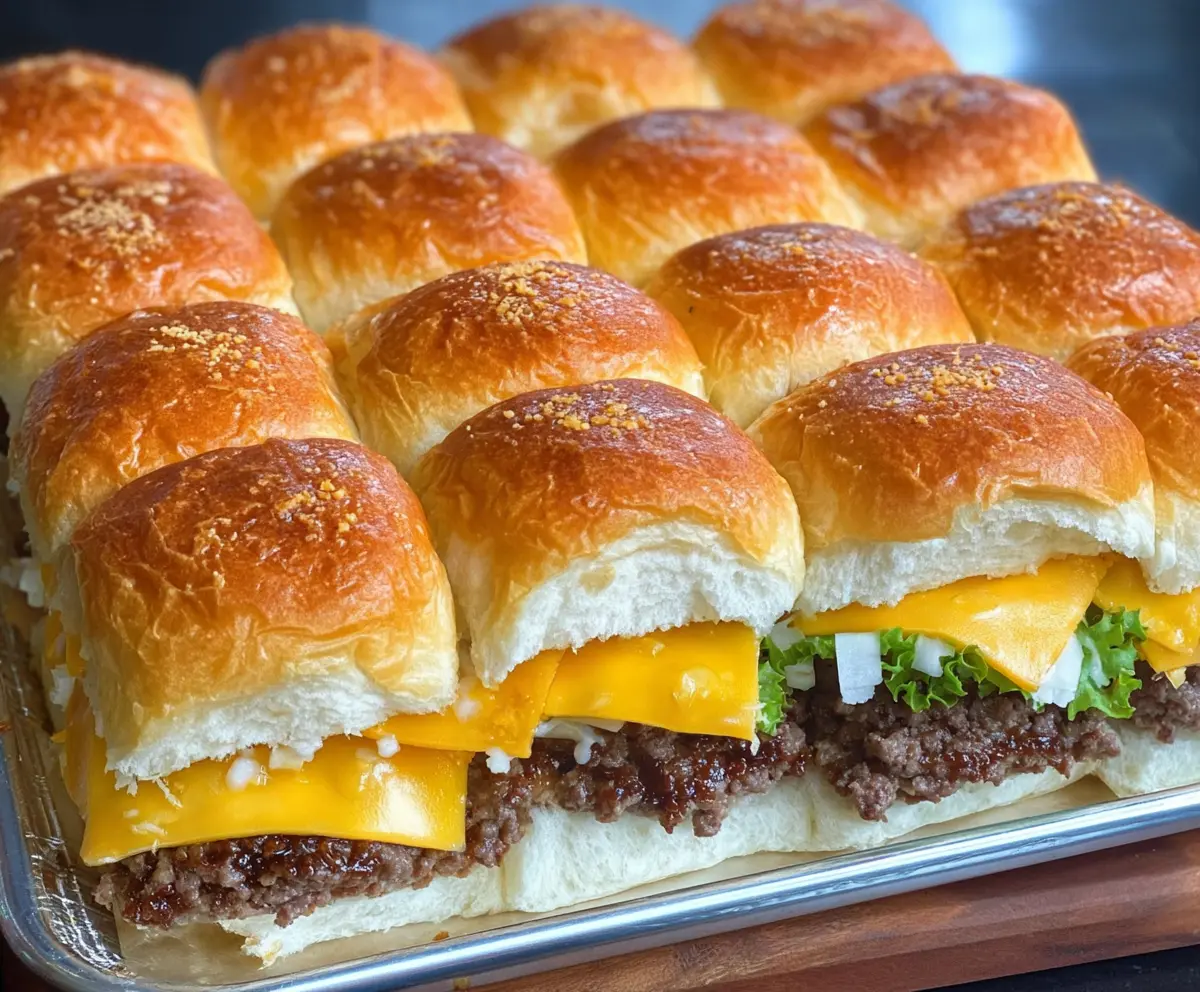
These cheeseburger sliders are a fun twist on the classic burger, using soft and sweet Hawaiian rolls! Each little bite is packed with juicy beef and melted cheese, making them a crowd favorite.
Who can resist these tasty little guys? I love how easy they are to make—just assemble, bake, and they’re ready to go! Perfect for parties or a cozy night in! 🍔✨
Key Ingredients & Substitutions
Hawaiian Rolls: These rolls add both sweetness and softness to the sliders. If you can’t find them, you can use any soft, sweet bread like dinner rolls or brioche. Just remember that you want something that can hold the fillings without falling apart!
Ground Beef: Ground beef is the classic choice for sliders. If you’re looking for a healthier option, try ground turkey or chicken. For a vegetarian version, you can use black beans or a plant-based meat substitute that mimics beef.
Cheddar Cheese: I love using sharp cheddar for extra flavor, but feel free to mix it up! Provolone, Monterey Jack, or even pepper jack can add a fun twist. Just make sure any cheese melts nicely!
Onion: Finely chopped onions give a nice crunch and flavor. If you prefer a milder taste, use green onions or skip them altogether. You can also caramelize regular onions for a sweeter flavor.
How Do I Ensure My Sliders Are Juicy and Flavorful?
To keep your sliders juicy, follow these simple tips. Mixing the beef with Worcestershire sauce and seasonings adds moisture and depth to the flavor.
- Don’t overwork the ground beef; this helps retain its tenderness. Mix just enough to combine.
- Keep an eye on the baking time so you don’t dry out the beef! Aim for an internal temperature of 160°F (71°C).
- Let the cheese melt on the hot beef before adding toppings for that gooey goodness!
- Brushing the butter-garlic mixture on top adds flavor and helps the rolls become golden and crispy.
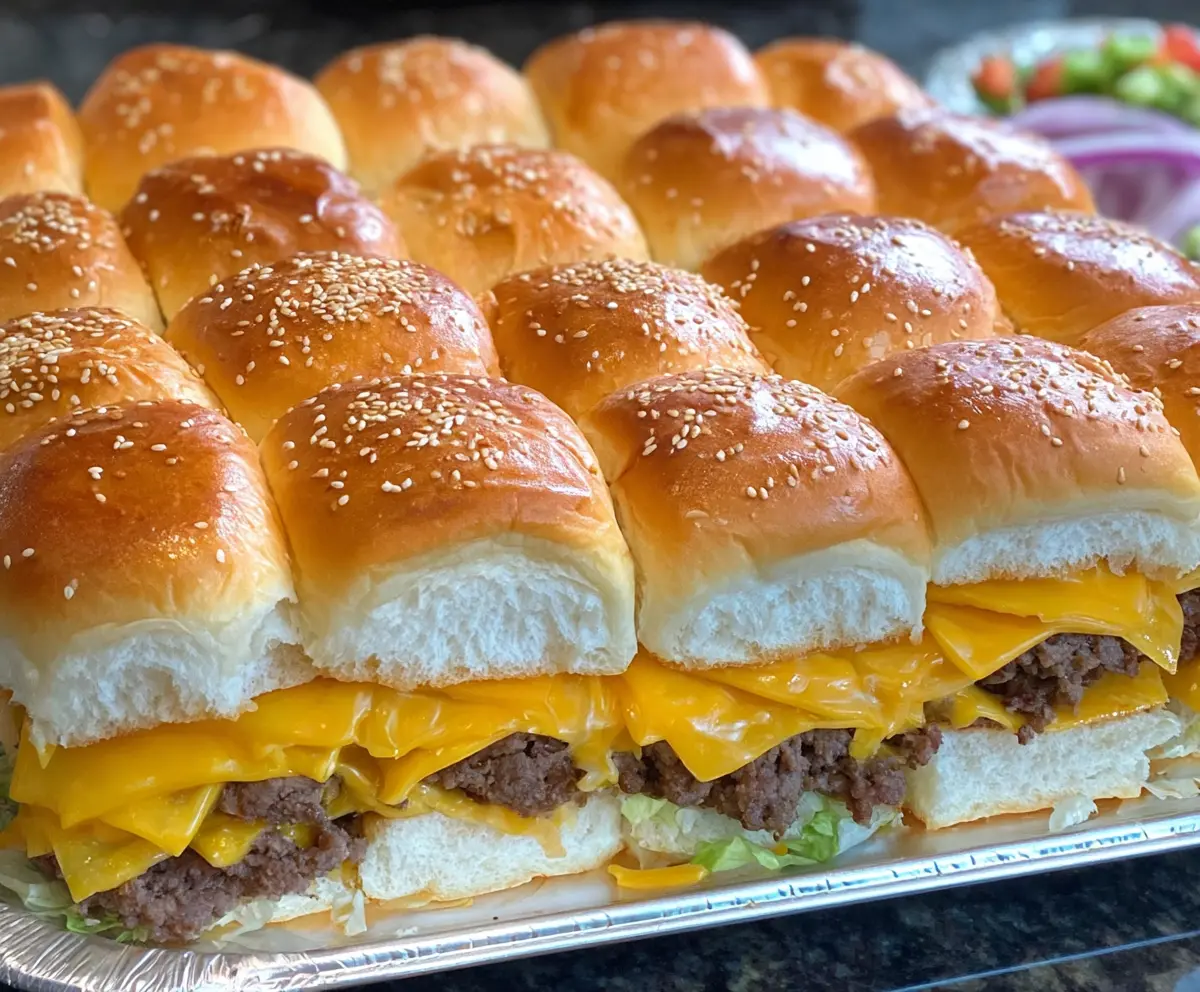
Cheeseburger Sliders With Hawaiian Rolls
Ingredients You’ll Need:
For the Sliders:
- 12 Hawaiian rolls (King’s Hawaiian or similar)
- 1 lb ground beef
- 12 slices cheddar cheese
- 1 small onion, finely chopped
- 6 leaves lettuce, torn or chopped to fit sliders
- 2 tablespoons Worcestershire sauce
- 1 teaspoon garlic powder
- Salt and black pepper, to taste
For the Butter Topping:
- 2 tablespoons butter, melted
- 1 teaspoon garlic powder (for butter topping)
Optional Condiments:
- Ketchup
- Mustard
- Pickles
- Other burger condiments as desired
How Much Time Will You Need?
This recipe takes about 10 minutes to prepare and approximately 30 minutes to cook. With a total of around 40 minutes, you’ll have a delicious batch of sliders ready to enjoy!
Step-by-Step Instructions:
1. Preheat Your Oven:
Start by preheating your oven to 350°F (175°C). This ensures that your sliders bake evenly and come out perfectly melty and tasty.
2. Prepare the Rolls:
Take the Hawaiian rolls and carefully slice them in half horizontally, keeping the whole tray intact. This will create a bottom layer and a top layer, making assembly a breeze!
3. Mix The Beef:
In a mixing bowl, combine the ground beef, Worcestershire sauce, garlic powder, salt, and pepper. Mix everything together gently, being careful not to overwork the meat, which can make it tough.
4. Shape the Patty:
Spread the meat mixture evenly onto the bottom half of the Hawaiian rolls. Shape it into a large, flat patty that matches the size of the roll tray. This step helps ensure every slider has a great meat-to-roll ratio!
5. Bake the Meat:
Place the meat layer in the oven and bake for about 15-20 minutes. You want it to be cooked through and no longer pink in the center.
6. Add the Cheese:
Once the meat is cooked, take it out of the oven and lay the cheddar cheese slices evenly over the hot beef. Let them sit for a minute to melt slightly—that gooey cheese is what everyone loves!
7. Layer the Toppings:
Sprinkle the chopped onions on top of the melted cheese, followed by the lettuce. This fresh crunch will complement the warmth of the sliders beautifully.
8. Put the Top Back On:
Carefully place the top half of the Hawaiian rolls back onto the sliders, creating little sandwich-like bites!
9. Brush with Butter:
In a small bowl, mix the melted butter with 1 teaspoon of garlic powder. Brush this mixture generously over the top of the rolls. This will add a beautiful color and flavor to the crust.
10. Final Bake:
Return the assembled sliders to the oven and bake for another 10 minutes. You want the tops to be nicely browned and everything heated through.
11. Serve and Enjoy:
Once baked, take them out of the oven, cut between the sliders to separate them, and serve warm. Add any extra condiments you like for a personal touch!
Enjoy your sweet and savory cheeseburger sliders with the perfect balance of juicy beef and soft Hawaiian rolls!
Can I Use Ground Turkey Instead of Beef?
Absolutely! Ground turkey is a great lean alternative. Just be aware that it may need a bit more seasoning since it has a milder flavor than beef. You can keep the Worcestershire sauce and add additional herbs or spices if desired.
Can I Make These Sliders Ahead of Time?
Yes, you can prepare the sliders in advance! Assemble everything up to the final baking step, cover tightly, and refrigerate for up to 24 hours. When you’re ready to serve, just pop them in the oven and bake until heated through and bubbly!
How Do I Store Leftovers?
Store any leftover sliders in an airtight container in the fridge for up to 3 days. To reheat, you can place them in the oven at 350°F (175°C) for about 10-15 minutes until warmed through. Wrapping them in foil helps keep them from drying out.
Can I Customize the Toppings?
Of course! Feel free to get creative with toppings. You can add sliced tomatoes, pickles, or even different cheeses. Experimenting with different toppings is a fun way to make each batch unique!