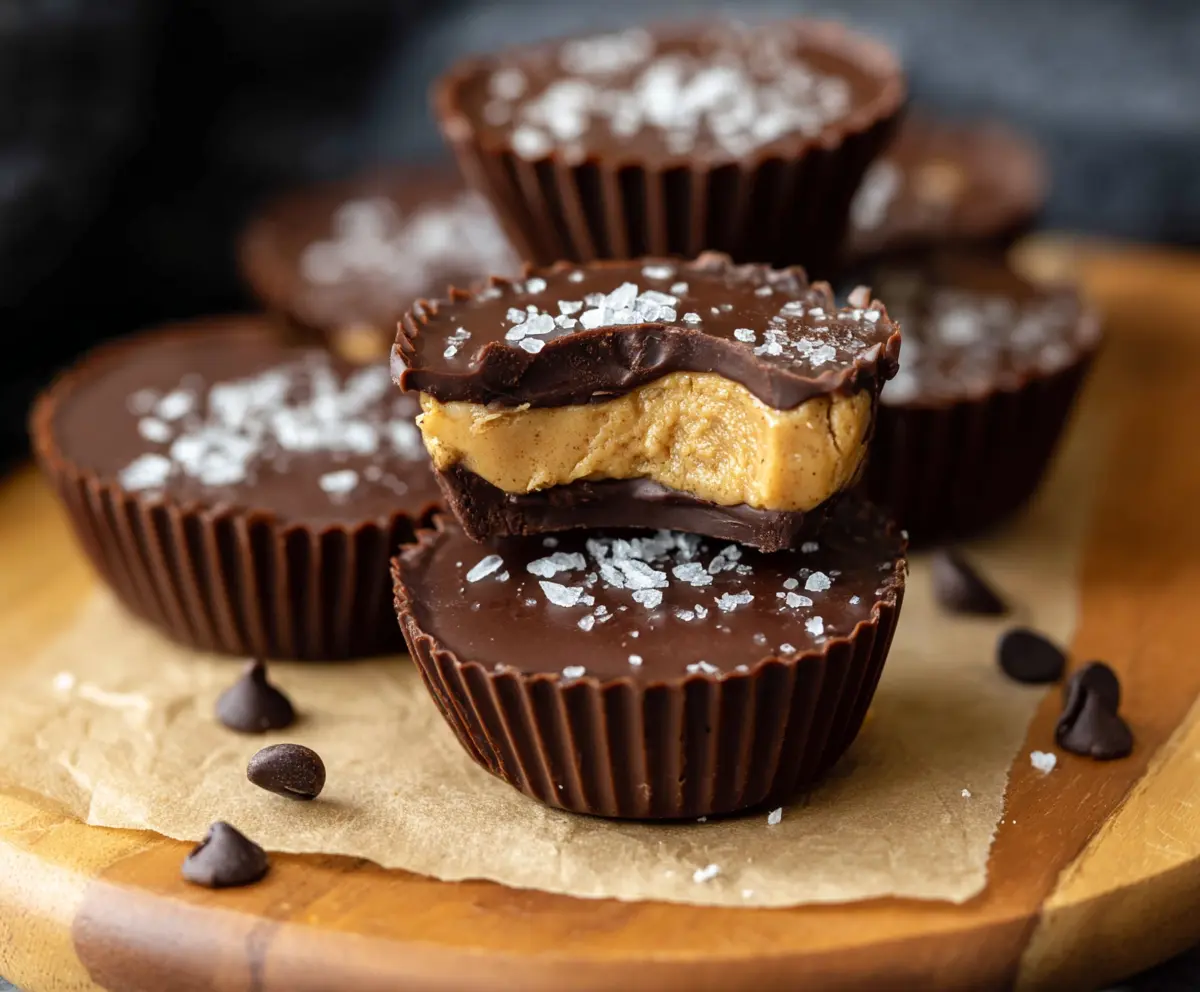
These Peanut Butter Protein Cups are a delicious treat that packs a protein punch! With creamy peanut butter and a chocolatey coating, they are both tasty and energizing.
They’re simple to make and perfect for a snack or post-workout boost. Trust me, you’ll want to keep these handy for when those sweet cravings hit! 🤗
Key Ingredients & Substitutions
Peanut Butter: Natural creamy peanut butter is my go-to for its great flavor. If you’re allergic to peanuts, try almond or sun butter instead. Just make sure they are smooth and unsweetened!
Protein Powder: You can use vanilla or unflavored protein powder. If you’re vegan, look for plant-based protein options. I find that using a blend with pea and brown rice gives a great texture!
Honey or Maple Syrup: Both are excellent for sweetness. If you prefer a sugar-free option, try stevia or monk fruit sweetener, but remember to adjust the quantity as they are sweeter than honey.
Coconut Oil: This helps with chocolate melting and gives a nice texture. If you’re not a fan, you could substitute with unsalted butter or a neutral oil, but coconut oil adds a lovely flavor!
Dark Chocolate: I recommend using high-quality chocolate to enhance the flavor. If you want a dairy-free option, make sure your chocolate chips are vegan-friendly. You can even try using cacao or carob chips for something different!
How Can I Achieve a Perfect Chocolate Coating?
The chocolate coating makes these cups extra special, but getting it right can be tricky. Here’s a helpful process:
- Start by melting the chocolate gently. Use a microwave at low power and stir frequently to avoid burning.
- Once melted, let it cool slightly before using. This helps the chocolate set better around the peanut butter.
- Ensure each liner is thoroughly coated. Spread chocolate up the sides for a strong shell instead of just a bottom layer.
- Don’t rush the chilling! Let the chocolate set completely in the freezer so the layers hold together well.
These steps will help you achieve a smooth and tasty chocolate coating on your peanut butter cups. Enjoy making and sharing these delicious treats!
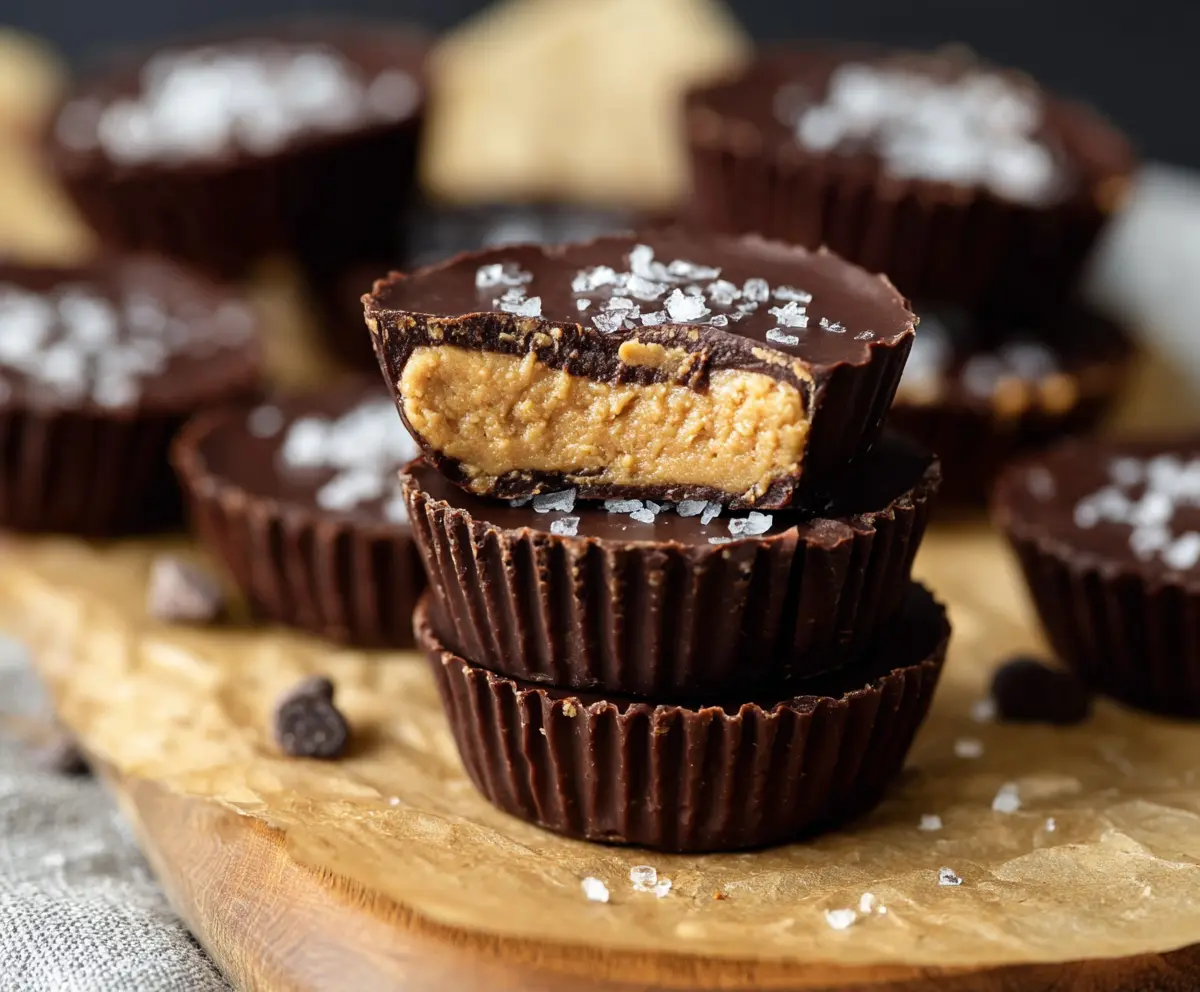
Peanut Butter Protein Cups
Ingredients You’ll Need:
- 1 cup natural creamy peanut butter (no added sugar or salt)
- 1/4 cup vanilla or unflavored protein powder
- 2 tablespoons honey or maple syrup (adjust for sweetness)
- 1/2 teaspoon pure vanilla extract
- 1/4 cup coconut oil, melted (divided)
- 1 1/2 cups dark chocolate chips (or chopped dark chocolate, 70% cocoa or higher)
- Flaky sea salt, for sprinkling
How Much Time Will You Need?
This recipe takes about 15 minutes to prepare, plus an additional 40 minutes to chill and set in the freezer. So in total, you’ll spend about 55 minutes before they’re ready to enjoy.
Step-by-Step Instructions:
1. Prepare the Peanut Butter Mixture:
In a medium bowl, combine the creamy peanut butter, protein powder, honey (or maple syrup), vanilla extract, and 2 tablespoons of the melted coconut oil. Stir everything together until it’s smooth and creamy. You want a nice texture that will hold up well in the cups! Set this mixture aside.
2. Prepare the Muffin Tin:
Line a muffin tin or silicone mold with cupcake liners. You need enough capacity for each cup to hold the peanut butter and chocolate layers nicely.
3. Melt the Chocolate:
In a microwave-safe bowl, melt the dark chocolate chips along with the remaining 2 tablespoons of coconut oil. Do this in 30-second intervals, stirring in between each one, until the chocolate is completely smooth and melted. Be careful not to burn it!
4. Coat the Cupcake Liners:
Using a spoon, scoop about 1 tablespoon of melted chocolate into each liner. Use the back of the spoon to gently swirl the chocolate around the bottom and up the sides of the liner to create a coating. Once done, place the muffin tray in the freezer for about 10 minutes to allow the chocolate base to set.
5. Add the Peanut Butter Layer:
After the chocolate has set, take the tray out of the freezer. Spoon about 1 tablespoon of the peanut butter mixture into each cup. Gently press it down, but be careful not to push through the chocolate walls!
6. Seal with More Chocolate:
Now it’s time to top off each peanut butter layer with another tablespoon of the melted chocolate. Spread it evenly to cover the peanut butter and seal everything in. This helps keep the delicious filling inside!
7. Add the Sea Salt:
Sprinkle a pinch of flaky sea salt on top of each cup before moving on to the next step. This will enhance the flavors beautifully!
8. Chill and Set:
Return the muffin tray to the freezer and let the cups chill for at least 30 minutes until they are fully set and firm to the touch.
9. Enjoy Your Peanut Butter Protein Cups!
Once the cups are properly set, carefully remove them from the liners. Store any extras in an airtight container in the refrigerator or freezer. They should last you up to 2 weeks (if they last that long, because they’re so delicious!). Enjoy these sweet and satisfying protein-packed snacks whenever you need a treat!
Enjoy these rich, fudgy Peanut Butter Protein Cups as a satisfying snack packed with protein and flavor!
Can I Use Different Types of Nut Butter?
Absolutely! If you prefer almond butter, cashew butter, or sunflower seed butter, feel free to substitute. Just keep in mind that different nut butters can alter the flavor a bit, but they will still be delicious!
Can I Make These Vegan?
Yes! To make these cups vegan, use maple syrup instead of honey and ensure your chocolate is dairy-free. Many brands offer vegan chocolate chips that work great!
How Should I Store These Protein Cups?
Store the peanut butter protein cups in an airtight container in the refrigerator for up to 2 weeks. You can also freeze them for up to 2 months. Just let them thaw in the fridge before enjoying!
Can I Modify the Sweetness Level?
Definitely! Adjust the sweetness by adding more honey or maple syrup to taste. If you prefer it less sweet, you can reduce the sweetener or experiment with a sugar substitute like stevia or monk fruit.