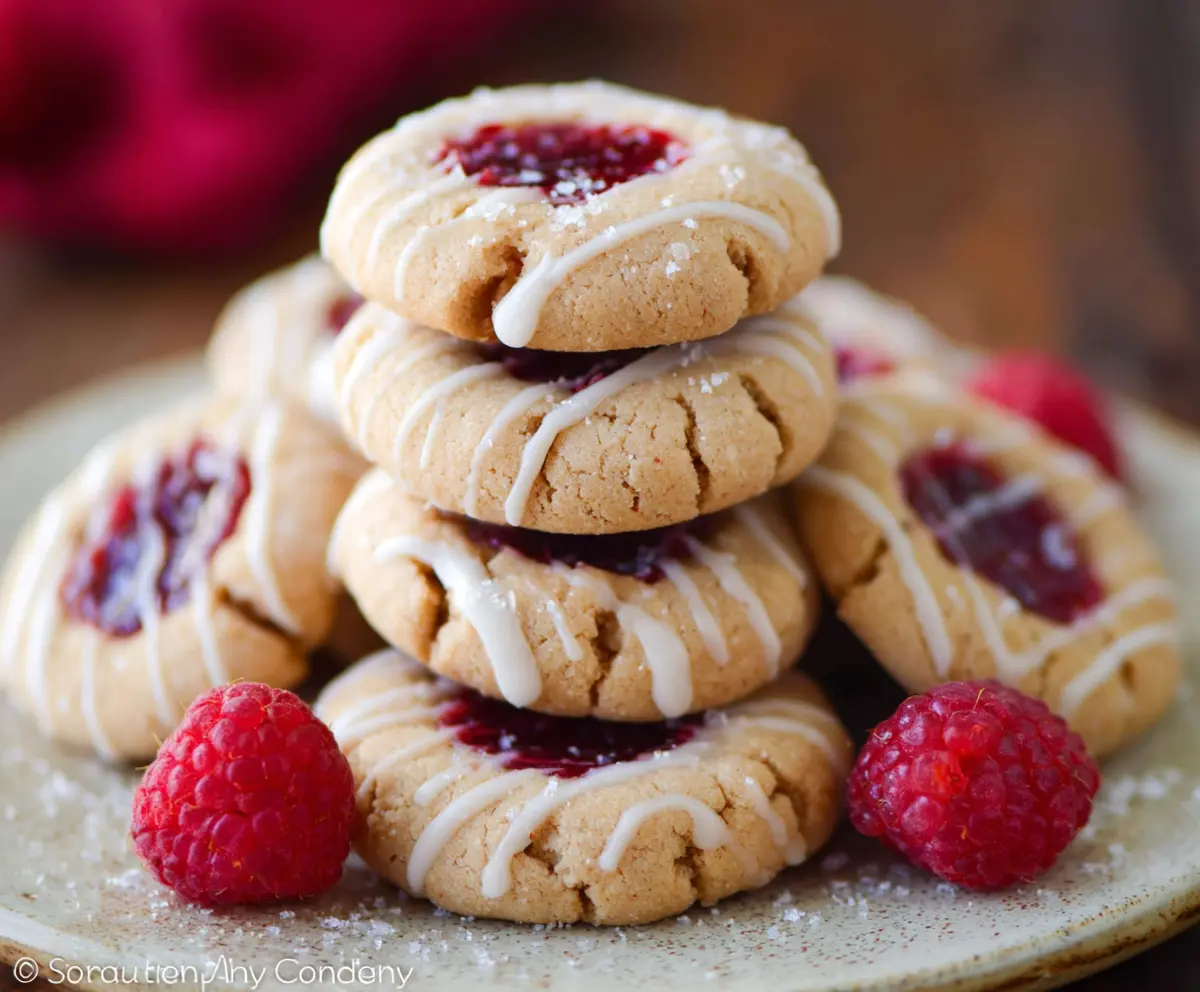
These Raspberry Almond Butter Cookies are a yummy treat! Made with a sweet almond butter that pairs perfectly with tangy raspberry, they’re soft and delicious.
I love how easy these cookies are to make. Just mix, scoop, and bake! Perfect for snack time or as a sweet surprise for friends. Who can resist a good cookie? 🍪
Key Ingredients & Substitutions
Almond Butter: This is the star of the show! You can use either smooth or crunchy almond butter, whichever you prefer. If you’re allergic to nuts, sunflower butter works great as a substitute!
Raspberry Jam: The tangy jam creates a lovely contrast with the sweetness. If you can’t find raspberry jam, go for strawberry or cherry preserves instead. You could even use fresh raspberries for a fresher taste, but the texture will be different.
Sugars: You’ll need both granulated and brown sugar for the right sweetness and texture. If you want a healthier option, coconut sugar can be used, but it may alter the color slightly.
Egg: If you’re looking for a vegan option, you can swap the egg with 1/4 cup of unsweetened applesauce or a flax egg (1 tablespoon ground flaxseed mixed with 2.5 tablespoons water).
How Do I Get Perfectly Shaped Cookies?
Shaping the cookies can sometimes be tricky, but here’s a simple way to do it. After mixing your dough, follow these steps for consistency:
- Use a cookie scoop or tablespoon to ensure even-sized cookies.
- Roll the dough into balls in your hands for a smooth finish.
- Space the cookies 2 inches apart on the baking sheet to allow room for spreading.
- When making the thumbprint, press gently for the right depth, but not too hard, or it may crack.
These tips will help you achieve beautifully shaped cookies that turn out perfectly every time!

Raspberry Almond Butter Cookies
Ingredients You’ll Need:
- 1 cup almond butter (smooth or crunchy)
- 1/2 cup granulated sugar
- 1/4 cup brown sugar, packed
- 1 large egg
- 1/2 teaspoon vanilla extract
- 1/2 teaspoon baking soda
- 1/4 teaspoon salt
- 1/3 cup raspberry jam or preserves (for the thumbprint center)
- 1/2 cup powdered sugar (for glaze)
- 1-2 tablespoons milk or almond milk (for glaze)
How Much Time Will You Need?
This delightful cookie recipe takes about 15 minutes for prep and 10-12 minutes for baking. You’ll also need a few minutes for cooling and glazing afterward, so overall, plan for about 30-45 minutes from start to finish!
Step-by-Step Instructions:
1. Prepping the Oven and Baking Sheet:
Start by preheating your oven to 350°F (175°C). While it’s heating, line a baking sheet with parchment paper or a silicone baking mat. This will help prevent the cookies from sticking.
2. Mixing the Cookie Dough:
In a medium mixing bowl, add the almond butter, granulated sugar, and brown sugar. Stir everything together until it becomes a smooth and creamy mixture. It should be nice and thick!
3. Adding Wet Ingredients:
Crack in the egg and pour in the vanilla extract. Mix well until fully combined, ensuring that the egg is evenly distributed throughout the dough.
4. Incorporating Baking Ingredients:
Add the baking soda and salt to the bowl. Stir it all together until the dough comes together uniformly, making sure there are no dry bits left.
5. Forming the Cookies:
Now, scoop out rounded tablespoon-sized balls of the dough and place them onto the prepared baking sheet, leaving about 2 inches of space between each cookie ball.
6. Creating the Thumbprint:
Using your thumb or the back of a small spoon, gently press an indentation in the center of each cookie ball. This is where the delicious raspberry jam will go!
7. Filling with Jam:
Fill each indentation with about 1/2 teaspoon of raspberry jam or preserves. Don’t worry if it seems a bit overflowing; it will settle while baking.
8. Baking Time:
Place the baking sheet in the oven and bake for about 10-12 minutes, until the edges of the cookies are lightly golden brown and they appear set in the middle. Keep an eye on them to prevent over-baking!
9. Cooling the Cookies:
After baking, remove the cookies from the oven and let them cool on the baking sheet for about 5 minutes. Then carefully transfer them to a wire rack to cool completely.
10. Making the Glaze:
While the cookies are cooling, mix the powdered sugar with 1-2 tablespoons of milk in a small bowl until it reaches a smooth, drizzling consistency. If it’s too thick, add a little more milk.
11. Drizzling the Glaze:
Once the cookies are cooled, drizzle the glaze over each cookie using a spoon or a piping bag for more control. Let the glaze set for a few minutes before enjoying your delicious treats!
And there you have it! Enjoy your sweet and tangy Raspberry Almond Butter Cookies with a warm cup of tea or coffee!
Can I Use Natural Almond Butter?
Absolutely! Natural almond butter works well in this recipe. Just make sure to stir it well before measuring, as natural nut butter can separate. Additionally, it may have a slightly different texture compared to processed almond butter, but the flavor will be delicious!
How Can I Make These Cookies Vegan?
No problem! To make these cookies vegan, simply substitute the egg with 1/4 cup of unsweetened applesauce or a flax egg (1 tablespoon ground flaxseed mixed with 2.5 tablespoons of water). This will keep the cookies moist and bind the ingredients together.
What’s the Best Way to Store Leftovers?
For best results, store leftover cookies in an airtight container at room temperature for up to 3 days. You can also refrigerate them for a longer shelf life, up to a week. If you prefer to freeze them, wrap each cookie individually in plastic wrap and store them in a freezer bag for up to 3 months. Just thaw before enjoying!
Can I Use Other Fruit Jams?
Definitely! While raspberry jam is the star of this recipe, you can easily swap it out for other fruit jams or preserves like strawberry, blueberry, or even apricot. Choose your favorite flavor for a fun twist!