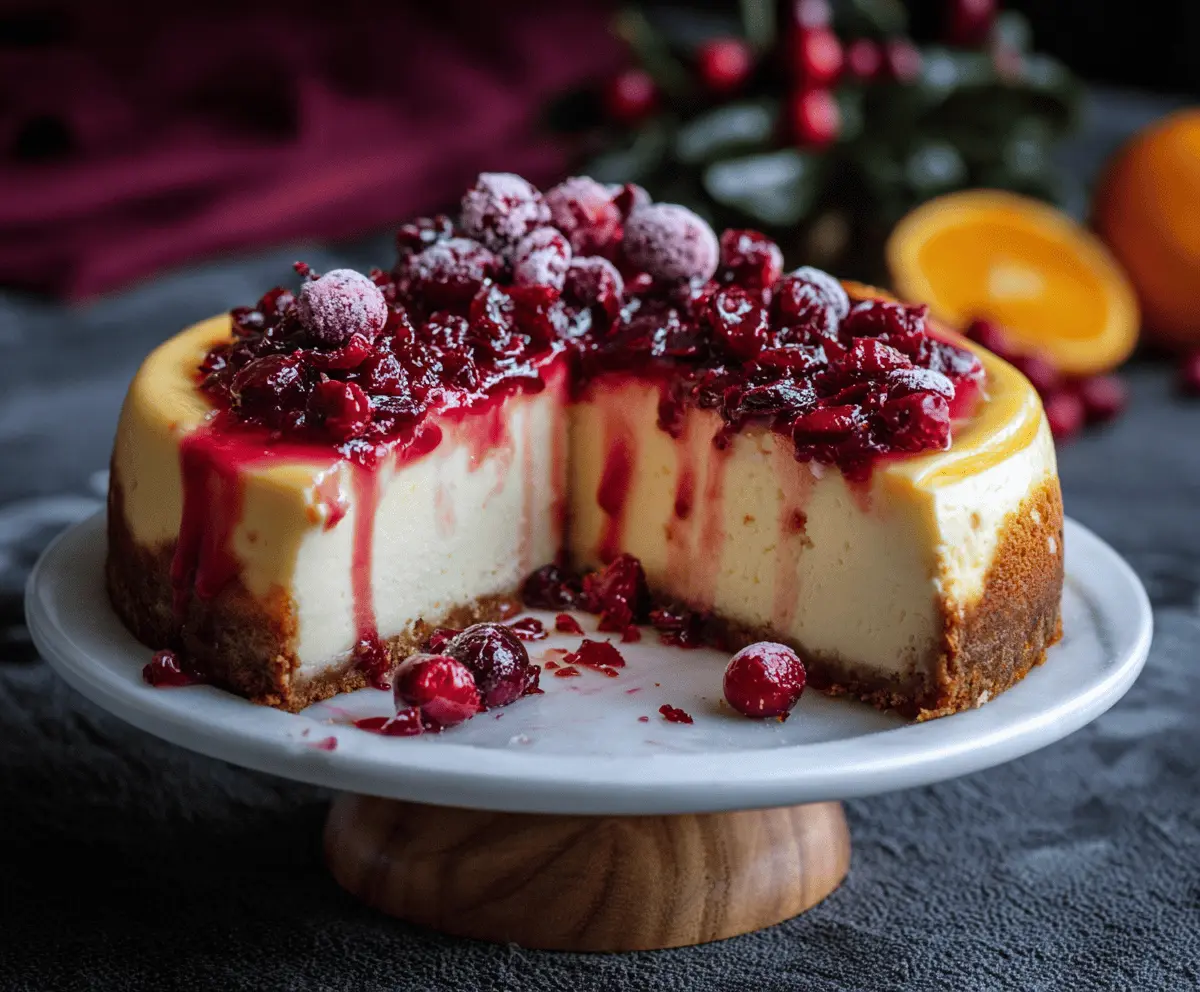
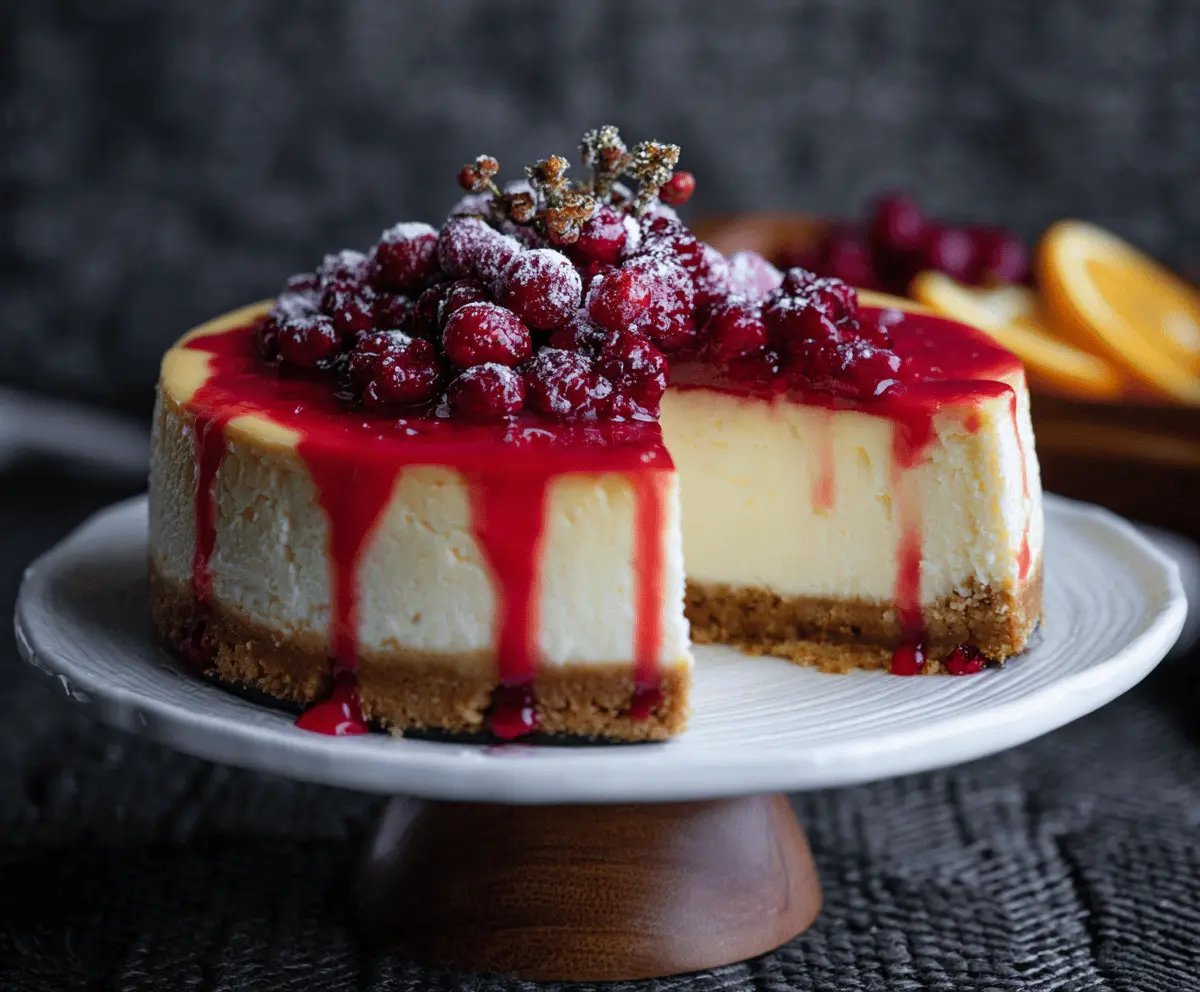
This cranberry orange cheesecake is a sweet and tangy treat that brings joy to any table. With a creamy filling and a zesty orange flavor, every bite is a delight!
I love how the tart cranberries perfectly balance the sweetness. It’s like a holiday hug on a plate! Perfect for gatherings, or just to treat yourself, right? 🍰
Key Ingredients & Substitutions
Graham cracker crumbs: They create the lovely crust. If you’re out, crushed digestive biscuits or even homemade cookie crumbs will work well. Just aim for a buttery taste!
Cream cheese: This is key for that creamy texture. For a lighter option, use Neufchâtel cheese, or for a dairy-free version, try a vegan cream cheese. Just make sure it’s softened for easy mixing.
Cranberries: Fresh cranberries are great for this recipe, but frozen ones can work too. If cranberries aren’t available, chopped cherries or mixed berries can add a different twist!
Orange juice and zest: Fresh zest and juice bring brightness. If you’re short on fresh, bottled juice can substitute but won’t have the same vibrant flavor. A little lemon zest also adds a nice zing!
What’s the Best Way to Ensure a Smooth Cheesecake Filling?
The key to a smooth cheesecake is mixing your ingredients thoroughly. Start with softened cream cheese to avoid lumps.
- Beat the cream cheese first until smooth before adding any other ingredients.
- Add sugar gradually, then mix in the eggs one at a time, ensuring each is fully incorporated before the next.
- Finally, gently fold in the orange juice and zest to avoid overmixing.
This technique will help you achieve a velvety filling that’s perfect for your cheesecake!
How to Make Cranberry Orange Cheesecake
Ingredients You’ll Need:
For the Crust:
- 1 1/2 cups graham cracker crumbs
- 1/4 cup granulated sugar
- 1/2 cup (1 stick) unsalted butter, melted
For the Cheesecake Filling:
- 24 oz (3 packages) cream cheese, softened
- 1 cup granulated sugar
- 3 large eggs
- 1 tsp vanilla extract
- Zest of 1 large orange
- 1/4 cup fresh orange juice
- 1/2 cup sour cream
For the Cranberry Orange Topping:
- 2 cups fresh or frozen cranberries
- 1/2 cup granulated sugar
- Zest of 1 orange
- 1/3 cup fresh orange juice
- 1 tsp cornstarch mixed with 1 tbsp water (optional, for thickening)
How Much Time Will You Need?
This delightful recipe will take about 30 minutes to prepare with an additional 55-65 minutes to bake, plus cooling time. Plan to chill the cheesecake for at least 4 hours (or overnight) to let the flavors blend beautifully and achieve the perfect texture!
Step-by-Step Instructions:
1. Prepare the Crust:
Preheat your oven to 325°F (160°C). In a medium bowl, mix the graham cracker crumbs, sugar, and melted butter until the crumbs are evenly moistened. Press this mixture firmly into the bottom of a 9-inch springform pan. Bake for 8-10 minutes until it’s slightly golden. Once done, remove it from the oven and set aside to cool.
2. Make the Filling:
In a large mixing bowl, use an electric mixer to beat the softened cream cheese until it’s nice and smooth. Gradually add in the sugar and continue to mix until well combined. Then add the eggs one at a time, making sure to mix well after each addition. Finally, stir in the vanilla extract, orange zest, orange juice, and sour cream until everything is well combined and smooth.
3. Bake the Cheesecake:
Pour the creamy filling over your baked crust in the springform pan. Place this on a baking sheet and bake in your preheated oven for about 55-65 minutes. The edges should be set while the center remains slightly jiggly. After baking, turn off the oven, crack the door open, and let your cheesecake cool inside for 1 hour. Then remove it and let it cool fully at room temperature.
4. Prepare the Cranberry Orange Topping:
In a small saucepan over medium heat, combine the cranberries, sugar, orange zest, and orange juice. Cook this mixture, stirring occasionally, until the cranberries burst and the mixture thickens, which should take about 10 minutes. If you prefer a thicker topping, stir in the cornstarch mixture and cook for an additional 1-2 minutes. Remove from heat and let it cool completely.
5. Assemble:
Once your cheesecake is completely cooled, carefully remove the sides of the springform pan and transfer the cheesecake to a serving plate. Spoon the cranberry orange topping generously over the top of the cheesecake. For an extra touch, you can garnish with a few sugared cranberries!
6. Chill and Serve:
Refrigerate your assembled cheesecake for at least 4 hours, or even overnight, to allow the flavors to meld together and the texture to firm up perfectly. When you’re ready, slice it up and enjoy your stunning cranberry orange cheesecake!
This cheesecake showcases a creamy, tangy orange-flavored filling topped with a vibrant, tart cranberry mixture, all sitting on a buttery graham cracker crust. Ideal for any festive gathering!
Can I Use Low-Fat Cream Cheese for This Recipe?
Yes, you can use low-fat cream cheese if you’re looking for a lighter alternative. Just remember that the texture might be slightly less creamy, but it will still be delicious!
How Can I Make This Cheesecake Gluten-Free?
To make this cheesecake gluten-free, simply substitute the graham cracker crumbs with gluten-free alternatives, like crushed gluten-free cookies or almond flour mixed with a bit of sugar and butter for the crust.
Can I Make the Topping in Advance?
Absolutely! You can prepare the cranberry orange topping ahead of time and store it in the refrigerator for up to 3 days. Just allow it to cool completely before refrigerating and then reheat slightly if needed before serving.
How Should I Store Leftover Cheesecake?
Store any leftovers in an airtight container in the refrigerator for up to 5 days. Make sure to cover it well to preserve its freshness. Cheesecake can also be frozen for longer storage; just wrap it tightly and enjoy within 2-3 months!