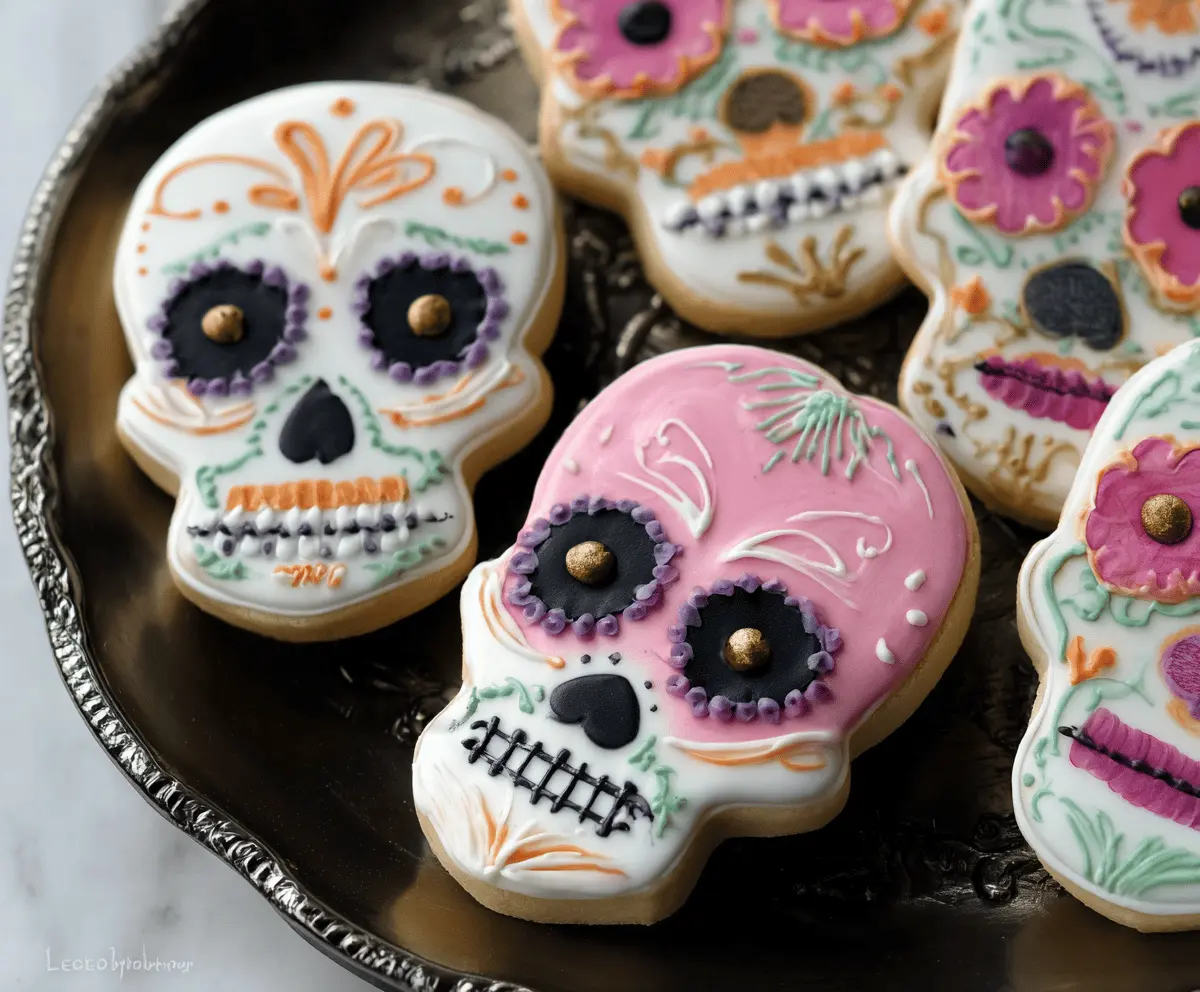
These Skull Sugar Cookies are the perfect treat for Halloween! They’re sweet, fun to decorate, and great for parties. With their spooky skull shape, they’ll impress everyone.
Baking these cookies is a blast! I love using colorful icing to make them extra festive. Plus, they make a delightful addition to my Halloween treat table—spook-tacular and tasty!
Key Ingredients & Substitutions
All-purpose flour: This is essential for the cookies’ structure. If you’re gluten-free, you can try a 1:1 gluten-free flour blend, but ensure it contains xanthan gum for texture.
Butter: Unsalted butter is best as you control the saltiness. If you need a dairy-free option, substitute with coconut oil or a vegan butter alternative, keeping the texture in mind.
Sugar: Granulated sugar gives sweetness, but you can use brown sugar for a richer flavor. Just remember that brown sugar might make your cookies a bit moister.
Meringue powder: Used to make royal icing. If you can’t find it, egg whites can be a substitute, but you’ll need to use them quickly since they spoil easily.
Food coloring: Get creative with colors! Natural food dyes or gel colors work well if you prefer to go natural. Look for vibrant options that won’t fade after drying.
What’s the Best Way to Roll and Cut Cookies Without Them Sticking?
Rolling out dough can be tricky, but using a few simple techniques helps avoid sticky situations!
- Chill the dough – it’s easier to handle when cold.
- Dust your work surface with flour before rolling, and keep some handy to sprinkle on the dough as you roll it out.
- Use a rolling pin with adjustable thickness rings to ensure even rolling.
- Dip your cookie cutter in flour before cutting out shapes to prevent sticking.
After cutting, make sure to lift the cookies gently with a spatula and place them on your parchment-lined baking sheet. This helps maintain their shape!
Skull Sugar Cookies
Ingredients You’ll Need:
For the Cookies:
- 3 cups all-purpose flour
- 1 teaspoon baking powder
- 1/4 teaspoon salt
- 3/4 cup unsalted butter, softened
- 1 cup granulated sugar
- 1 large egg
- 1 tablespoon vanilla extract
- 1/2 teaspoon almond extract (optional)
For the Royal Icing:
- 4 cups powdered sugar, sifted
- 3 tablespoons meringue powder
- 9-10 tablespoons water
- Food coloring (purple, black, orange, pink, gold or edible gold dust)
- Edible gold glitter or gold luster dust for shimmer
How Much Time Will You Need?
This recipe will take around 1 hour for prep, plus an additional hour for chilling the dough, and about 10-15 minutes for baking. You’ll need extra time for decorating, so plan for an overall total of about 2-3 hours to make these spooky treats!
Step-by-Step Instructions:
1. Prepare the Cookie Dough:
In a medium bowl, whisk together the flour, baking powder, and salt until well combined. In a large mixing bowl, cream the softened butter and granulated sugar together until light and fluffy. This takes about 2-3 minutes. Next, beat in the egg, vanilla extract, and almond extract until everything is blended together smoothly. Gradually add the dry ingredients to the wet mixture, stirring until just combined. Be careful not to overmix!
Once your dough is ready, divide it into two equal discs, wrap each in plastic wrap, and chill in the refrigerator for at least 1 hour to make it easier to roll out later.
2. Roll and Cut the Cookies:
When you’re ready to bake, preheat your oven to 350°F (175°C). On a lightly floured surface, take one disc of dough and roll it out to about 1/4 inch thick. Use a skull-shaped cookie cutter to cut out shapes, and place each cookie on a baking sheet lined with parchment paper. Bake cookies for 8-10 minutes, or until the edges are just beginning to turn golden. Once done, allow the cookies to cool completely on a wire rack before decorating them.
3. Make the Royal Icing:
In a large bowl, mix together the powdered sugar and meringue powder. Next, add water, one tablespoon at a time, mixing on low speed until the icing reaches a thick but pipeable consistency. You want it to hold its shape well. Once your icing is ready, divide it into separate bowls and use food coloring to tint your icing in various colors: a white base for flooding, plus purple, black, orange, pink, and gold for decoration.
4. Decorate the Cookies:
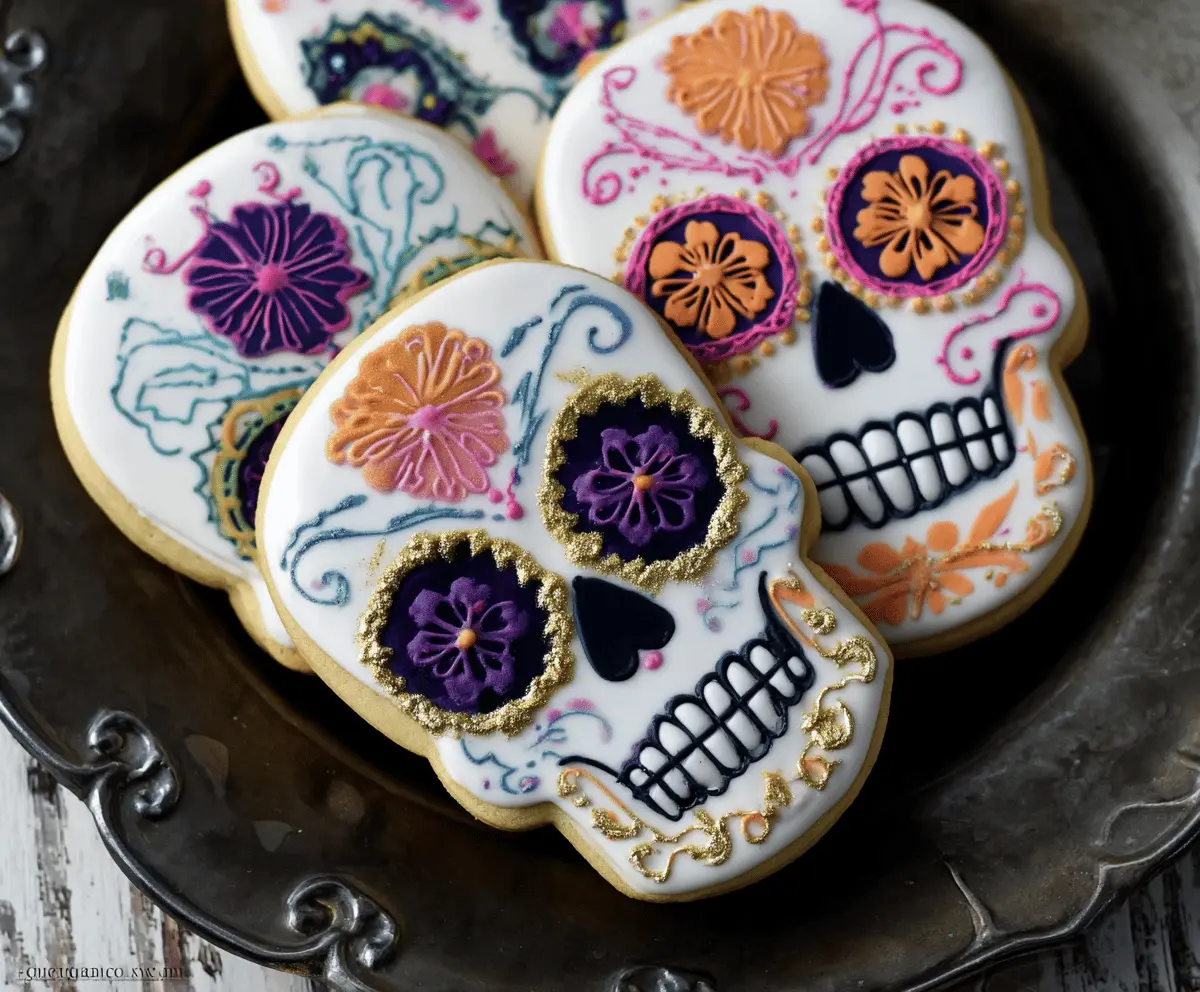
Begin decorating by flooding the cookies with your white royal icing to create a smooth base layer. Let these dry completely before moving on. After that, use the deep purple icing to pipe and fill the eye sockets of the skulls. With orange and purple icing, create beautiful flower shapes in the eyes using petal piping techniques. Use black icing to detail the nose—make it into an upside-down heart—and pipe neat lines for the teeth.
Add small scrolling lines and swirls around the skull using pink, blue, and gold icing for extra flair. Finally, sprinkle some edible gold dust or glitter to highlight the eyes and other decorations for that extra sparkle! Let the decorated cookies dry thoroughly before stacking or storing.
Enjoy your beautifully decorated Skull Sugar Cookies—perfect for Halloween or Día de los Muertos celebrations!
Can I Use Different Cookie Shapes?
Absolutely! While skull-shaped cookies are fun for Halloween, feel free to use any cookie cutter shape you prefer. Just keep an eye on the baking time, as different shapes may require slight adjustments!
Can I Make the Cookie Dough in Advance?
Yes, you can! The cookie dough can be prepared up to 2 days in advance. Just wrap it tightly in plastic wrap and refrigerate. When you’re ready to bake, allow it to soften slightly at room temperature before rolling it out.
How to Store Leftover Cookies?
Store any leftover cookies in an airtight container at room temperature for up to a week. If you have decorated cookies with royal icing, let the icing dry completely beforehand to avoid smudging!
What’s the Best Way to Thin Royal Icing?
If your royal icing is too thick for piping, add water a teaspoon at a time until you reach your desired consistency. For flooding, it should be runny enough to spread but still hold its shape. Always mix thoroughly to ensure even consistency!