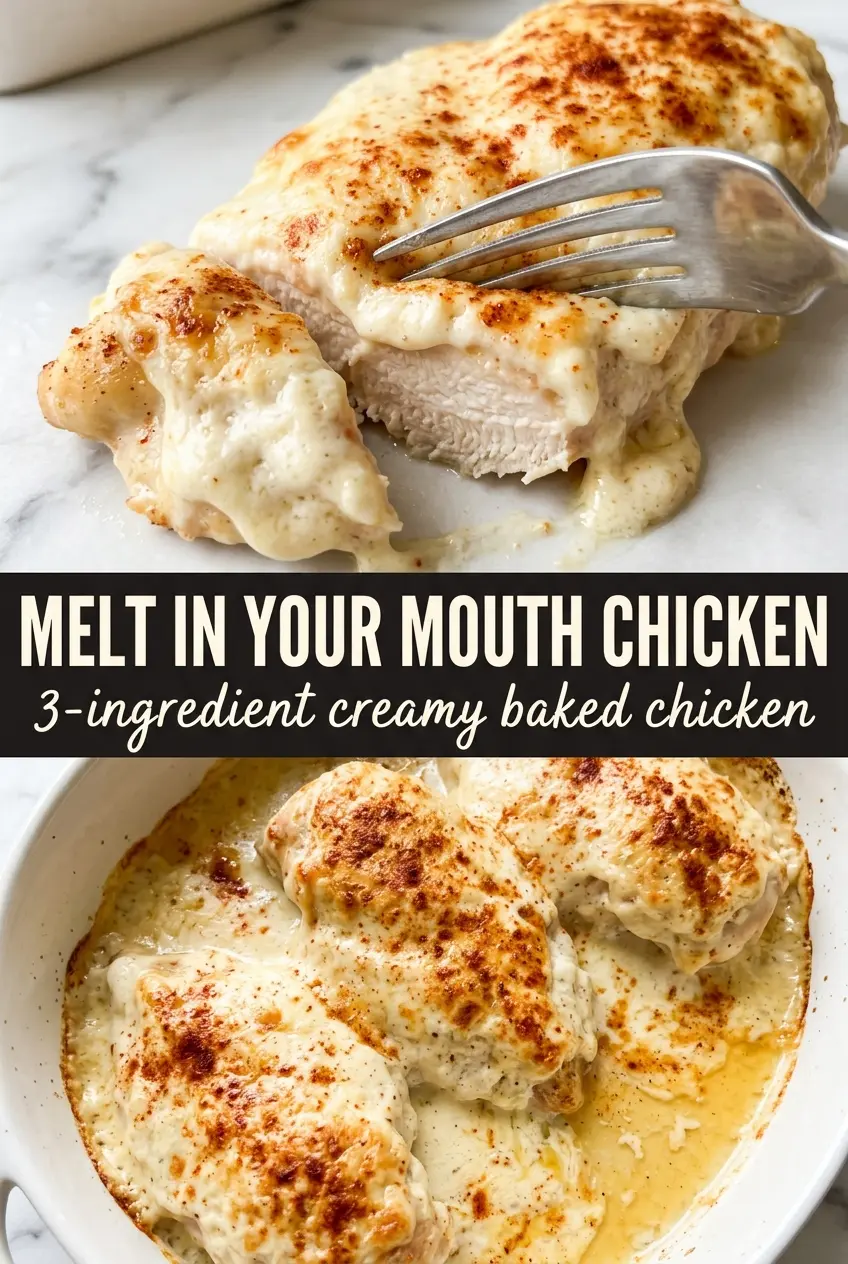
Golden, juicy chicken breasts with a savory Parmesan crust have a way of disappearing fast, and this version earns its keep because the topping bakes into a puffy, browned blanket that protects the meat underneath. The chicken stays moist instead of drying out, and the edges pick up just enough color to taste rich without turning heavy.
The trick is in the topping. Mayonnaise gives the crust its creamy body and keeps everything spreadable, while freshly grated Parmesan melts into the surface and sets up with a little crunch at the edges. Lemon juice cuts the richness, and the seasonings get mixed into the topping instead of sprinkled on top, so every bite tastes balanced.
Below, I’ll walk through the few details that matter most: how thick to spread the topping, what to look for when the chicken is done, and a few smart swaps if you want to adjust the recipe without losing the tender result.
The topping turned golden and a little crisp around the edges, and the chicken stayed unbelievably juicy. I used a meat thermometer and pulled it right at 165, which made all the difference.
Pin this Parmesan-crusted Melt In Your Mouth Chicken for nights when you want tender baked chicken with a golden, creamy topping.
The Secret to Keeping the Parmesan Crust Creamy Instead of Greasy
The topping works because it bakes like a thin, seasoned blanket, not a thick frosting. If the mixture sits in a heavy layer, the mayonnaise has nowhere to go as it heats, and you can end up with a slick surface instead of that puffy, browned crust. Spread it all the way to the edges, but keep it even and generous rather than piled on.
Freshly grated Parmesan matters here. The pre-shredded stuff often contains anti-caking agents that make the topping a little grainy and less willing to melt into the mayonnaise. The lemon juice also earns its place; it keeps the richness from turning flat and helps the whole topping taste brighter once it browns.
- Chicken breasts — Use breasts that are similar in size so they finish at the same time. If one side is much thicker, pound the thickest part lightly so the chicken cooks evenly without drying at the thin end.
- Mayonnaise — This is what keeps the chicken tender. Greek yogurt can work in a pinch, but the crust will be tangier and a little less stable, so expect a sharper finish and a less plush texture.
- Parmesan cheese — Freshly grated is worth it. It melts better, browns better, and gives the topping a cleaner salty bite.
- Lemon juice — A small amount is enough. Too much can loosen the topping and make it slide off, so keep it measured.
What Each Ingredient Is Actually Doing in This Recipe

- Primary ingredient (the star) — Quality matters most. Choose the best you can find.
- Cooking medium (oil, butter, or broth) — This carries flavors and prevents dryness.
- Seasonings (salt, pepper, spices, herbs) — Layer flavors so nothing overpowers. Build depth gradually.
- Aromatics (garlic, onion, herbs) — Cook with fat to bloom flavors. Become the foundation.
- Supporting ingredients — Complement the main ingredient without overpowering it.
- Sauce or liquid (if applicable) — Brings flavors together. Balance richness with acid.
- Acid (lemon, vinegar, wine, or other) — Brightens and prevents flat-tasting results.
- Final finish (garnish, glaze, or sauce) — Prevents one-dimensional taste and adds visual appeal.
Building the Topping So the Chicken Stays Juicy
Season the Chicken First
Lay the chicken breasts in the baking dish and season them lightly before the topping goes on. That early layer of salt and pepper seasons the meat itself, not just the crust. If the breasts are very thick at one end, flatten the thickest part just enough to even them out so the thinner edge doesn’t overcook while the center catches up.
Mix the Crust Until It Looks Smooth
Stir the mayonnaise, Parmesan, garlic powder, onion powder, smoked paprika, and lemon juice until the mixture is evenly combined. It should look thick, creamy, and spreadable, not dry or clumpy. If it seems loose, a little extra Parmesan tightens it up; if it seems stiff, let it sit for a minute so the cheese hydrates and blends in.
Bake Until the Center Hits 165°F
Spread the topping over each breast in a thick, even layer, then bake until the top is golden and the chicken reaches 165°F in the thickest part. The crust should look browned in spots and slightly puffed, and the juices around the chicken should run clear. If the topping browns before the chicken is done, tent it loosely with foil and keep baking until the temperature comes up.
Serve It Right Away
Let the chicken rest just a couple of minutes, then garnish with parsley and serve while the crust is still crisp on top. This dish is at its best right out of the oven, when the topping is set and the meat underneath is still hot and juicy. If it sits too long, the crust softens, so have the rest of the meal ready before it comes out of the oven.
Three Ways to Make This Work for Different Kitchens
Dairy-Free Version
Use a good-quality dairy-free mayonnaise and skip the Parmesan, then add a little extra garlic powder plus a pinch of nutritional yeast if you want some of that savory depth back. The topping will still bake up creamy, but it won’t brown quite the same way, so don’t wait for a deep crust before pulling it from the oven.
Lower-Carb Comfort Dinner
This recipe already fits nicely into a lower-carb meal, so the main adjustment is what you serve with it. Pair it with roasted broccoli, green beans, or cauliflower mash so the creamy topping has something simple to lean against without making the plate feel heavy.
Bone-In Chicken Thighs Instead of Breasts
Bone-in thighs bring richer flavor and stay forgiving in the oven, but they take longer and the topping can darken before the meat is finished. Start checking for doneness later and use the same 165°F internal temperature, though the darker meat often tastes best a few degrees higher and fully tender.
Storage and Reheating
- Refrigerator: Store leftovers in an airtight container for up to 3 days. The crust softens, but the chicken stays tender if you reheat it gently.
- Freezer: It freezes, but the mayonnaise-based topping loses some of its texture after thawing. Freeze only if you need to, and wrap portions tightly before storing for up to 2 months.
- Reheating: Warm covered in a 325°F oven until heated through. The biggest mistake is blasting it in the microwave, which tightens the chicken and turns the topping oily.
Questions I Get Asked About This Recipe
Melt In Your Mouth Chicken
Ingredients
Equipment
Method
- Preheat your oven to 375°F and grease a 9x13 baking dish so the chicken releases easily.
- Place the chicken breasts in the prepared dish and season lightly with salt and cracked black pepper.
- In a bowl, mix mayonnaise, Parmesan cheese, garlic powder, onion powder, smoked paprika, and fresh lemon juice until smooth and thick enough to spread.
- Spread the Parmesan mayonnaise mixture generously over each chicken breast, covering completely so it bakes into a golden crust.
- Bake at 375°F for 25-30 minutes until the topping is golden and bubbly and the internal temperature reaches 165°F, with visible puffing and browning on top.
- Garnish with fresh parsley and serve immediately, letting the crackly crust stay intact while the chicken is hot.